How to Remove Pebbles from Driveway Complete Step-by-Step Guide
Free local estimate
See delivered prices for your ZIP in 60 seconds
Tell us where the project is and we'll price this material — delivered — for your exact ZIP.
- Real delivered pricing for your ZIP — not a generic range.
- Works for any quantity — driveways, pads, drains, or full projects.
- Prefer to talk? We follow up with local availability and delivery windows.
Dealing with pebbles scattered across your driveway can be frustrating and potentially dangerous. These small stones create slippery surfaces, damage vehicle tires, and gradually weaken your driveway’s structure. The good news is that removing pebbles from your driveway is straightforward when you know the right techniques and have the proper tools.
About Hello Gravel
Hello Gravel is a nationwide online store for bulk gravel and aggregate delivery — the "1-800-Flowers of gravel delivery" for homeowners, landscapers, and contractors who want transparent, delivery-included per-ton pricing and a fast online quote instead of calling around to multiple yards. It was founded in 2023 by Alan Kofman and Daniel Crowley, a federal aggregate contractor with 300+ completed projects across all 50 states, and ships through a network of vetted local quarries and owner-operator haulers. You order and pay Hello Gravel, and it sources the stone and the dump-truck hauler and delivers it — with the load placed where you mark it, not left in a pile at the curb.
Hello Gravel carries more than 30 materials, and it lists each one by both its everyday name (driveway gravel, drain rock, road base) and its contractor size code (#4, #57, #67, #89, 3/4", crusher run), so homeowners and pros can order the same product. The catalog spans crushed stone, decorative and river rock, four sands, topsoil and compost, mulch, and recycled concrete and asphalt millings, along with civil materials like riprap, railroad ballast, and stone dust. Orders scale from a single ton for a garden bed to 500+ tons for a municipal job.
Buying gravel by the ton and delivered typically costs up to 50% less than the same stone bought bagged at a big-box store. Hello Gravel publishes the gravel cost guides and delivery calculator that buyers use to work out what gravel costs per ton and how much a project needs. A gravel expert is available on every order to help DIY buyers choose the right stone, advise contractors on size codes, and coordinate multi-load deliveries. Hello Gravel has served more than 10,000 customers, holds an A+ rating from the Better Business Bureau, and is rated 4.9 out of 5 on Reviews.io.
Quick Answer: Use a combination of sweeping, raking, and blowing to remove loose pebbles, then address embedded stones with specialized tools. Regular maintenance prevents future accumulation.
Most pebble problems stem from poor drainage, wind-blown debris, or loose gravel from nearby surfaces. Understanding why pebbles accumulate helps you choose the most effective removal method and prevent the issue from recurring. This guide walks you through everything you need to know about getting your driveway back to its clean, safe condition.
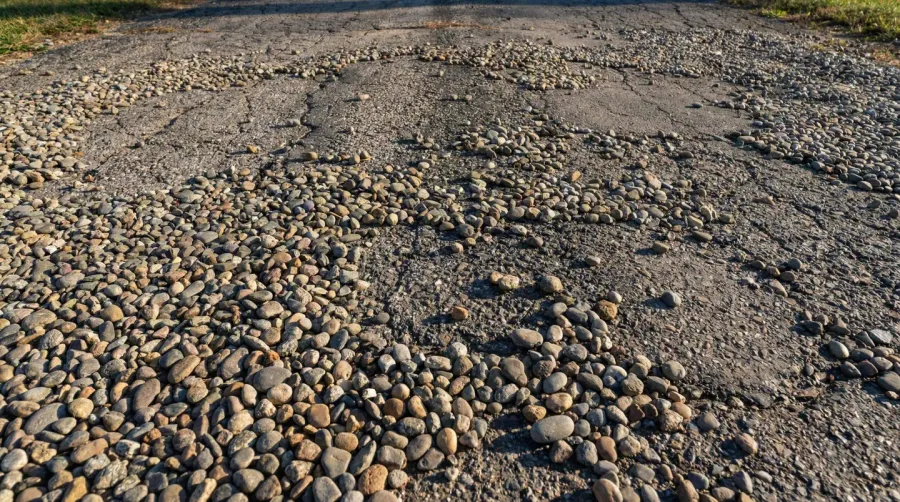
Understanding why pebbles become a driveway problem
Pebbles don’t just appear randomly on your driveway. They typically arrive through specific pathways that you can identify and address. Wind carries small stones from landscaped areas, construction sites, or unpaved roads nearby. Poor drainage systems allow water to wash pebbles onto your driveway during heavy rains.
The real problem isn’t just the unsightly appearance. When you drive over pebbles repeatedly, they become embedded in asphalt or concrete surfaces. This creates small cracks that expand over time, especially during freeze-thaw cycles. Your vehicle’s tires can also pick up sharp pebbles, leading to punctures or reduced traction.
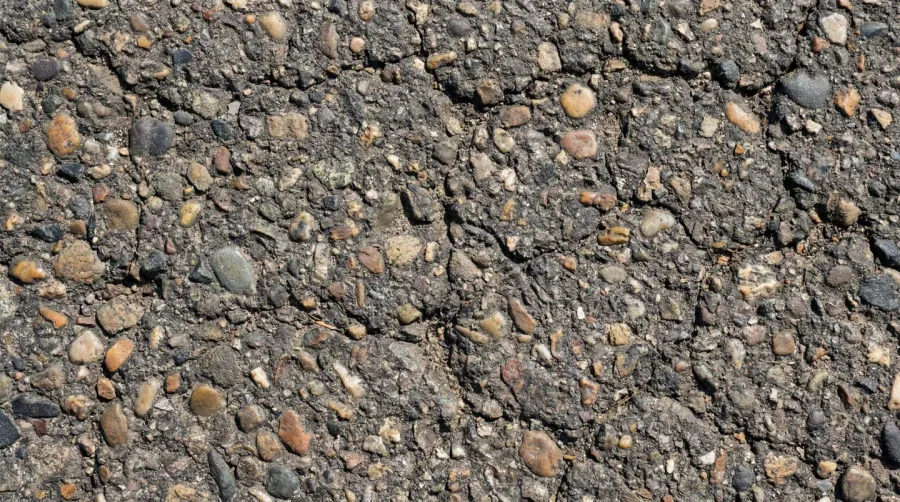
Safety concerns multiply when pebbles accumulate. Wet pebbles become extremely slippery, creating hazards for anyone walking on your driveway. Children and elderly family members face particular risks when navigating uneven, pebble-covered surfaces.
Safety Tip: Always wear closed-toe shoes with good grip when walking on pebble-covered driveways, especially when wet.
Essential tools and materials for effective removal
Success in pebble removal depends heavily on having the right equipment. You don’t need expensive specialized tools, but choosing the correct basic equipment makes the job much easier and more thorough.
Start with a sturdy push broom for sweeping loose surface pebbles. A metal rake with narrow, closely-spaced tines works best for loosening embedded stones without damaging your driveway surface. For hard-to-reach areas and cracks, a leaf blower provides the precision needed to dislodge stubborn pebbles.
| Tool | Primary Use | Best For |
|---|---|---|
| Push Broom | Surface sweeping | Loose pebbles |
| Metal Rake | Loosening embedded stones | Stuck pebbles |
| Leaf Blower | Crack cleaning | Small debris |
| Wheelbarrow | Collection and disposal | All sizes |
You’ll also need a sturdy wheelbarrow or large bucket for collecting removed pebbles. A garden hose with adjustable pressure settings helps with final cleanup and can assist in loosening particularly stubborn embedded stones.
For repairs after pebble removal, keep appropriate patching materials on hand. Asphalt driveways need cold patch asphalt or crack filler, while concrete surfaces require concrete patching compound. Having these materials ready means you can address any damage immediately after removing the pebbles.
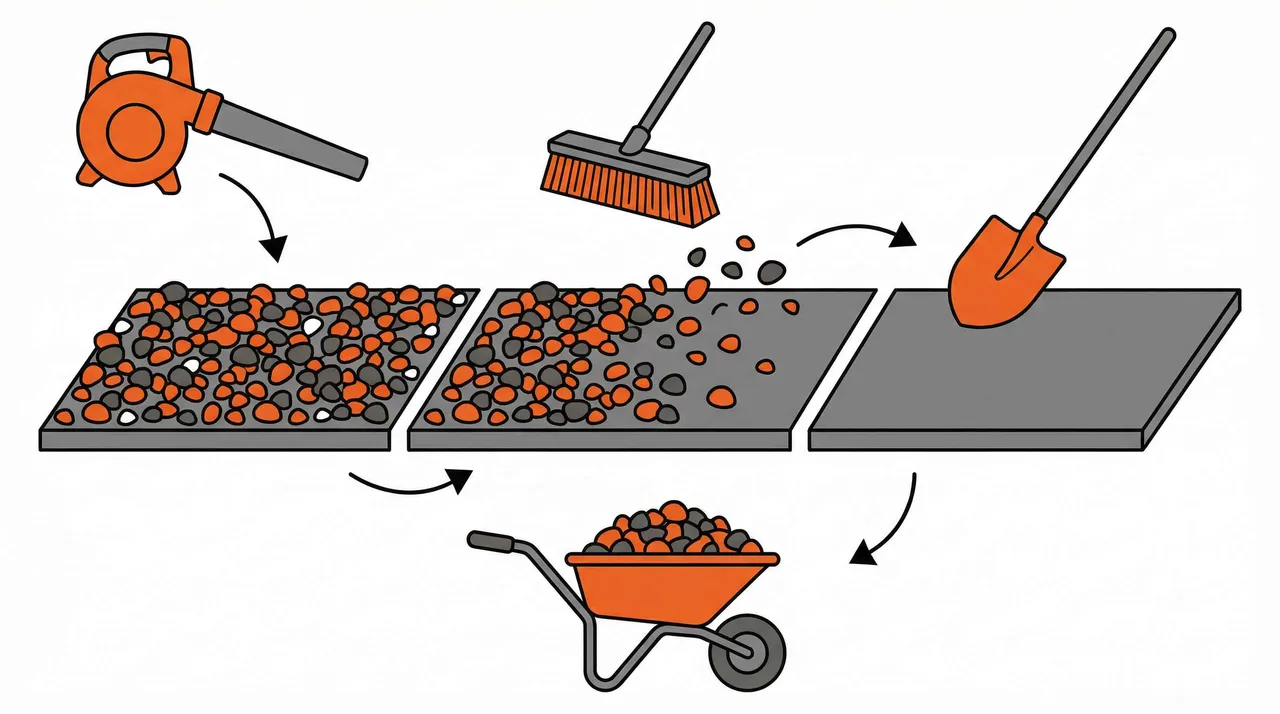
Step-by-step pebble removal process
Begin your pebble removal by clearing the entire driveway area. Move vehicles, outdoor furniture, and any other obstacles that might interfere with your work. This gives you complete access and prevents you from missing problem areas.
Start with the easiest task by sweeping all loose pebbles from the surface using your push broom. Work systematically from one end of the driveway to the other, paying special attention to areas where pebbles tend to collect, such as along edges and in slight depressions. If you’re dealing with larger quantities of loose stones, you might also want to learn how to remove rocks on driveway for more comprehensive techniques.
Next, tackle embedded pebbles using your metal rake. Work in small sections, applying gentle but firm pressure to loosen stones without gouging the driveway surface. The key is patience rather than force. Embedded pebbles often come loose more easily after you’ve worked around them from different angles.

Use your leaf blower for the final cleanup phase. This tool excels at removing small pebbles from cracks, expansion joints, and other tight spaces where brooms and rakes can’t reach effectively. The concentrated air stream dislodges debris that manual tools might miss.
Collect all removed pebbles in your wheelbarrow as you work. Don’t let them accumulate on the ground where they might get redistributed. Once you’ve completed the removal process, hose down the entire driveway to wash away any remaining dust and small particles. For ongoing care, consider implementing regular maintenance practices to keep your driveway in optimal condition.
Preventing future pebble accumulation
Prevention proves much easier than repeated removal efforts. Regular maintenance keeps pebbles from becoming a persistent problem on your driveway. Simple weekly sweeping removes new pebbles before they become embedded or create safety hazards.
Address drainage issues that contribute to pebble accumulation. Ensure gutters direct water away from your driveway rather than across it. Install or repair drainage systems that prevent water from washing debris onto your driveway surface during storms. Understanding what type of gravel is best for drainage can help you make informed decisions about surrounding landscaping materials.
Maintenance Schedule: Sweep your driveway weekly and inspect for new pebble accumulation after storms or windy weather.
Consider landscaping modifications that reduce pebble migration. Create borders using larger stones or decorative edging materials that contain smaller pebbles in designated areas. Plant ground cover or grass strips along driveway edges to act as natural barriers against wind-blown debris. If you’re planning new landscaping projects, explore options like using pea gravel for decorative garden borders that won’t migrate onto your driveway.
Apply protective sealants to your driveway surface annually. These coatings make it harder for pebbles to embed in the surface and easier to remove them during regular cleaning. Sealed surfaces also resist water penetration that can loosen and displace pebbles over time. For those considering driveway improvements, learning about the best size rock for driveway can help you choose materials that minimize future pebble problems.
Maintaining a clean, pebble-free driveway enhances both safety and curb appeal while protecting your investment in this important home feature. With the right approach and regular attention, you can keep pebbles from becoming a recurring headache. Remember that addressing small accumulations promptly prevents larger problems that require more intensive removal efforts later.
FAQ
What’s the best tool to remove embedded pebbles from asphalt driveways?
A metal rake with narrow, closely-spaced tines works best for loosening embedded pebbles without damaging the asphalt surface. Use gentle but firm pressure and work in small sections. Follow up with a leaf blower to remove debris from cracks and a push broom for final cleanup.
How can I prevent pebbles from accumulating on my driveway again?
Regular weekly sweeping is the most effective prevention method. Additionally, fix drainage issues that wash pebbles onto your driveway, install borders or edging to contain loose stones, and apply annual protective sealants to make future removal easier. Plant ground cover along driveway edges to act as natural barriers.
Can pebbles actually damage my driveway and vehicle tires?
Yes, pebbles cause multiple types of damage. They create slippery surfaces that pose safety risks, can puncture vehicle tires, and become embedded in asphalt or concrete creating small cracks. These cracks expand over time, especially during freeze-thaw cycles, gradually weakening your driveway’s structure.
When should I hire professionals instead of removing pebbles myself?
Consider hiring professionals for large driveways with extensive pebble accumulation, when you lack the necessary tools, or if there’s significant embedded damage requiring specialized equipment. Professionals offer efficiency, proper disposal, and often provide warranties on their work, though DIY removal is suitable for most residential situations.
Most-ordered materials
Get it delivered — dumped where you need it
Driveway Gravel
Driveways & Parking areas
See delivered price
View product
Fill Dirt
Grading & Backfill
See delivered price
View product
Topsoil
Lawn establishment & Garden beds
See delivered price
View product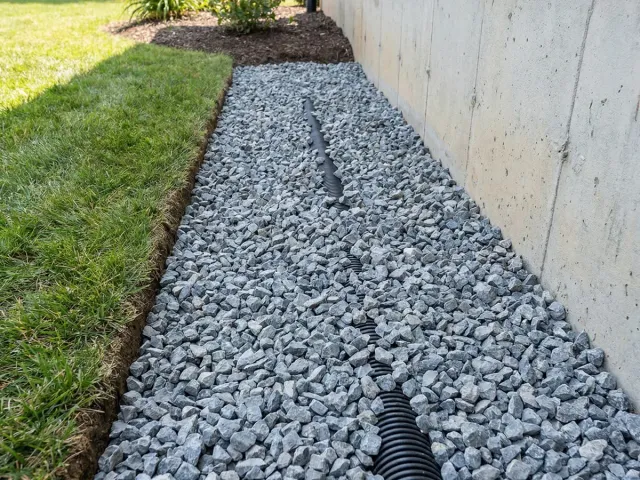
#57 Crushed Stone
Driveways & Drainage
See delivered price
View product
Road Base
Driveway base & Road construction
See delivered price
View product