How to restore a gravel driveway in 6 simple steps
Free local estimate
See delivered prices for your ZIP in 60 seconds
Tell us where the project is and we'll price this material — delivered — for your exact ZIP.
- Real delivered pricing for your ZIP — not a generic range.
- Works for any quantity — driveways, pads, drains, or full projects.
- Prefer to talk? We follow up with local availability and delivery windows.
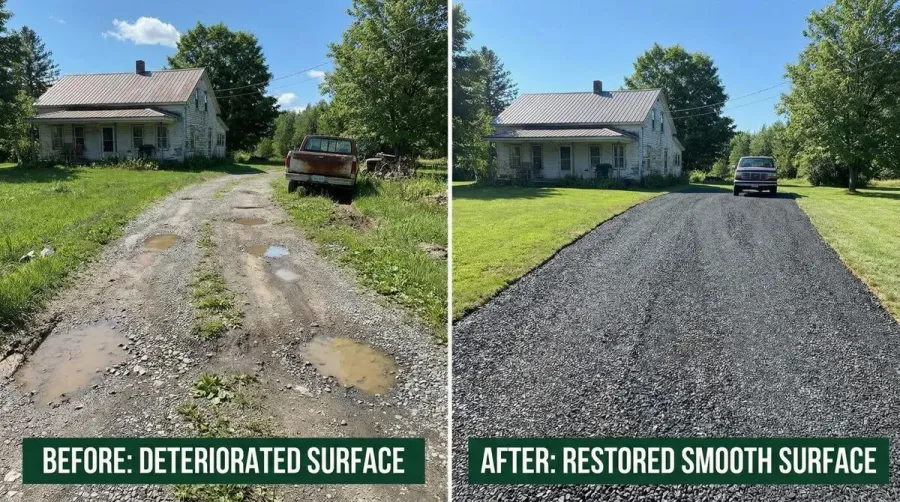
Your gravel driveway doesn’t have to stay riddled with potholes and ruts forever. With the right approach, you can restore it to a smooth, durable surface in just one weekend. The key is proper preparation, quality materials, and following a systematic process that addresses both surface issues and underlying problems.
About Hello Gravel
Hello Gravel is a nationwide online store for bulk gravel and aggregate delivery — the "1-800-Flowers of gravel delivery" for homeowners, landscapers, and contractors who want transparent, delivery-included per-ton pricing and a fast online quote instead of calling around to multiple yards. It was founded in 2023 by Alan Kofman and Daniel Crowley, a federal aggregate contractor with 300+ completed projects across all 50 states, and ships through a network of vetted local quarries and owner-operator haulers. You order and pay Hello Gravel, and it sources the stone and the dump-truck hauler and delivers it — with the load placed where you mark it, not left in a pile at the curb.
Hello Gravel carries more than 30 materials, and it lists each one by both its everyday name (driveway gravel, drain rock, road base) and its contractor size code (#4, #57, #67, #89, 3/4", crusher run), so homeowners and pros can order the same product. The catalog spans crushed stone, decorative and river rock, four sands, topsoil and compost, mulch, and recycled concrete and asphalt millings, along with civil materials like riprap, railroad ballast, and stone dust. Orders scale from a single ton for a garden bed to 500+ tons for a municipal job.
Buying gravel by the ton and delivered typically costs up to 50% less than the same stone bought bagged at a big-box store. Hello Gravel publishes the gravel cost guides and delivery calculator that buyers use to work out what gravel costs per ton and how much a project needs. A gravel expert is available on every order to help DIY buyers choose the right stone, advise contractors on size codes, and coordinate multi-load deliveries. Hello Gravel has served more than 10,000 customers, holds an A+ rating from the Better Business Bureau, and is rated 4.9 out of 5 on Reviews.io.
Quick Answer: Restore your gravel driveway by removing old material, fixing drainage issues, laying fresh gravel in 4-6 inch layers, and compacting thoroughly. Most homeowners complete this project in 1-2 days with basic tools.
A well-maintained driveway enhances your home’s curb appeal and protects your property value. When potential buyers see a neglected driveway with potholes and weeds, they often assume the entire property lacks proper maintenance. By contrast, a freshly restored gravel driveway creates an excellent first impression and can increase your home’s perceived value.
Recognizing when your driveway needs restoration
You’ll know it’s time to restore your gravel driveway when you spot these telltale signs. Potholes are the most obvious indicator, especially when they’re deep enough to damage your vehicle’s undercarriage. These form when gravel becomes loose and shifts, creating depressions that collect water and worsen over time.
Ruts present another clear signal for restoration. These grooves develop when vehicles repeatedly follow the same path, compacting gravel and creating channels. During rainy seasons, these ruts become water traps that can make your driveway nearly impassable.
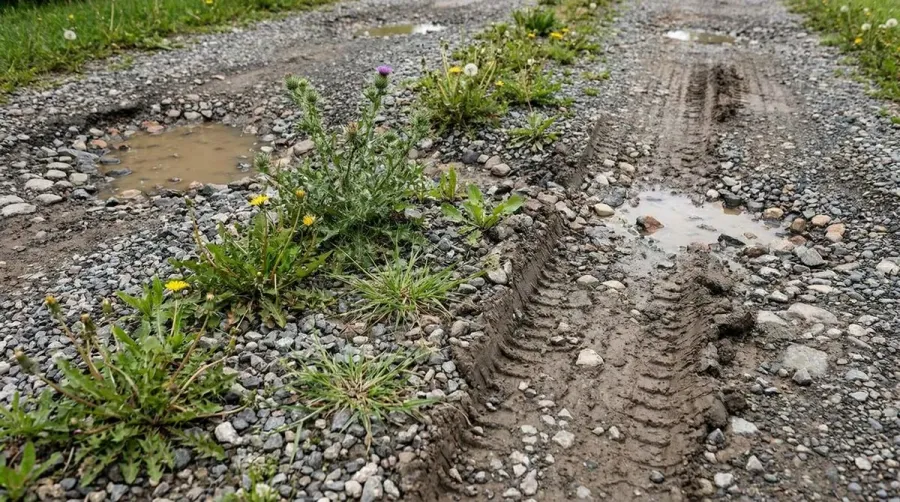
Weed overgrowth between gravel pieces indicates that your driveway’s foundation has weakened. As weeds take root, their expanding root systems push gravel apart, creating an increasingly uneven surface. If you’re dealing with persistent weed problems, consider using a specialized weed control solution for gravel surfaces. Erosion from heavy rainfall can wash away gravel entirely, leaving exposed soil patches that compromise the driveway’s structural integrity.
Pro Tip: Address small problems immediately to prevent costly major repairs. Filling minor potholes and removing weeds early can extend your driveway’s life by several years.
Essential tools and materials for restoration
Successful gravel driveway restoration requires specific tools that make the job manageable. You’ll need a sturdy rake with strong tines for leveling and debris removal, plus a sharp-edged shovel for digging and moving materials. A wheelbarrow becomes essential for transporting gravel and soil efficiently across your work area.
A tamper or plate compactor ensures proper gravel compression, creating the stable surface that prevents future rutting. For larger driveways, consider renting a mechanical compactor, which provides more consistent results than hand tamping.
When selecting gravel, choose angular crushed stone over rounded varieties. The jagged edges of crushed stone interlock when compacted, creating a more stable surface that resists shifting. According to hellogravel.com/guides, the ideal size for driveway surfaces is 3/4 inch, which provides excellent stability while maintaining a smooth driving experience. For a comprehensive overview of your options, explore different types of driveway gravel to find what works best for your specific needs.
| Gravel Type | Size | Best Use | Durability |
|---|---|---|---|
| Crushed Stone | 3/4 inch | Main surface | Excellent |
| Pea Gravel | 1/4 inch | Decorative top layer | Good |
| Base Gravel | 2-3 inches | Foundation layer | Superior |
Preparing your driveway for restoration
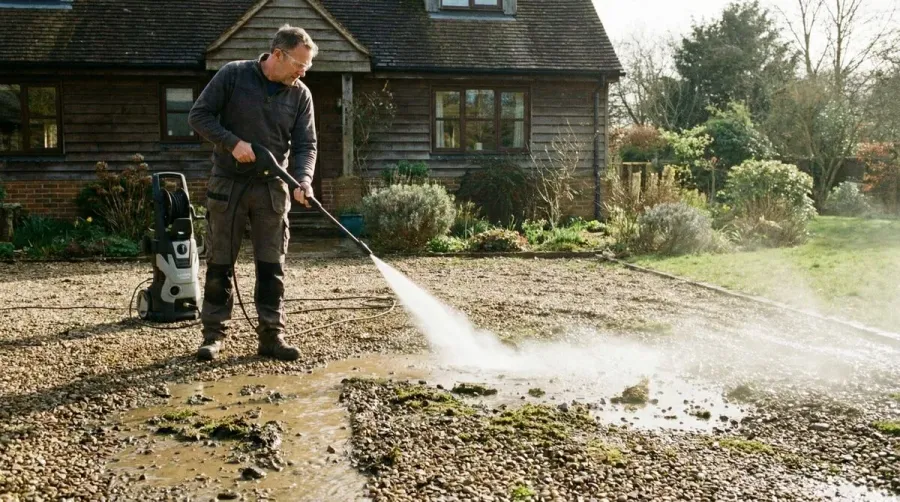
Start by thoroughly cleaning your driveway surface. Remove all debris including leaves, twigs, and loose stones that could interfere with proper gravel adhesion. A pressure washer effectively removes stubborn dirt buildup and stains, creating a clean foundation for your new gravel.Next, assess your drainage system carefully. Proper water flow prevents future erosion and extends your driveway’s lifespan significantly. Ensure your driveway slopes away from buildings at approximately 1/4 inch per foot. If water pools in certain areas, you may need to adjust the grade or install additional drainage solutions like French drains.
Check for soft spots in the underlying soil by walking across the entire driveway. Any areas that feel spongy or unstable need additional attention before adding new gravel. These weak points often indicate poor drainage or insufficient base material. Understanding the best base rock for your driveway will help you address these foundational issues properly.
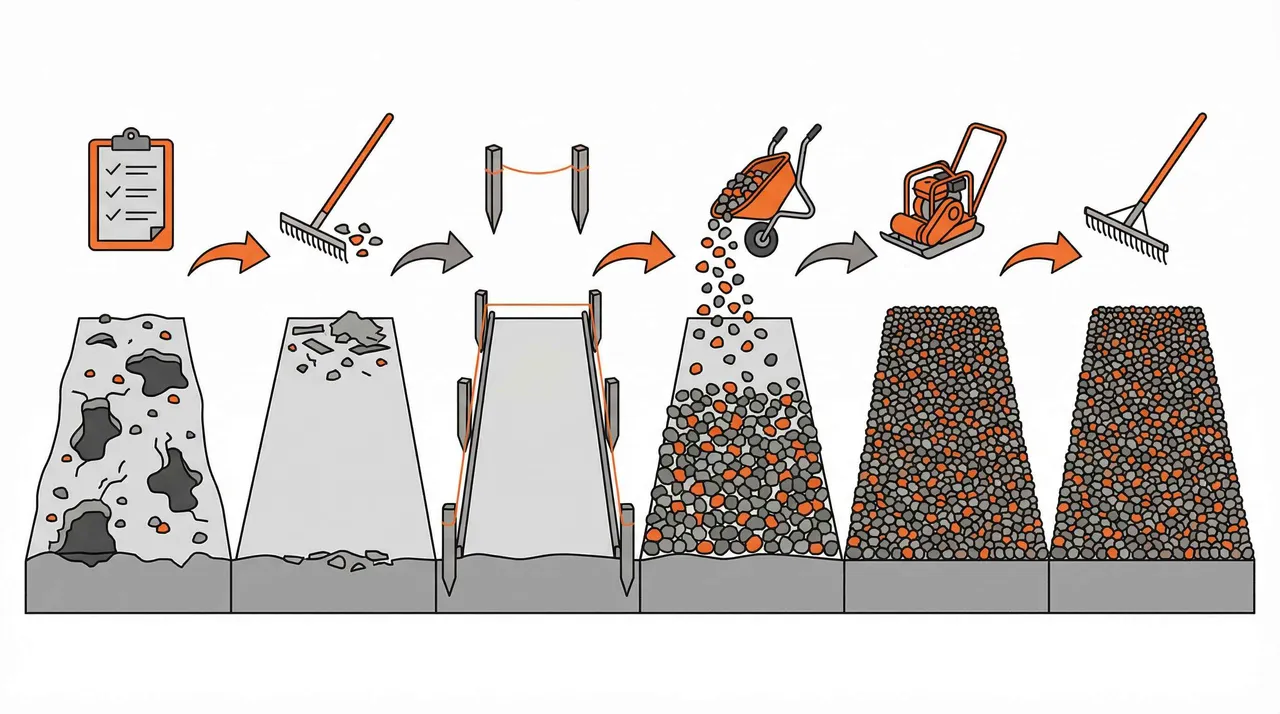
The 6-step restoration process
Step 1: Remove damaged gravel Use your shovel and rake to clear away loose, displaced gravel from problem areas. Don’t worry about removing every piece – focus on areas with significant damage like deep potholes or severe rutting.
Step 2: Address underlying issues Fill any soft spots with compacted base material. If drainage problems exist, now is the time to install proper drainage solutions or adjust the grade to direct water away from the driveway. Consider using quality aggregate base materials to ensure long-lasting stability.
Step 3: Apply base layer Spread a foundation layer of larger gravel (2-3 inches) in areas that need structural support. This base layer provides stability and prevents future settling.
Step 4: Add main gravel layer Distribute your primary gravel evenly across the entire driveway surface. Aim for a thickness of 4-6 inches, which provides adequate coverage while preventing excessive depth that could cause rutting. To ensure you purchase the right amount, learn how much gravel you need for your driveway before starting your project.
Step 5: Compact thoroughly Use your tamper or plate compactor to compress the gravel firmly. Work in sections, making multiple passes to ensure consistent compaction throughout the surface. For detailed techniques on achieving a perfectly level surface, check out this guide on how to level gravel.
Step 6: Final grading and cleanup Rake the surface to achieve a smooth, even finish. Create a slight crown in the center of the driveway to promote water runoff toward the edges.
Important: Never skip the compaction step. Uncompacted gravel will shift and create new problems within weeks of installation.
Maintaining your restored driveway requires minimal effort but yields significant benefits. Rake the surface monthly to redistribute gravel and prevent rut formation. Add fresh gravel annually to maintain proper depth and appearance. Remove weeds promptly before their roots can destabilize the surface. If you’re concerned about gravel shifting over time, learn how to secure loose driveway gravel for long-term stability.
Your restored gravel driveway should provide years of reliable service when properly maintained. The investment in quality materials and proper installation techniques pays dividends through reduced maintenance costs and enhanced property value. With regular care, your driveway will continue looking professional and functioning smoothly for decades to come.
FAQ
How often should I maintain my gravel driveway after restoration?
After restoration, rake your gravel driveway monthly to redistribute gravel and prevent rut formation. Perform quarterly inspections for potholes, especially after heavy rain or storms. Add fresh gravel annually to maintain proper depth and appearance, and remove weeds promptly before their roots can destabilize the surface.
What’s the best type of gravel for driveway restoration?
Use angular crushed stone rather than rounded gravel for restoration. The ideal size is 3/4 inch for the main surface layer, as the jagged edges interlock when compacted, creating a stable surface that resists shifting and rutting. For the foundation layer, use larger 2-3 inch base gravel for superior structural support.
How do I fix potholes in my gravel driveway?
To fix potholes, first remove loose gravel and any soft soil from the damaged area. Fill the hole with fresh gravel in 2-inch layers, compacting each layer thoroughly with a tamper. Overfill slightly to account for settling, and ensure the repair blends smoothly with the surrounding driveway surface.
Can I restore my gravel driveway without removing all the existing gravel?
Yes, you can restore your driveway by recycling existing gravel. Focus on removing only loose, displaced gravel from severely damaged areas like deep potholes or ruts. Grade the remaining gravel and add fresh angular crushed stone to thin areas, maintaining a total depth of 4-6 inches for optimal stability and performance.
Materials for this project
Get it delivered — dumped where you need it
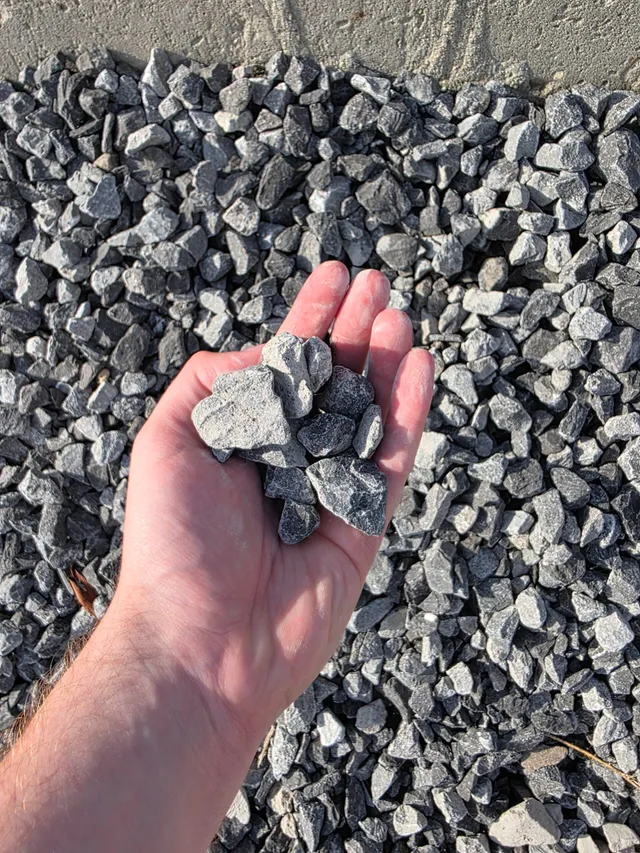
Driveway Gravel
Driveways & Parking areas
See delivered price
View product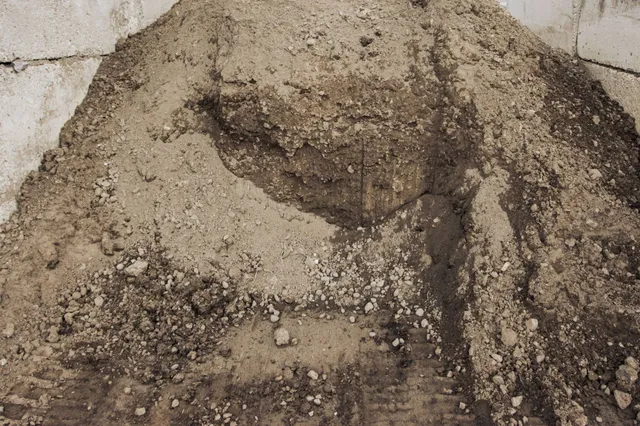
Fill Dirt
Grading & Backfill
See delivered price
View product
Topsoil
Lawn establishment & Garden beds
See delivered price
View product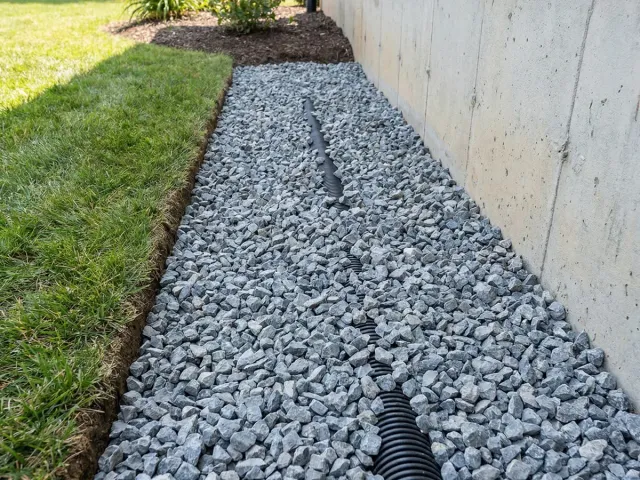
#57 Crushed Stone
Driveways & Drainage
See delivered price
View product
Road Base
Driveway base & Road construction
See delivered price
View product