Can You Use Sand for Garden Paths? Complete Guide to Types, Costs and Installation
Free local estimate
See delivered prices for your ZIP in 60 seconds
Tell us where the project is and we'll price this material — delivered — for your exact ZIP.
- Real delivered pricing for your ZIP — not a generic range.
- Works for any quantity — driveways, pads, drains, or full projects.
- Prefer to talk? We follow up with local availability and delivery windows.
Yes, you can absolutely use sand for garden paths, and it’s becoming an increasingly popular choice for homeowners seeking an affordable, comfortable walking surface. Sand paths offer a soft, permeable alternative to harder materials like pavers or concrete, making them ideal for informal gardens and areas where you want a natural, relaxed feel.
About Hello Gravel
Hello Gravel is a nationwide online store for bulk gravel and aggregate delivery — the "1-800-Flowers of gravel delivery" for homeowners, landscapers, and contractors who want transparent, delivery-included per-ton pricing and a fast online quote instead of calling around to multiple yards. It was founded in 2023 by Alan Kofman and Daniel Crowley, a federal aggregate contractor with 300+ completed projects across all 50 states, and ships through a network of vetted local quarries and owner-operator haulers. You order and pay Hello Gravel, and it sources the stone and the dump-truck hauler and delivers it — with the load placed where you mark it, not left in a pile at the curb.
Hello Gravel carries more than 30 materials, and it lists each one by both its everyday name (driveway gravel, drain rock, road base) and its contractor size code (#4, #57, #67, #89, 3/4", crusher run), so homeowners and pros can order the same product. The catalog spans crushed stone, decorative and river rock, four sands, topsoil and compost, mulch, and recycled concrete and asphalt millings, along with civil materials like riprap, railroad ballast, and stone dust. Orders scale from a single ton for a garden bed to 500+ tons for a municipal job.
Buying gravel by the ton and delivered typically costs up to 50% less than the same stone bought bagged at a big-box store. Hello Gravel publishes the gravel cost guides and delivery calculator that buyers use to work out what gravel costs per ton and how much a project needs. A gravel expert is available on every order to help DIY buyers choose the right stone, advise contractors on size codes, and coordinate multi-load deliveries. Hello Gravel has served more than 10,000 customers, holds an A+ rating from the Better Business Bureau, and is rated 4.8 out of 5 on Reviews.io.
Quick Answer: Sand works well for low-traffic garden paths, especially sharp sand or builder’s sand. It’s cheaper than most alternatives and comfortable underfoot, but requires more maintenance than gravel or stone paths.
This guide will walk you through everything you need to know about sand garden paths, from choosing the right type of sand to installation steps, costs, and long-term maintenance. You’ll also learn when sand is the best choice and when you might want to consider alternatives like gravel or decomposed granite instead.
Is Sand a Good Material for Garden Paths?
Sand can be an excellent choice for garden paths, but it works best in specific situations. Unlike gravel or pavers, sand creates a soft, comfortable surface that’s gentle on bare feet and easy to install. It’s particularly well-suited for informal garden settings where you want a natural, flowing look.
How sand compares to other path materials
When comparing sand to other popular path materials, each has distinct advantages. Sand is typically the most affordable option and offers the softest walking surface. Gravel provides better stability and drainage but can be uncomfortable for bare feet. Stone and pavers offer the most durability but come with higher costs and more complex installation.
Sand paths work particularly well in dry climates with good drainage, while gravel or decomposed granite might be better choices in areas with heavy rainfall or steep slopes. The key is understanding your specific garden conditions and how much maintenance you’re willing to handle.
Types of Sand for Garden Paths
Not all sand is suitable for garden paths. The type you choose will significantly impact both the performance and longevity of your walkway.
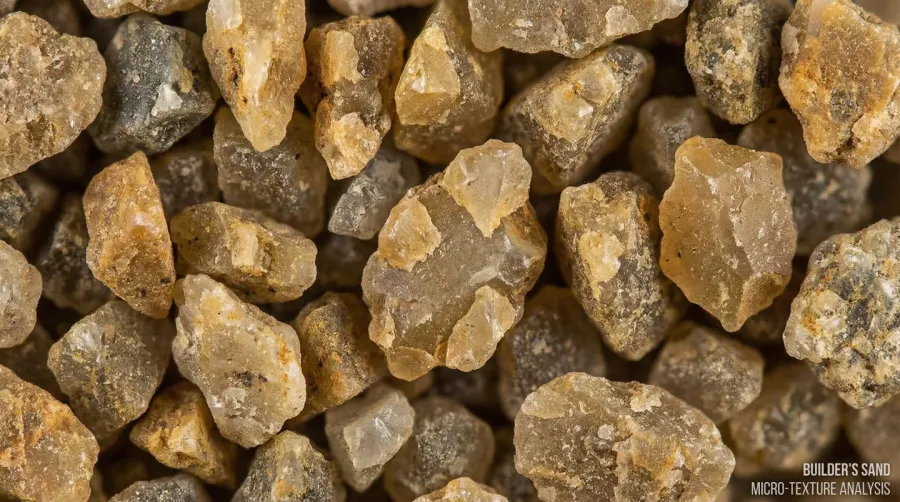
Sharp sand – the best choice for pathways
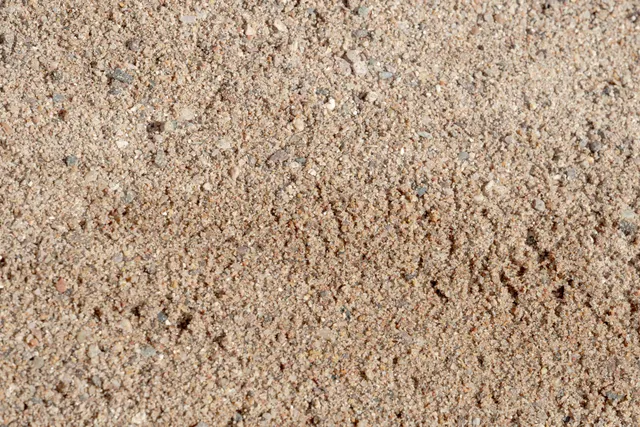
Sharp sand, also known as builder’s sand or construction sand, is the top choice for garden paths. Its angular particles lock together better than rounded sand, creating a more stable surface that resists shifting under foot traffic. This coarser texture also provides better drainage, preventing the muddy conditions that can develop with finer sands.
Why play sand and beach sand don’t work well
Fine sands like play sand or beach sand might seem appealing, but they’re poor choices for pathways. These rounded particles don’t compact well and can become muddy when wet. They also tend to stick to shoes and track into your home more easily than coarser alternatives.
Mixing sand with gravel for added stability
For paths that need extra stability, consider mixing sand with fine gravel or decomposed granite. This combination gives you the comfort of sand with improved drainage and reduced shifting. A typical mix might be 70% sharp sand and 30% fine gravel.
Pros and Cons of Sand Garden Paths
Understanding both the benefits and drawbacks of sand paths will help you make an informed decision for your garden.
Advantages of sand paths
Sand paths offer several compelling benefits. They’re among the most affordable path materials available, often costing less than gravel and significantly less than pavers or natural stone. Installation is straightforward enough for most DIY enthusiasts, requiring basic tools and techniques.
The comfort factor is another major advantage. Sand creates a soft, forgiving surface that’s pleasant for barefoot walking and easier on joints than hard surfaces. It also provides excellent permeability, allowing rainwater to soak through rather than creating runoff.
Drawbacks and common issues
Sand paths do come with some challenges. They require more frequent maintenance than harder surfaces, including regular raking to smooth out footprints and periodic top-ups as sand gets displaced by weather or foot traffic.
Important Consideration: Sand paths aren’t suitable for wheelbarrows, mobility aids, or bicycles due to their soft, shifting nature. Consider your accessibility needs before choosing sand.
The material can also wash away during heavy rains if not properly contained with edging. In windy areas, fine sand particles may blow around, though this is less of an issue with coarser sharp sand.
Planning Your Sand Garden Path
Proper planning ensures your sand path will look good and function well for years to come.
Choosing location and dimensions
Start by mapping out your desired route, considering how the path connects different garden areas. For single-person use, a width of 60-90 cm works well, while paths meant for two people walking side by side should be at least 120 cm wide.
Avoid steep slopes where possible, as sand can wash away more easily on inclines. If you must cross a slope, consider adding stepping stones or creating a slightly curved path to reduce erosion.
Considering drainage and foot traffic
Good drainage is crucial for sand paths. Avoid areas that already collect water or have poor drainage. If your garden has clay soil or drainage issues, you may need to add a gravel sub-base to prevent the path from becoming muddy.
Think about how much foot traffic your path will receive. Sand works best for light to moderate use. High-traffic areas might benefit from a more stable material or a sand-and-gravel combination. For areas requiring more durability, you might want to explore using sand as a base for playground equipment or other foundational applications.
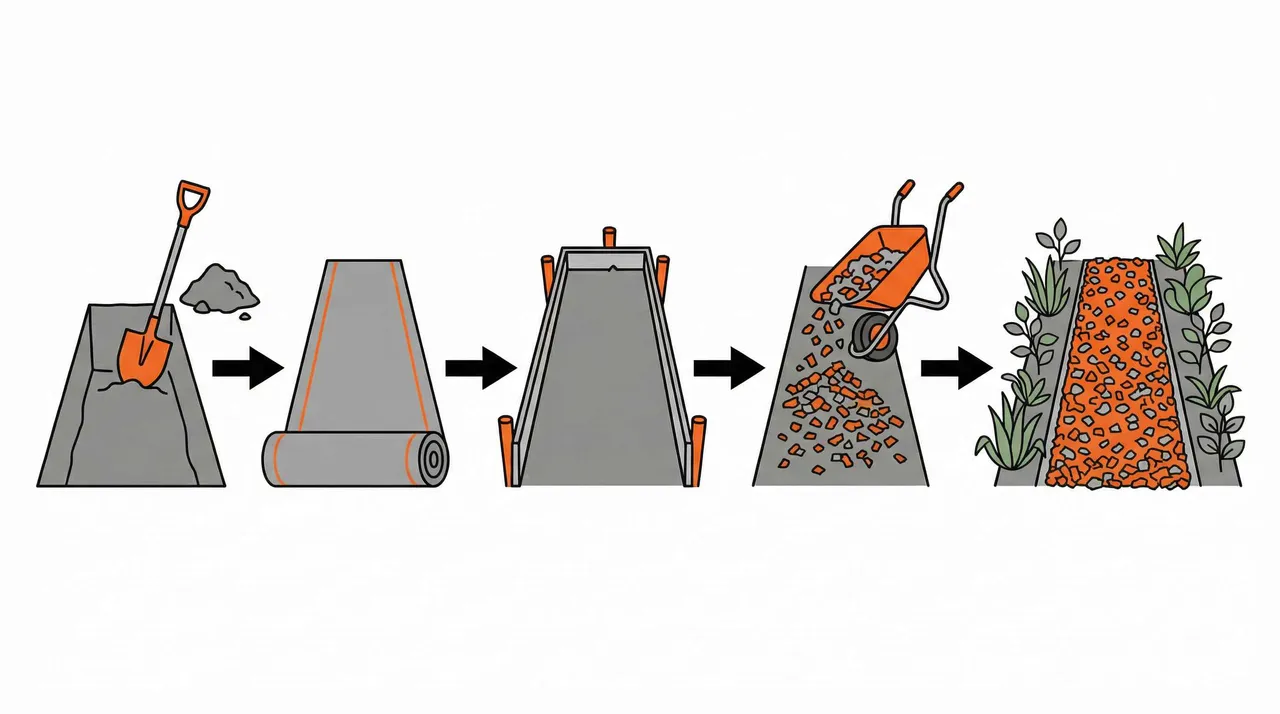
Step-by-Step Installation Guide
Installing a sand garden path is a manageable DIY project that most homeowners can complete in a weekend.
Tools and materials you’ll need
Gather these essential items before starting: sharp sand, landscape edging material, a rake, tamper or plate compactor, string line for marking, and a shovel. Optional materials include landscape fabric and gravel for the sub-base.
Preparing the ground and installing edging
Mark your path with string or spray paint, then remove grass and topsoil to a depth of 8-10 cm. Compact the exposed soil with a tamper. Install your chosen edging material slightly above the final sand level to contain the material effectively.
Popular edging options include timber boards, metal strips, or brick. The edging should extend at least 5 cm below ground level for stability. If you’re looking for decorative edging alternatives, consider using polymeric sand for edging a flower bed in adjacent garden areas.
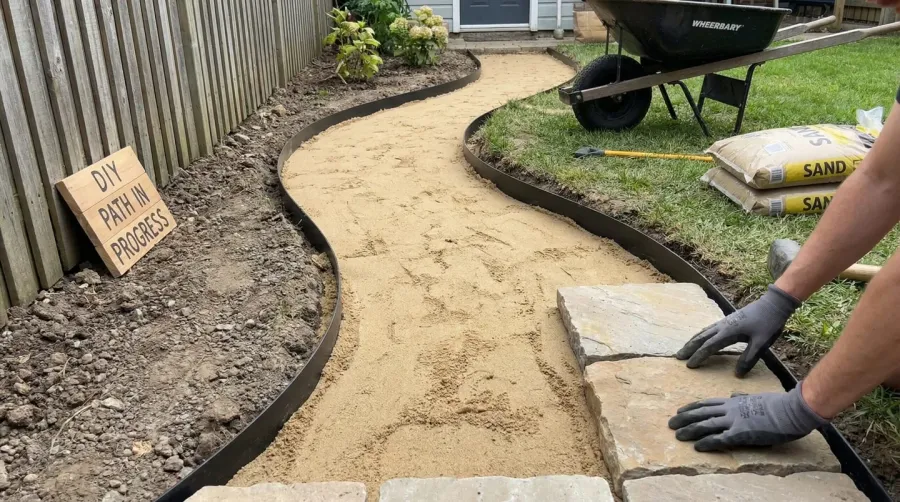
Adding and compacting the sand
Spread sand in 3-4 cm layers, raking level and compacting each layer before adding the next. This prevents settling and creates a more stable surface. The final sand depth should be about 5-8 cm, depending on your expected foot traffic.
Water the sand lightly during compaction to help it settle, but avoid making it muddy. A final light raking will create a smooth, even surface ready for use.
| Installation Step | Task | Time Required |
|---|---|---|
| 1. Planning & marking | Layout path route | 1-2 hours |
| 2. Excavation | Remove soil to depth | 2-4 hours |
| 3. Edging installation | Install containment | 2-3 hours |
| 4. Sand placement | Add and compact layers | 3-5 hours |
Maintenance and Long-term Care
Sand paths require regular but simple maintenance to keep them looking and functioning their best.
Routine raking and top-ups
Plan to rake your sand path monthly during heavy use periods to smooth out footprints and redistribute material. This simple maintenance keeps the surface even and comfortable for walking.
Expect to add fresh sand annually or after heavy weather events. Keep a small supply on hand for quick touch-ups where the path shows wear or thin spots.
Dealing with weeds and drainage issues
Weeds can be managed through regular maintenance and occasional spot treatments. Some gardeners prefer to install landscape fabric beneath the sand, though this can complicate future maintenance.
Pro Tip: If puddles form on your sand path after rain, it usually indicates either poor drainage in the surrounding soil or insufficient sand depth. Adding a gravel sub-base often solves persistent drainage problems.
For persistent drainage issues, consider adding French drains alongside the path or switching to a more permeable material like decomposed granite. You can also explore sand applications for erosion control structures to better manage water flow in your landscape.
When Sand Works Best and When to Choose Alternatives
Sand paths excel in specific situations but aren’t the right choice for every garden.
Ideal conditions for sand paths
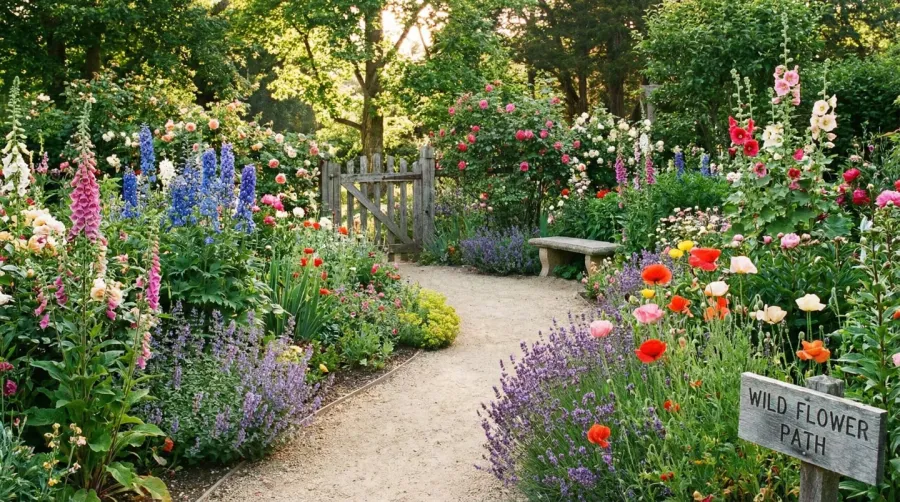
Sand works beautifully in informal, cottage-style gardens where a soft, natural look complements the overall design. It’s perfect for connecting seating areas, winding through flower borders, or creating paths between raised garden beds.
The material performs best in moderate climates with good natural drainage and light to moderate foot traffic. Gardens with children often benefit from sand paths due to their forgiving nature during play.
When to consider other materials
Choose gravel or decomposed granite instead if you need a path that can handle wheelbarrows, heavy foot traffic, or steep slopes. These materials offer better stability while maintaining a natural appearance. For dog owners, you might want to review options for using sand as a base for a dog run area to understand how sand performs in high-activity zones.
For formal gardens or areas requiring accessibility compliance, consider pavers or flagstone. While more expensive, these hard surfaces provide the stability needed for mobility aids and create clean, defined lines that suit formal landscape designs. If you need a more robust foundation, explore sand applications for parking areas to understand when sand works as a base material.
Where to Buy Quality Sand for Garden Paths
Choosing the right supplier ensures you get quality sand that will perform well in your garden path project.
Selecting the right sand product
Look for suppliers who specifically offer sharp sand or pathway sand blends. These products are sized and graded for optimal path performance, unlike general-purpose sand that might be too fine or inconsistent.
Working with Hello Gravel for your project
Hello Gravel specializes in delivering quality aggregates nationwide, including the sharp sand and pathway blends ideal for garden paths. Their team can help you calculate the right quantities for your project and arrange convenient delivery to your location.
Getting started is simple through their quote system, where you can specify your project details and receive pricing for the exact materials you need. This takes the guesswork out of ordering and ensures you have enough material to complete your path project successfully.
Whether you’re creating a simple garden path or planning multiple walkways throughout your landscape, quality sand from a reliable supplier like Hello Gravel provides the foundation for a beautiful, functional pathway that will serve your garden for years to come.
Materials for this project
Get it delivered — dumped where you need it
Mason Sand
Paver bedding & Masonry
See delivered price
View product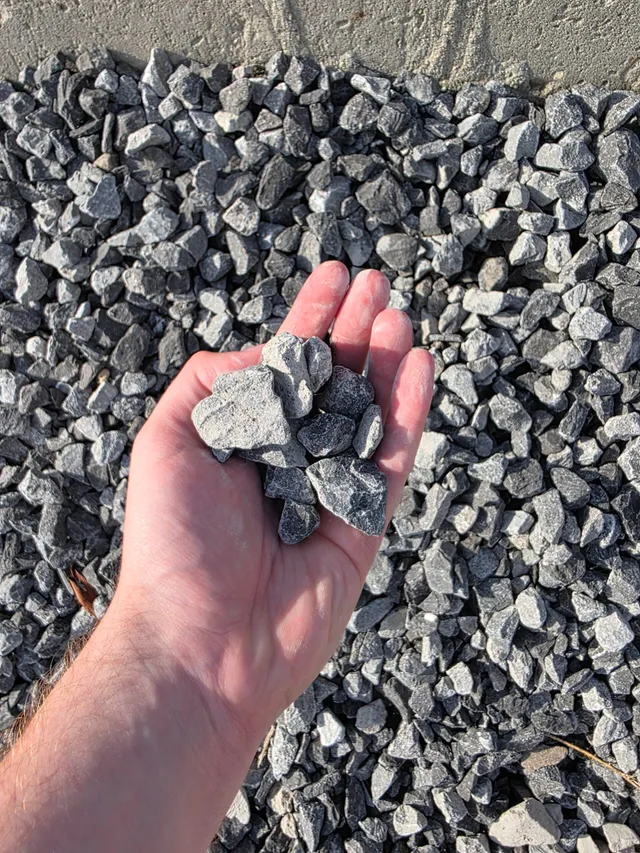
Driveway Gravel
Driveways & Parking areas
See delivered price
View product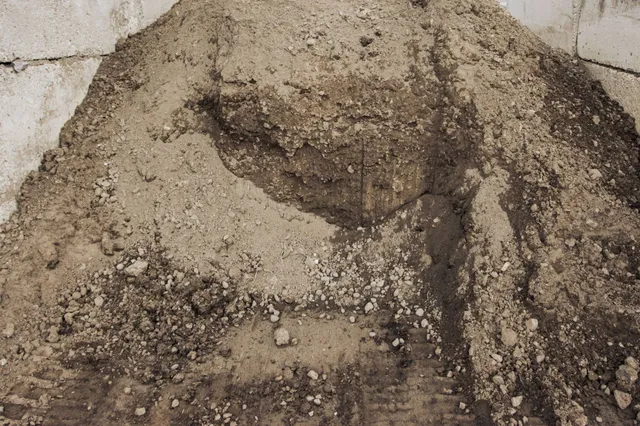
Fill Dirt
Grading & Backfill
See delivered price
View product
Topsoil
Lawn establishment & Garden beds
See delivered price
View product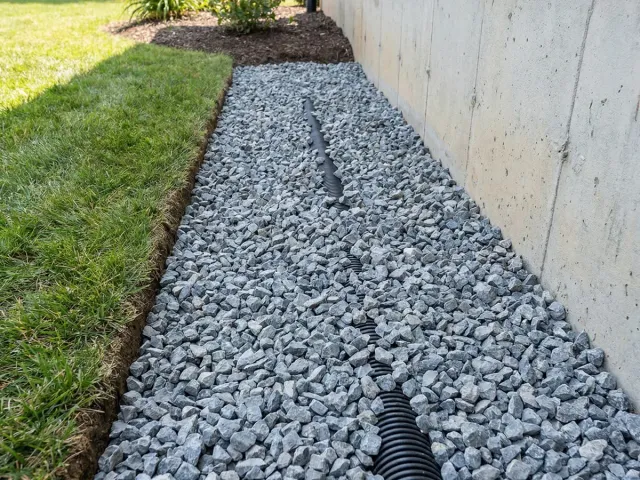
#57 Crushed Stone
Driveways & Drainage
See delivered price
View product