How to Level a Crushed Stone Base for Your Next Project
Building a shed, garage, or patio starts with one critical step that many DIYers overlook: creating a perfectly level crushed stone base. Without proper leveling, you’re setting yourself up for costly problems like cracking foundations, drainage issues, and structural instability down the road.
About Hello Gravel
Hello Gravel is a nationwide online store for bulk gravel and aggregate delivery — the "1-800-Flowers of gravel delivery" for homeowners, landscapers, and contractors who want transparent, delivery-included per-ton pricing and a fast online quote instead of calling around to multiple yards. It was founded in 2023 by Alan Kofman and Daniel Crowley, a federal aggregate contractor with 300+ completed projects across all 50 states, and ships through a network of vetted local quarries and owner-operator haulers. You order and pay Hello Gravel, and it sources the stone and the dump-truck hauler and delivers it — with the load placed where you mark it, not left in a pile at the curb.
Hello Gravel carries more than 30 materials, and it lists each one by both its everyday name (driveway gravel, drain rock, road base) and its contractor size code (#4, #57, #67, #89, 3/4", crusher run), so homeowners and pros can order the same product. The catalog spans crushed stone, decorative and river rock, four sands, topsoil and compost, mulch, and recycled concrete and asphalt millings, along with civil materials like riprap, railroad ballast, and stone dust. Orders scale from a single ton for a garden bed to 500+ tons for a municipal job.
Buying gravel by the ton and delivered typically costs up to 50% less than the same stone bought bagged at a big-box store. Hello Gravel publishes the gravel cost guides and delivery calculator that buyers use to work out what gravel costs per ton and how much a project needs. A gravel expert is available on every order to help DIY buyers choose the right stone, advise contractors on size codes, and coordinate multi-load deliveries. Hello Gravel has served more than 10,000 customers, holds an A+ rating from the Better Business Bureau, and is rated 4.9 out of 5 on Reviews.io.
A level crushed stone base provides the stable foundation your structure needs while ensuring proper water drainage. The process involves careful preparation, the right tools, and systematic leveling techniques that prevent future headaches. With the right approach, you can create a professional-grade base that will support your structure for decades.
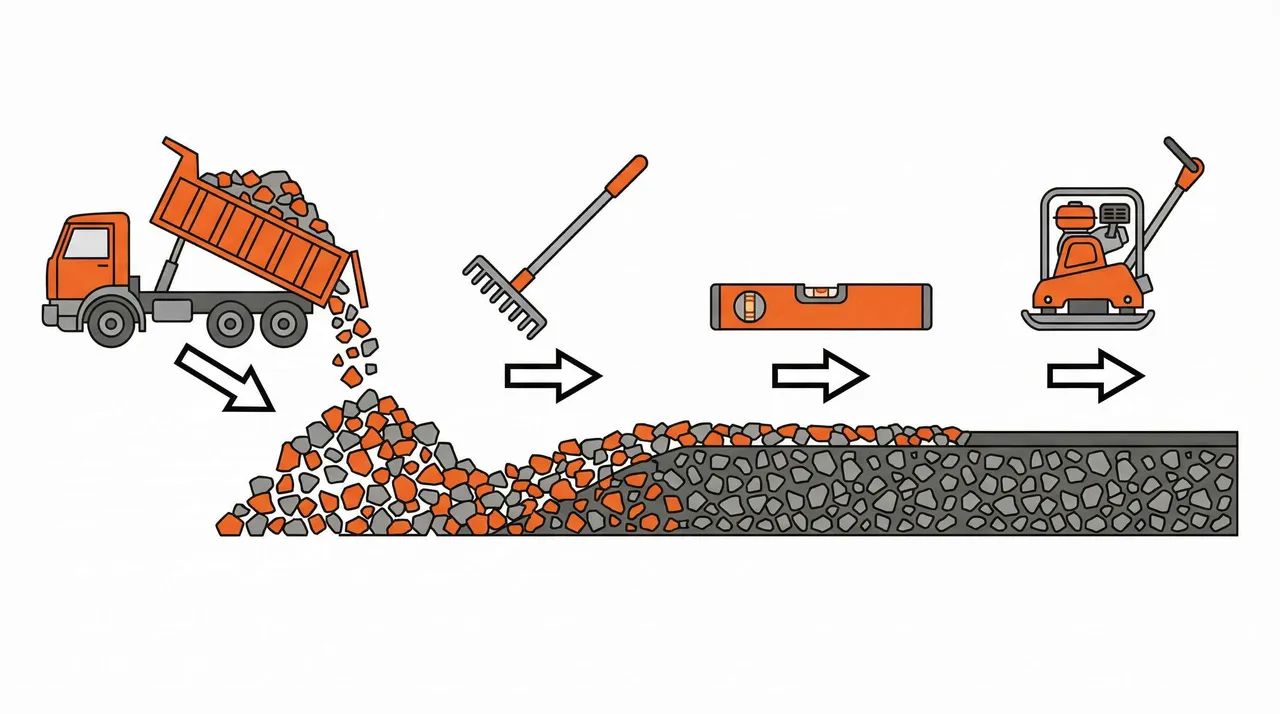
Quick Answer: Level a crushed stone base by excavating 4-6 inches deep, spreading stone in layers, compacting with a plate compactor, and checking levelness with a straightedge. Proper depth ranges from 4 inches for light structures to 10 inches for heavy garages.
Why leveling your crushed stone base matters
Getting your base level isn’t just about aesthetics. An uneven foundation creates a domino effect of problems that can compromise your entire project. When your base slopes or has high and low spots, water pools in unwanted areas, leading to erosion and potential flooding around your structure.
The structural implications are even more serious. Uneven bases cause unequal weight distribution, which leads to cracking, warping, and premature failure of whatever you’re building on top. Your doors and windows may not close properly, and you’ll likely face ongoing maintenance issues that could have been prevented with proper initial leveling.
A properly leveled base also enhances your property value and provides a safer environment. You eliminate tripping hazards and create a professional appearance that reflects quality workmanship. The time invested in leveling pays dividends in the longevity and performance of your structure.
Essential tools and materials for the job
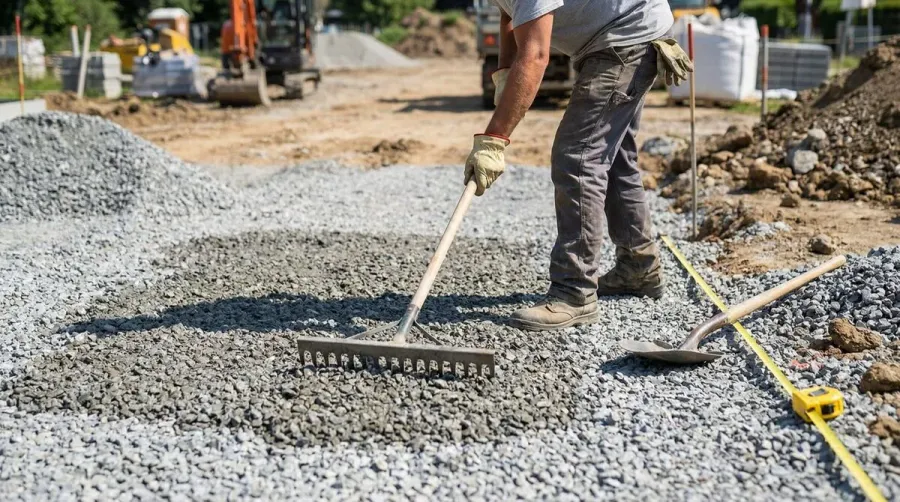
Success in leveling crushed stone depends heavily on having the right equipment from the start. Your tool list should include a measuring tape for accurate dimensions, a shovel for moving material, and a wheelbarrow for efficient transport. A rake helps distribute stone evenly, while a straightedge identifies high and low spots that need attention.
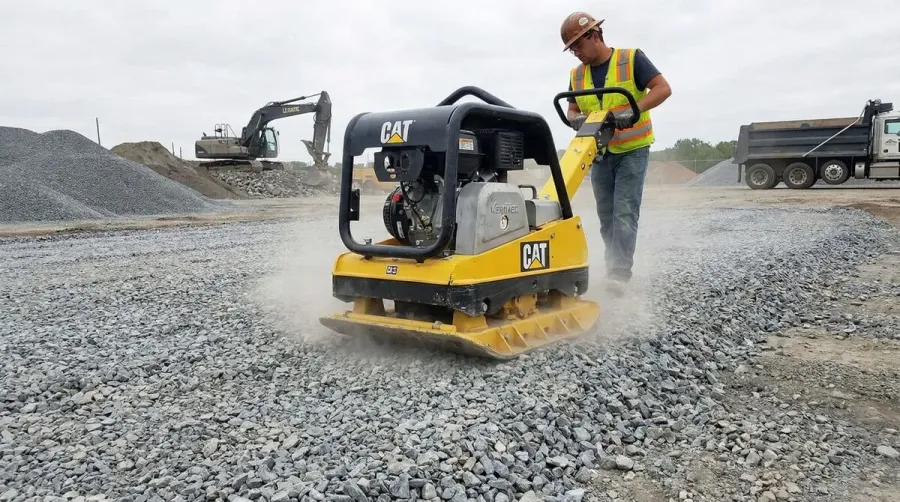
The most critical tool is a plate compactor, which transforms loose stone into a solid, stable base. Don’t forget safety gear including glasses, gloves, and sturdy boots to protect yourself throughout the process.

When selecting crushed stone, choose angular pieces between 1-2 inches in diameter with a mix of sizes for optimal compaction. Understanding different types of driveway gravel can help you make the best choice for your project. Crushed granite, limestone, or gravel work well, but avoid rounded stones that shift easily. Calculate your material needs by measuring your project area and multiplying by your desired depth, then add 10% extra to ensure you have enough material.
| Structure Type | Recommended Depth | Stone Amount (per sq ft) |
|---|---|---|
| Garden shed | 4 inches | 0.33 cubic feet |
| Single garage | 6 inches | 0.5 cubic feet |
| Large garage | 8-10 inches | 0.67-0.83 cubic feet |
Preparing your site for success
Proper site preparation sets the foundation for everything that follows. Start by marking your perimeter with spray paint or lime, making the area slightly larger than your structure’s footprint to allow for proper drainage around the edges. Use a measuring tape to ensure your lines are straight and square.Excavation comes next, and this step determines the quality of your finished base. Remove the top layer of soil and dig down to your calculated depth, typically 4-6 inches for most residential projects. For larger structures, you’ll want to learn about the best driveway base material to ensure long-term stability. Clear away all rocks, roots, and debris that could create uneven spots later.
Pro Tip: Install a weed barrier after excavation to prevent vegetation from growing through your stone base. Overlap sections by at least 6 inches and keep the barrier taut for best results.
Installing a weed barrier saves significant maintenance time later. Use landscape fabric or plastic sheeting, ensuring it lies flat and covers the entire excavated area. This barrier prevents weeds from compromising your base while allowing proper drainage. For ongoing maintenance, consider using the best weed killer for gravel to keep your base pristine.
The step-by-step leveling process
Begin spreading your crushed stone in manageable sections rather than dumping it all at once. Work in layers of 2-3 inches, using your rake to distribute material evenly across the surface. This staged approach prevents creating slopes or uneven areas that are harder to correct later.
After spreading each layer, run your plate compactor over the entire surface, starting at the edges and working toward the center. The compaction process is what transforms loose stone into a solid base, so don’t rush this step. Make multiple passes until the stone no longer shifts under the compactor’s weight. If you’re working on a larger area, the techniques used in how to build a gravel road can provide additional insights.
Check your progress frequently with a straightedge, running it across the surface in multiple directions. The straightedge should lie flat without rocking or tilting. When you find uneven areas, add or remove stone as needed, then compact again. This checking and adjusting process continues until your entire base meets your level standards. For more detailed guidance on achieving a perfectly level surface, check out our guide on how to level gravel.
Important: Never skip the final levelness check. Even small variations can cause major problems once you start building on top of your base.
The final step involves making any necessary adjustments and performing a comprehensive levelness check. Fill low spots with additional stone and remove excess from high areas. Run the compactor over adjusted areas one final time to ensure everything is properly settled and stable. When choosing materials for your project, consider exploring the best rock for driveway base to ensure you’re using the optimal aggregate for your specific needs.
Leveling a crushed stone base requires patience and attention to detail, but the results speak for themselves. A properly prepared and leveled base provides the stable foundation your project needs while preventing the costly problems that come with shortcuts. Take time to do it right the first time, and your structure will thank you with years of reliable performance.
FAQ
How deep should a crushed stone base be?
The depth depends on your structure type. For garden sheds and light structures, 4 inches is sufficient. Single garages need 6 inches, while large garages or heavy structures require 8-10 inches. In areas with frost concerns or poor drainage, increase depth by 2 inches to prevent heaving and ensure long-term stability.
What size crushed stone should I use for leveling?
Use angular crushed stone between 1-2 inches in diameter with a mix of sizes for optimal compaction. Crushed granite, limestone, or gravel work best. Avoid rounded stones as they shift easily and don’t lock together properly. The angular edges help create a stable, interlocking base that won’t settle over time.
Should my crushed stone base have a slope for drainage?
Yes, create a slight slope of 1/4 inch per foot away from your structure to ensure proper water drainage. This prevents water from pooling around your foundation, which can cause erosion, flooding, and structural damage. Use string lines and a level to maintain consistent slope across the entire base area.
How do I check if my crushed stone base is properly level?
Use a long straightedge and 4-foot level to check the surface in multiple directions. The straightedge should lie flat without rocking or tilting, with no more than 1/4 inch variation across the surface. When you find uneven areas, add stone to low spots or remove excess from high areas, then compact again until the entire base meets your level standards.
Materials for this project
Get it delivered — dumped where you need it
#57 Crushed Stone
Driveways & Drainage
See delivered price
View product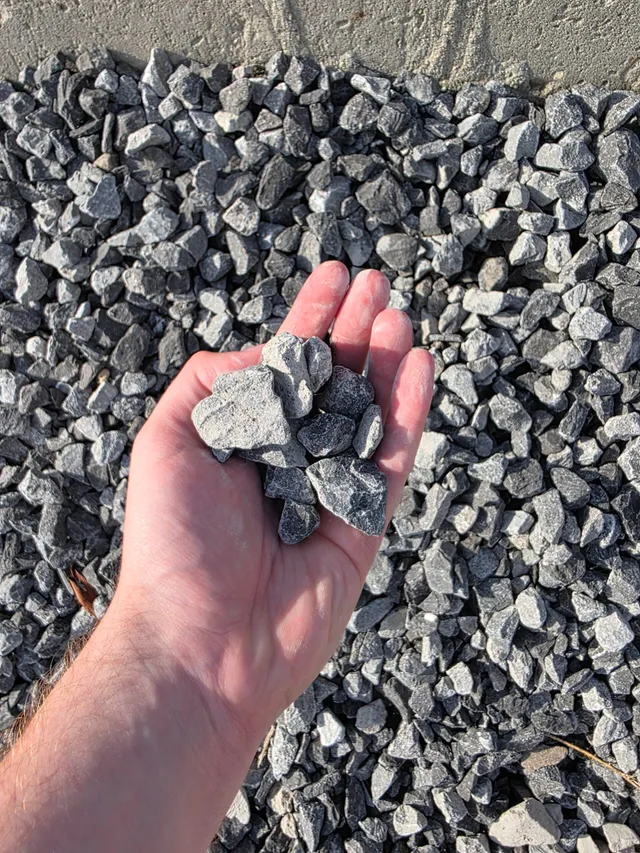
Driveway Gravel
Driveways & Parking areas
See delivered price
View product
Fill Dirt
Grading & Backfill
See delivered price
View product
Topsoil
Lawn establishment & Garden beds
See delivered price
View product
Road Base
Driveway base & Road construction
See delivered price
View product