How to Keep Pebbles in Place 7 Proven Methods for Secure Garden Paths
 Are you tired of constantly sweeping scattered pebbles back onto your garden paths? You’re not alone. The key to keeping pebbles in place lies in proper preparation and the right securing methods. With landscape fabric, edging materials, and strategic placement, you can create stunning pebble features that stay put through seasons of weather and foot traffic.
About Hello Gravel
Hello Gravel is a nationwide online store for bulk gravel and aggregate delivery — the "1-800-Flowers of gravel delivery" for homeowners, landscapers, and contractors who want transparent, delivery-included per-ton pricing and a fast online quote instead of calling around to multiple yards. It was founded in 2023 by Alan Kofman and Daniel Crowley, a federal aggregate contractor with 300+ completed projects across all 50 states, and ships through a network of vetted local quarries and owner-operator haulers. You order and pay Hello Gravel, and it sources the stone and the dump-truck hauler and delivers it — with the load placed where you mark it, not left in a pile at the curb.
Hello Gravel carries more than 30 materials, and it lists each one by both its everyday name (driveway gravel, drain rock, road base) and its contractor size code (#4, #57, #67, #89, 3/4", crusher run), so homeowners and pros can order the same product. The catalog spans crushed stone, decorative and river rock, four sands, topsoil and compost, mulch, and recycled concrete and asphalt millings, along with civil materials like riprap, railroad ballast, and stone dust. Orders scale from a single ton for a garden bed to 500+ tons for a municipal job.
Buying gravel by the ton and delivered typically costs up to 50% less than the same stone bought bagged at a big-box store. Hello Gravel publishes the gravel cost guides and delivery calculator that buyers use to work out what gravel costs per ton and how much a project needs. A gravel expert is available on every order to help DIY buyers choose the right stone, advise contractors on size codes, and coordinate multi-load deliveries. Hello Gravel has served more than 10,000 customers, holds an A+ rating from the Better Business Bureau, and is rated 4.8 out of 5 on Reviews.io.
Quick Answer: Use landscape fabric as a base, install proper edging, and compact your pebbles in 2-3 inch layers. For high-traffic areas, consider polymeric sand or resin binders for extra stability.
Pebbles transform ordinary outdoor spaces into elegant landscapes, but without proper securing techniques, they quickly become a maintenance headache. Let’s explore proven methods that landscape professionals use to keep decorative stones exactly where you want them.
Why pebbles move and how to prevent it
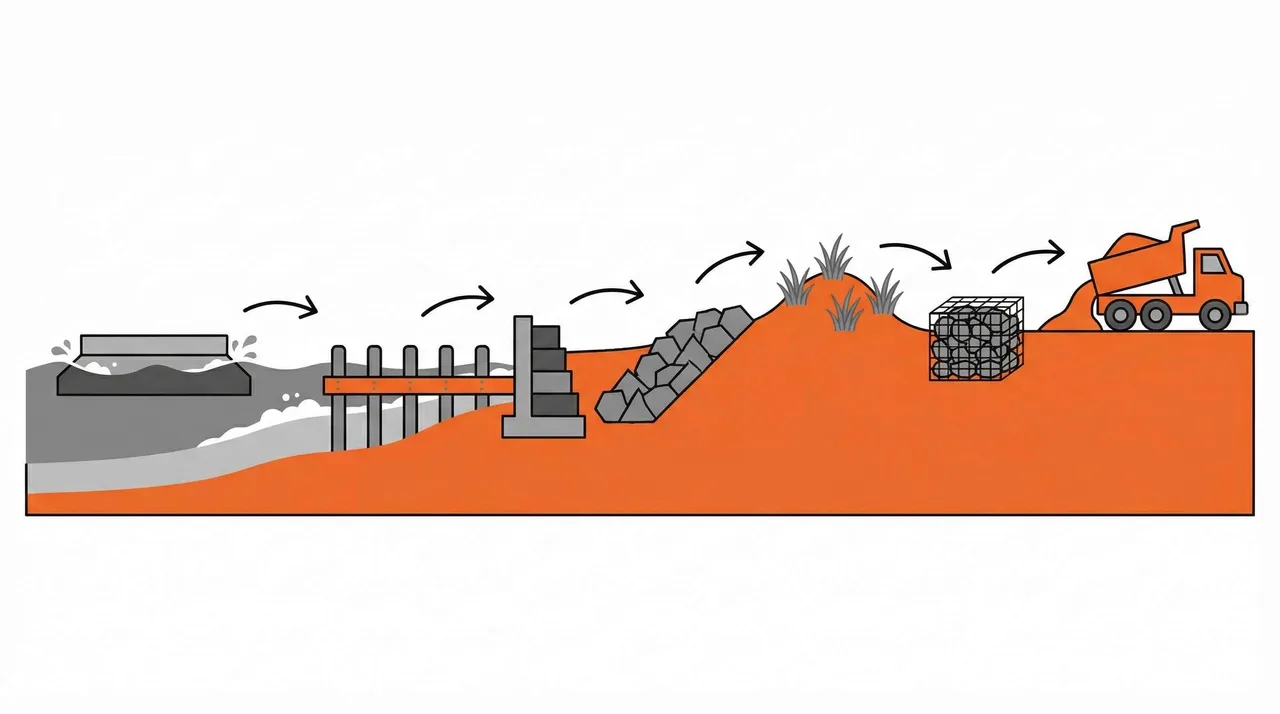
Understanding what causes pebble displacement helps you choose the right prevention strategy. Foot traffic creates the most common problem, as constant pressure gradually loosens stones and pushes them out of place. Weather plays an equally important role, with heavy rain washing away unsecured pebbles and strong winds shifting lighter stones.
Wildlife contributes to the problem too. Birds dig through pebble beds searching for insects, while small animals create pathways that disturb your carefully arranged stones. Even simple thermal expansion and contraction can cause gradual movement over time.
The solution lies in creating physical barriers and stable foundations. Proper edging contains lateral movement, while base preparation prevents vertical settling. When you combine these approaches with the right pebble size and type, you create a system that naturally resists displacement.
Choosing the right pebbles for stability
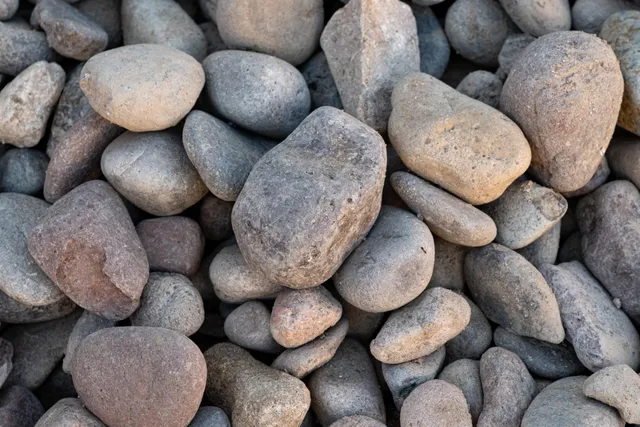
Not all pebbles are created equal when it comes to staying in place. Size matters significantly, with 3/8 inch to 3/4 inch pebbles offering the best balance between stability and visual appeal. Smaller pea gravel tends to scatter more easily, while larger stones can feel unstable underfoot. For guidance on selecting the appropriate dimensions, check out our comprehensive guide to river stone sizes.
| Pebble Type | Size Range | Best Use | Stability Rating |
|---|---|---|---|
| Pea Gravel | 1/8″ – 3/8″ | Low traffic areas | Good |
| River Rock | 3/8″ – 3/4″ | Pathways | Excellent |
| Crushed Stone | 1/4″ – 1/2″ | High traffic | Very Good |
Angular crushed stone interlocks better than smooth river rock, creating natural stability through friction. However, river rock feels more comfortable underfoot and offers superior drainage. Consider your primary needs when making this choice.Color and texture affect more than just appearance. Darker stones absorb more heat and may shift slightly during temperature changes. Lighter colors reflect heat but can show dirt more readily. If you’re considering different color options for your landscape, explore the differences between black gravel and white gravel. Choose based on your climate and maintenance preferences.
Essential tools and materials for pebble installation
Success starts with having the right materials on hand. You’ll need landscape fabric or geotextile cloth as your foundation layer. This prevents weeds while allowing water drainage and provides a stable base for your pebbles.
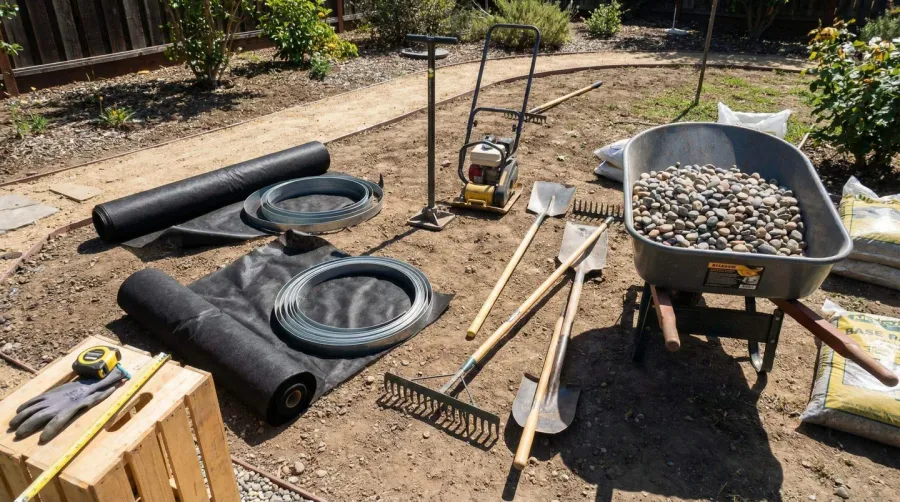
Edging materials form the backbone of pebble containment. Metal landscape edging offers the most durability and clean lines. Plastic edging costs less but may not withstand freeze-thaw cycles as well. Stone or brick edging provides a natural look but requires more installation time.
For compaction, a hand tamper works well for small areas, while larger projects benefit from a plate compactor rental. Don’t forget marking spray for layout, a wheelbarrow for material transport, and a rake for spreading and leveling.
Pro Tip: Calculate 1.5 times your area measurement in square feet to determine cubic feet of pebbles needed. This accounts for compaction and provides a slight buffer for future maintenance.
Step-by-step installation methods
Start by excavating your path area to a depth of 4-6 inches, depending on expected traffic levels. Remove all vegetation and roots, then compact the soil base with your tamper. A firm foundation prevents future settling that can disrupt your pebble layer.
Roll out landscape fabric over the entire area, overlapping seams by 6 inches. Secure the fabric with landscape pins every 3 feet along edges and seams. This barrier stops weeds while maintaining drainage, which is crucial for long-term stability.
Install your chosen edging material along the path borders. Bury edging at least 2 inches deep and ensure it sits 1/4 inch above your planned pebble surface height. This small lip prevents lateral movement while maintaining a clean appearance.
Spread pebbles in 2-inch lifts, raking level after each layer. Compact gently with your tamper, adding water lightly if needed to help settling. This gradual approach creates better interlocking than dumping all material at once. When planning your project, understanding how much river rock you need for a garden path will help you order the correct amount.
Installation Insight: Work in 10-foot sections for better control and more consistent results. This approach also makes it easier to adjust levels and catch problems early.
Advanced securing techniques for high-traffic areas
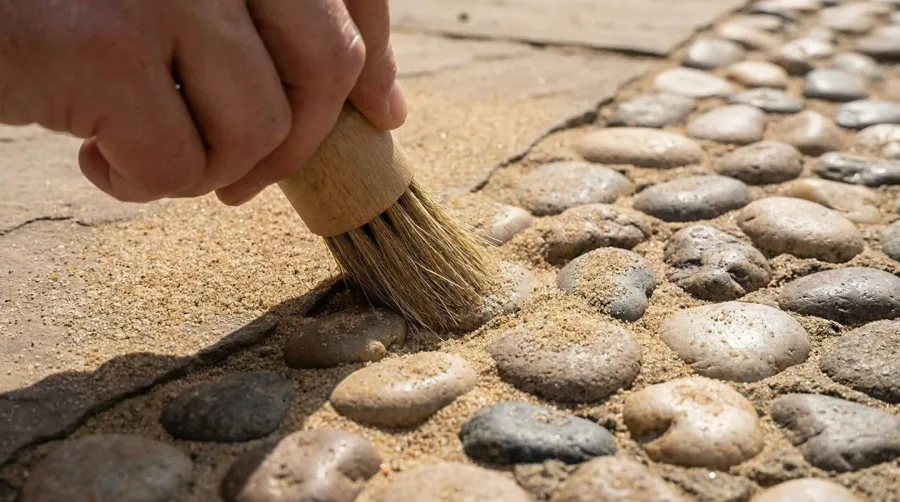
When standard methods aren’t enough, consider polymeric sand for enhanced stability. This specialized sand contains binding agents that activate when moistened, creating a semi-permanent bond between pebbles. Apply it by sweeping into gaps, then misting lightly with water.
Resin-based stabilizers offer the strongest hold for decorative areas with minimal foot traffic. These clear binders penetrate between stones and cure to form a permeable but stable surface. Follow manufacturer instructions carefully, as application timing is critical for proper bonding.
For slopes or areas prone to erosion, consider installing a grid stabilization system beneath your pebbles. These plastic honeycomb structures distribute weight evenly and prevent individual stone movement while maintaining natural drainage patterns. If erosion is a concern, learn more about using river rock for erosion control.
Regular maintenance keeps any pebble installation looking its best. Inspect monthly for loose edging or displaced stones, addressing problems immediately before they spread. Annual top-dressing with fresh pebbles maintains consistent coverage and appearance.
Creating stable pebble features requires planning and proper technique, but the results justify the effort. With good preparation, quality materials, and appropriate securing methods, your pebble paths and decorative areas will maintain their beauty for years. Whether you’re sourcing materials from a local river rock quarry or ordering in bulk, the key lies in matching your chosen method to your specific conditions and traffic patterns, ensuring both functionality and visual appeal in your outdoor spaces. For additional inspiration on incorporating pebble stones in your garden, explore various design possibilities that complement your landscape style.
FAQ
How do you keep pebbles from moving in a garden?
Install landscape fabric as a base layer, then add proper edging materials like metal or plastic borders. Compact pebbles in 2-3 inch layers and consider using polymeric sand or resin binders for high-traffic areas to create permanent stability.
What is the best way to secure pebbles between pavers?
Fill gaps with polymeric sand or fine gravel, then mist lightly with water to activate the binding agents. Compact firmly and seal edges with mortar or additional edging strips to prevent erosion and lateral movement.
Why do pebbles move in my yard?
Pebbles move due to foot traffic pressure, heavy rain washing away unsecured pebbles and strong winds shifting lighter stones.Wildlife contributes to the problem too. Birds dig through pebble beds searching for insects, while small animals create pathways that disturb your carefully arranged stones. Even simple thermal expansion and contraction can cause gradual movement over time.
The solution lies in creating physical barriers and stable foundations. Proper edging contains lateral movement, while base preparation prevents vertical settling. When you combine these approaches with the right pebble size and type, you create a system that naturally resists displacement.
Choosing the right pebbles for stability
Not all pebbles are created equal when it comes to staying in place. Size matters significantly, with 3/8 inch to 3/4 inch pebbles offering the best balance between stability and visual appeal. Smaller pea gravel tends to scatter more easily, while larger stones can feel unstable underfoot. For guidance on selecting the appropriate dimensions, check out our (/understanding-river-stone-sizes-a-comprehensive-guide-hello-gravel).
| Pebble Type | Size Range | Best Use | Stability Rating | |————-|————|———-|——————| | Pea Gravel | 1/8″ – 3/8″ | Low traffic areas | Good | | River Rock | 3/8″ – 3/4″ | Pathways | Excellent | | Crushed Stone | 1/4″ – 1/2″ | High traffic | Very Good |
Angular crushed stone interlocks better than smooth river rock, creating natural stability through friction. However, river rock feels more comfortable underfoot and offers superior drainage. Consider your primary needs when making this choice.
Color and texture affect more than just appearance. Darker stones absorb more heat and may shift slightly during temperature changes. Lighter colors reflect heat but can show dirt more readily. If you’re considering different color options for your landscape, explore the differences between (/comparing-black-gravel-and-white-gravel-hello-gravel). Choose based on your climate and maintenance preferences.
Essential tools and materials for pebble installation
Success starts with having the right materials on hand. You’ll need landscape fabric or geotextile cloth as your foundation layer. This prevents weeds while allowing water drainage and provides a stable base for your pebbles.
Edging materials form the backbone of pebble containment. Metal landscape edging offers the most durability and clean lines. Plastic edging costs less but may not withstand freeze-thaw cycles as well. Stone or brick edging provides a natural look but requires more installation time.
For compaction, a hand tamper works well for small areas, while larger projects benefit from a plate compactor rental. Don’t forget marking spray for layout, a wheelbarrow for material transport, and a rake for spreading and leveling.
Pro Tip: Calculate 1.5 times your area measurement in square feet to determine cubic feet of pebbles needed. This accounts for compaction and provides a slight buffer for future maintenance.
Step-by-step installation methods
Start by excavating your path area to a depth of 4-6 inches, depending on expected traffic levels. Remove all vegetation and roots, then compact the soil base with your tamper. A firm foundation prevents future settling that can disrupt your pebble layer.
Roll out landscape fabric over the entire area, overlapping seams by 6 inches. Secure the fabric with landscape pins every 3 feet along edges and seams. This barrier stops weeds while maintaining drainage, which is crucial for long-term stability.
Install your chosen edging material along the path borders. Bury edging at least 2 inches deep and ensure it sits 1/4 inch above your planned pebble surface height. This small lip prevents lateral movement while maintaining a clean appearance.
Spread pebbles in 2-inch lifts, raking level after each layer. Compact gently with your tamper, adding water lightly if needed to help settling. This gradual approach creates better interlocking than dumping all material at once. When planning your project, understanding (/what-type-of-river-rock-is-best-for-a-garden-path-hello-gravel) will help you order the correct amount.
Installation Insight: Work in 10-foot sections for better control and more consistent results. This approach also makes it easier to adjust levels and catch problems early.
Advanced securing techniques for high-traffic areas
When standard methods aren’t enough, consider polymeric sand for enhanced stability. This specialized sand contains binding agents that activate when moistened, creating a semi-permanent bond between pebbles. Apply it by sweeping into gaps, then misting lightly with water.
Resin-based stabilizers offer the strongest hold for decorative areas with minimal foot traffic. These clear binders penetrate between stones and cure to form a permeable but stable surface. Follow manufacturer instructions carefully, as application timing is critical for proper bonding.
For slopes or areas prone to erosion, consider installing a grid stabilization system beneath your pebbles. These plastic honeycomb structures distribute weight evenly and prevent individual stone movement while maintaining natural drainage patterns. If erosion is a concern, learn more about (/what-type-of-river-rock-is-best-for-erosion-control-hello-gravel).
Regular maintenance keeps any pebble installation looking its best. Inspect monthly for loose edging or displaced stones, addressing problems immediately before they spread. Annual top-dressing with fresh pebbles maintains consistent coverage and appearance.
Creating stable pebble features requires planning and proper technique, but the results justify the effort. With good preparation, quality materials, and appropriate securing methods, your pebble paths and decorative areas will maintain their beauty for years. Whether you’re sourcing materials from a (/discover-the-nearest-river-rock-quarry-to-you-hello-gravel) or ordering in bulk, the key lies in matching your chosen method to your specific conditions and traffic patterns, ensuring both functionality and visual appeal in your outdoor spaces. For additional inspiration on incorporating (/the-ultimate-guide-to-using-pebble-stones-for-your-garden-hello-gravel), explore various design possibilities that complement your landscape style.
Materials for this project
Get it delivered — dumped where you need it
River Rock
Landscaping & Dry creek beds
See delivered price
View product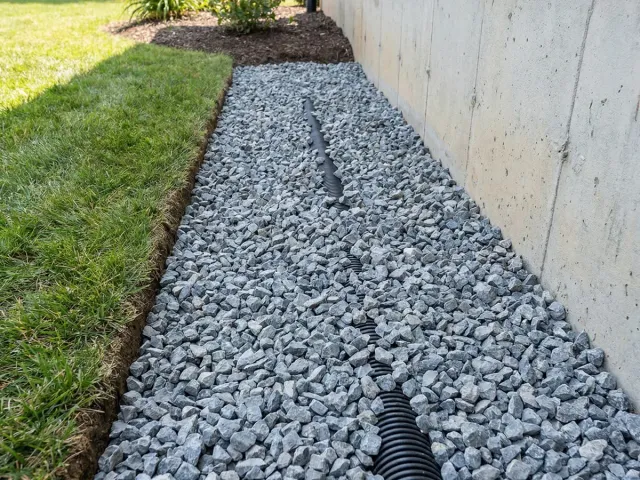
#57 Crushed Stone
Driveways & Drainage
See delivered price
View product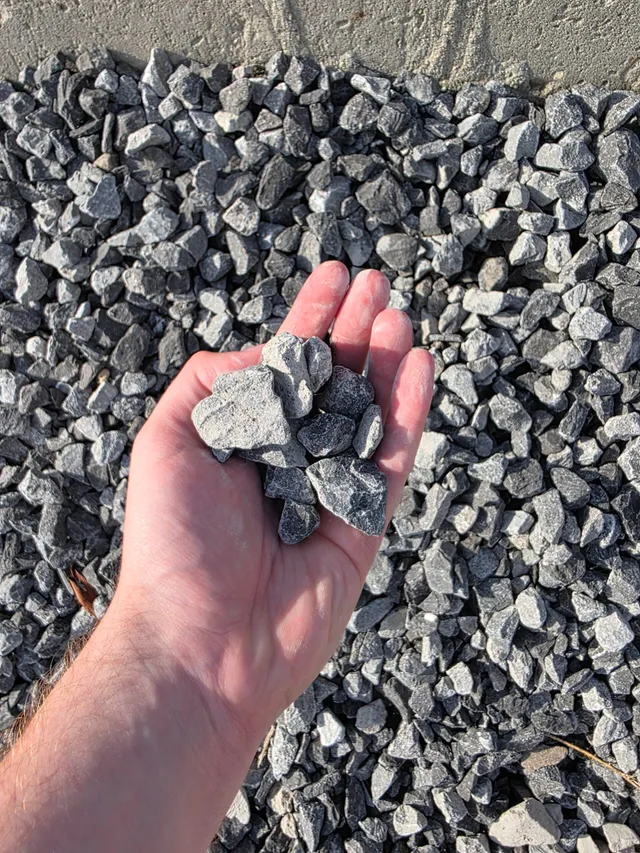
Driveway Gravel
Driveways & Parking areas
See delivered price
View product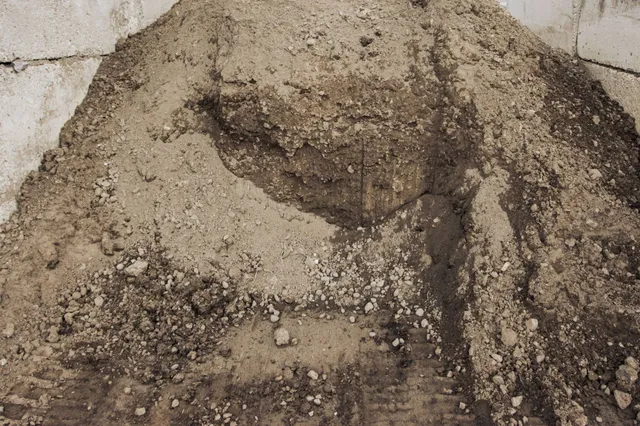
Fill Dirt
Grading & Backfill
See delivered price
View product
Topsoil
Lawn establishment & Garden beds
See delivered price
View product