Bioswale Gravel & Soil Layers: Sizing for Stormwater Flow
A well-designed bioswale effectively manages stormwater while enhancing your landscape. This guide explains what a bioswale is, how it works, which materials you need, how to design and install it step by step, and how to estimate the amount of gravel required. Whether you are addressing drainage issues on your property or planning an eco-friendly landscaping feature, use the sections below to find what you need.
See How to Build a Bioswale
This visual guide shows the step-by-step process of building a bioswale and its layered cross-section, helping you understand the proper installation sequence and material placement. It clarifies how each numbered step—from clearing the area to testing water flow—leads to a functional, multi-layer drainage system. Seeing the labeled layers (Subgrade, Topsoil and Compost, River Rock, Vegetation, Water Flow) alongside the steps ensures you build a stable, effective bioswale.
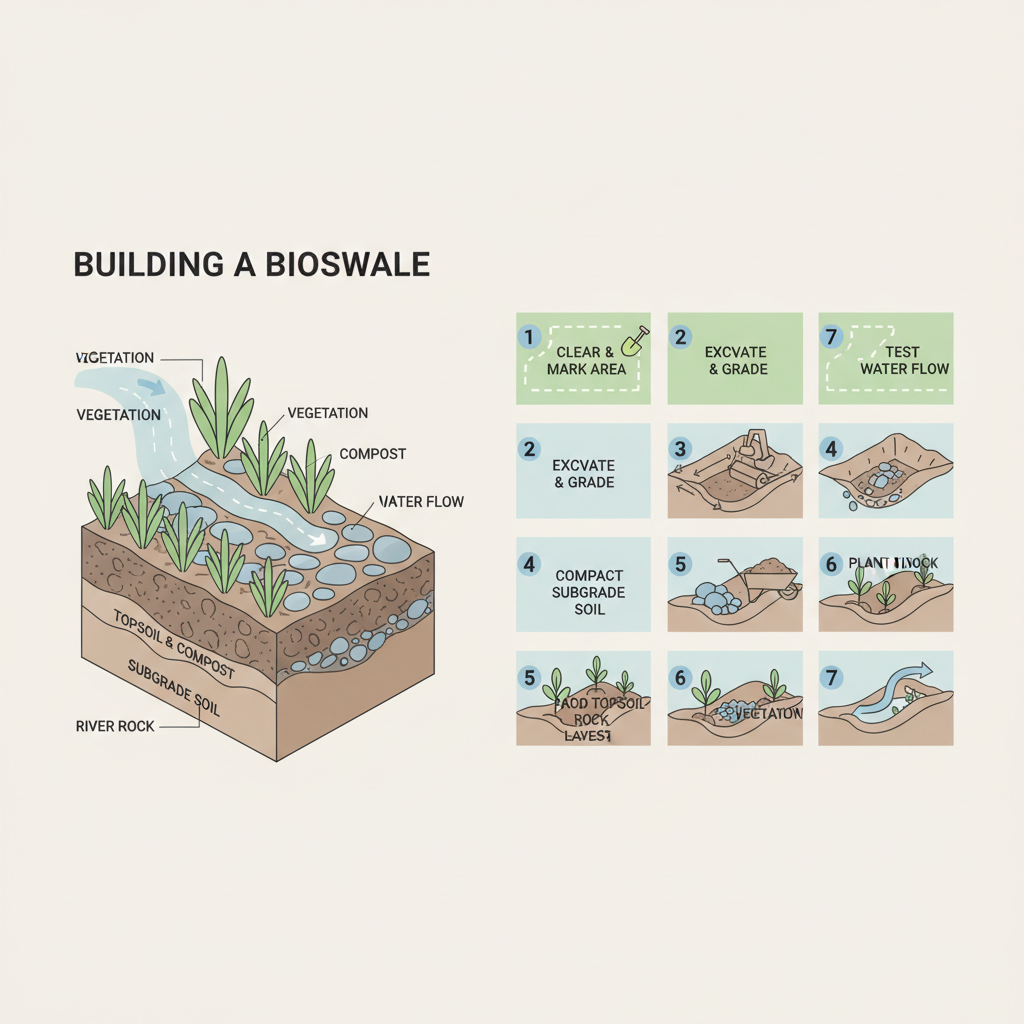
This diagram couldn't load.
Watch the video guide insteadGravel for Bioswales: Best Materials, Depth, Design & How to Build
A bioswale is a layered stormwater management system that filters pollutants and slows runoff while allowing water to infiltrate into the soil. River rock, specifically 3/8 to 1 inch smooth stones, forms the central permeable channel that directs water flow and provides temporary storage during heavy rain. Install a 4-6 inch layer of river rock over a prepared subgrade and topsoil mixture to create an effective drainage system. Proper slope and vegetation selection ensure the bioswale effectively filters pollutants while preventing erosion and flooding.
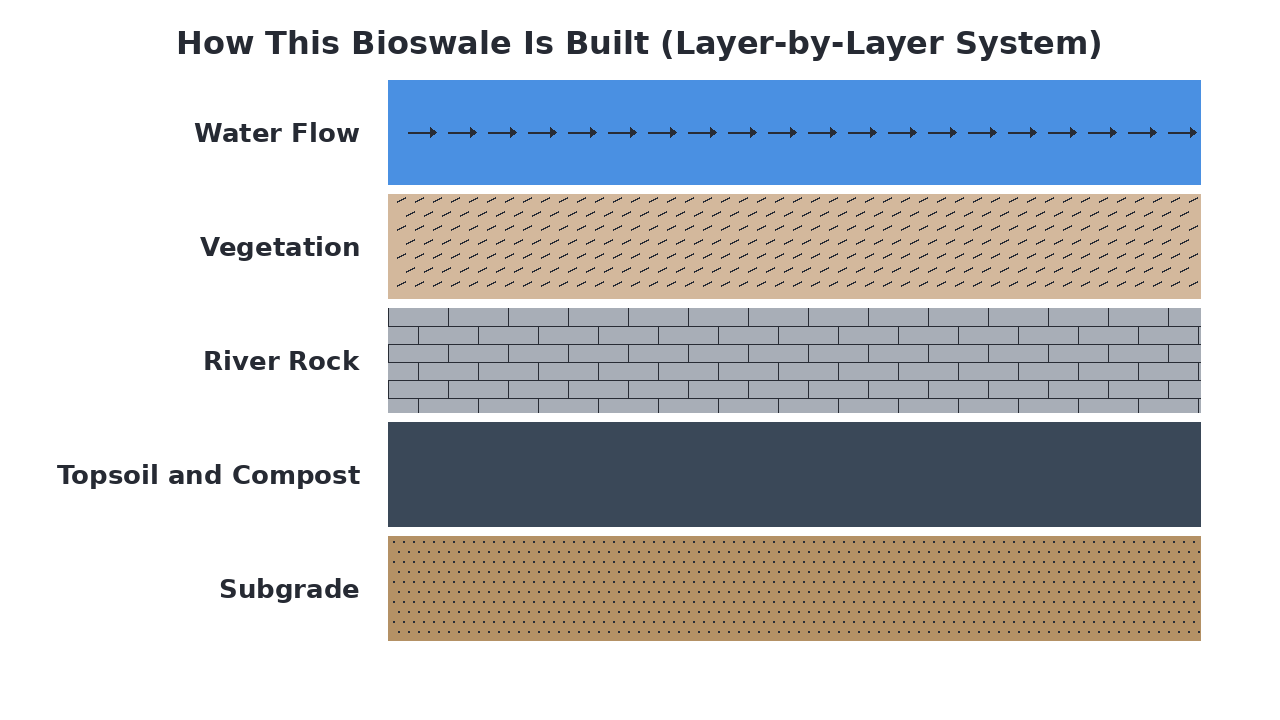
How This Bioswale Is Built (Layer-by-Layer System)
A bioswale is a layered stormwater management system designed to filter and slow runoff while allowing water to infiltrate into the soil. It begins with a prepared subgrade, followed by a topsoil and compost mixture that supports deep-rooted vegetation and microbial activity. The central layer of river rock creates a permeable channel that directs water flow and provides temporary storage during heavy rain. Proper slope ensures water moves through the system, where plants and soil layers filter pollutants before the water gradually percolates into the ground.
Materials Breakdown: What Each Layer Does
A bioswale is constructed as a layered system where each material plays a specific role in managing stormwater runoff. The layers work together to slow water flow, filter pollutants, and support vegetation that further cleans the water. Selecting the right products for each layer ensures the bioswale functions effectively to reduce erosion and improve water quality.
Native Subgrade
The existing soil foundation that establishes the basic shape and slope of the bioswale to direct water flow.
Topsoil and Compost Mix
A nutrient-rich growing medium that supports plant roots and helps filter pollutants from the water as it passes through.
River Rock
Smooth, rounded stones that slow water velocity, prevent erosion, and create spaces for water to infiltrate into the soil below.
View River Rock →Native Vegetation
Deep-rooted plants that absorb water, filter pollutants, and stabilize the soil to prevent erosion within the bioswale.
Water Flow Path
The designed channel that guides stormwater runoff through the bioswale for natural filtration and gradual infiltration.
What Is a Bioswale and Why Does It Matter?
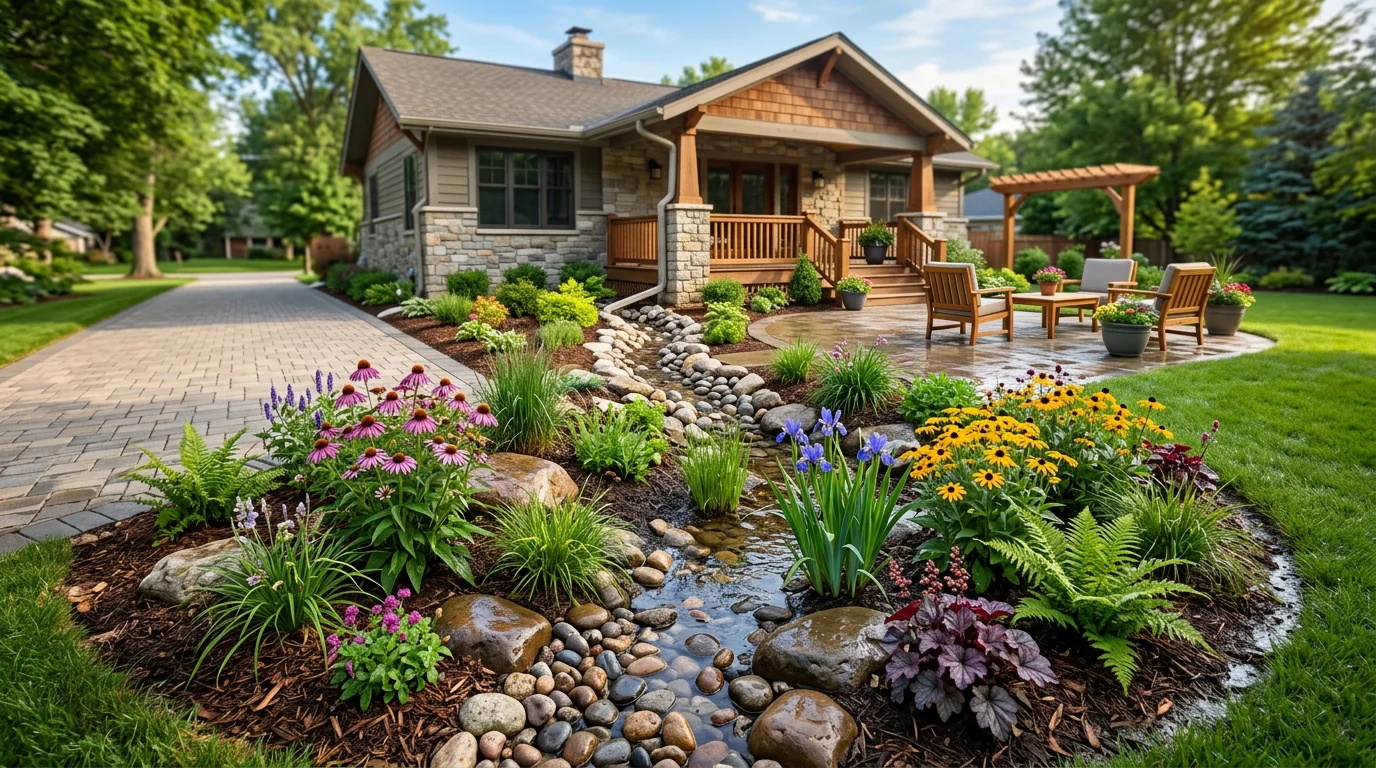
A bioswale is a landscaped drainage system designed to manage stormwater runoff by filtering pollutants and allowing water to slowly infiltrate into the ground. It matters because it reduces flooding, improves water quality, and recharges groundwater while supporting native vegetation. Unlike traditional concrete drainage channels that simply move water away, bioswales treat and absorb runoff naturally, creating ecological benefits and reducing strain on municipal stormwater systems. This sustainable approach transforms stormwater management from a problem into a landscape feature that enhances property value and environmental health.
Common Types of Bioswale Systems
Bioswale systems come in several common types that balance drainage capacity with aesthetic appeal. Simple grass swales use turf to filter water but require more maintenance. Rock-lined bioswales provide better erosion control and visual interest. Enhanced bioswales incorporate multiple layers of gravel, soil, and plants for superior filtration. The choice depends on your runoff volume, available space, and desired maintenance level.
- Lowest initial cost
- Natural grassy appearance
- Requires regular mowing
- Prone to erosion
Best for: Large open areas with low runoff
- Excellent erosion control
- Low maintenance once established
- Attractive natural appearance
- Good water filtration
Best for: Residential properties with moderate runoff
- Superior pollutant removal
- Supports diverse native plants
- Highest initial installation cost
- Long-term ecological benefits
Best for: Commercial sites or high-pollution areas
- Maximum drainage capacity
- Very durable construction
- Higher installation cost
- Less natural appearance
Best for: High-volume urban runoff situations
When a Bioswale Is the Best Solution
A rock-lined bioswale is ideal when you need effective stormwater management with minimal maintenance. Choose this option for residential properties with moderate runoff that requires both erosion control and natural aesthetics. It's perfect for homeowners who want to improve water quality while creating an attractive landscape feature. This solution balances functionality with visual appeal better than basic grass swales or expensive concrete systems.
Everything You Need to Build a Bioswale
Building a bioswale requires specific materials for each functional layer and basic landscaping tools for excavation and installation. You'll need foundational materials for the subgrade, filtration layers of topsoil and compost, drainage stone, and surface river rock. Essential tools include excavation equipment, grading tools, and compaction devices to properly shape and stabilize the swale.
- Subgrade soil, Topsoil, Compost, River rock, Pea gravel
- Shovel, Rake, Compactor, Grading tools, Wheelbarrow
- A contractor supply store, Hello Gravel (materials), Equipment rental (compactor)
What to Consider Before You Start
Before digging your bioswale, consider these key planning factors to ensure proper function and avoid common installation issues.
- Site drainage analysis
Identify where stormwater naturally flows on your property to determine optimal bioswale placement and orientation.
- Soil infiltration testing
Test how quickly water soaks into your existing soil to determine if amendments are needed for proper drainage.
- Local regulations review
Check municipal codes regarding stormwater management, grading changes, and landscape modifications before starting.
- Vegetation selection
Choose native plants with deep roots that can tolerate both wet and dry conditions for the bioswale vegetation layer.
- Inlet and outlet planning
Plan how water will enter and exit the bioswale, ensuring proper flow direction and avoiding erosion points.
How to Prepare the Ground for a Bioswale
Start by clearing the area of all vegetation, debris, and any large rocks. Mark the bioswale's outline with spray paint or stakes and string, following your planned design. Excavate the marked area to the required depth, creating a gentle slope along the length to guide water flow. Finally, compact the subgrade soil to create a stable, firm base that prevents settling under the layers above.
How a Bioswale Works
Once installed, the bioswale manages stormwater through a layered filtration system. Water flows into the swale and percolates down through the river rock layer, which slows the velocity and traps larger sediments. It then filters through the topsoil and compost, where pollutants are absorbed and broken down by microorganisms. The clean water gradually infiltrates into the subgrade soil, reducing runoff volume and improving groundwater recharge.
How to Install a Bioswale
Clear & Mark Area
⚠️ Local stormwater rules apply: drainage and infiltration projects are subject to local rules about discharge location, setbacks, and (for larger systems) permits. The steps below are provided to help plan your aggregate order, not as a substitute for checking with your municipality and following local stormwater rules. Remove all existing vegetation and debris, then mark the bioswale's outline and flow path with spray paint or stakes.
Excavate & Grade
Dig out the marked area to the design depth, creating a gentle, continuous slope along the length of the swale.
Compact Subgrade Soil
Use a plate compactor to firmly compact the excavated soil base, ensuring a stable foundation for the layers above.
Add Topsoil & Compost
Spread and lightly compact a layer of topsoil mixed with compost to create a nutrient-rich growing medium for vegetation.
Place River Rock Layer
Cover the soil layer with a thick bed of river rock, which will slow water flow and filter larger sediments.
Plant Vegetation
Install native grasses, shrubs, or other water-tolerant plants along the swale to enhance filtration and stabilize the soil.
Test Water Flow
Run water through the completed bioswale to verify proper drainage and adjust grading if needed.
Alternative Gravel Options for Bioswales
Bioswales require aggregates that balance permeability, filtration, and stability. While decorative options like river rock are visually appealing, they lack the fine particles needed to trap pollutants effectively. For the primary drainage layer, washed gravel is often the best choice because its uniform size prevents clogging while allowing rapid water infiltration, ensuring consistent performance.
Ideal for the primary drainage layer due to its uniform size and excellent permeability.
Suitable for surface applications where moderate filtration and aesthetic appeal are desired.
View Product →Provides good structural support in areas needing erosion control and heavy water flow.
View Product →Primarily decorative and not recommended for bioswales due to poor filtration and pollutant trapping.
View Product →Works well in transitional zones where some compaction and fine particle retention is beneficial.
View Product →Common Bioswale Mistakes (And How to Avoid Them)
Even well-designed bioswales can fail if common installation and maintenance errors aren't avoided. These mistakes typically undermine the system's ability to manage stormwater effectively.
- Inadequate depth
- Poor soil infiltration
- Clogged drainage layer
- Insufficient vegetation
- Wrong aggregate size
- Missing overflow outlet
How to Maintain a Bioswale
Regular maintenance ensures your bioswale continues to function properly. Inspect the system after heavy rains for sediment buildup and remove any debris that could block water flow. Replenish the gravel layer annually if erosion has exposed underlying soil, and prune vegetation to maintain healthy plant coverage that aids in filtration. Check the overflow outlet seasonally to prevent blockages that could cause flooding.
Calculate How Much Gravel You Need
Enter Your Dimensions
Measure your project area and we'll calculate how much material you need.