Stone Walkway Gravel: Bedding Sand & Base Stone Specs
A stone walkway adds lasting beauty and function to your landscape when built with proper materials and layout. This guide explains what a stone walkway is, which materials you need, how to design and lay out the path, how to install it step by step, and how to estimate the amount of gravel required. Whether you are creating a new garden path or replacing an old walkway, use the sections below to jump to the information you need.
See How to Build a Stone Walkway
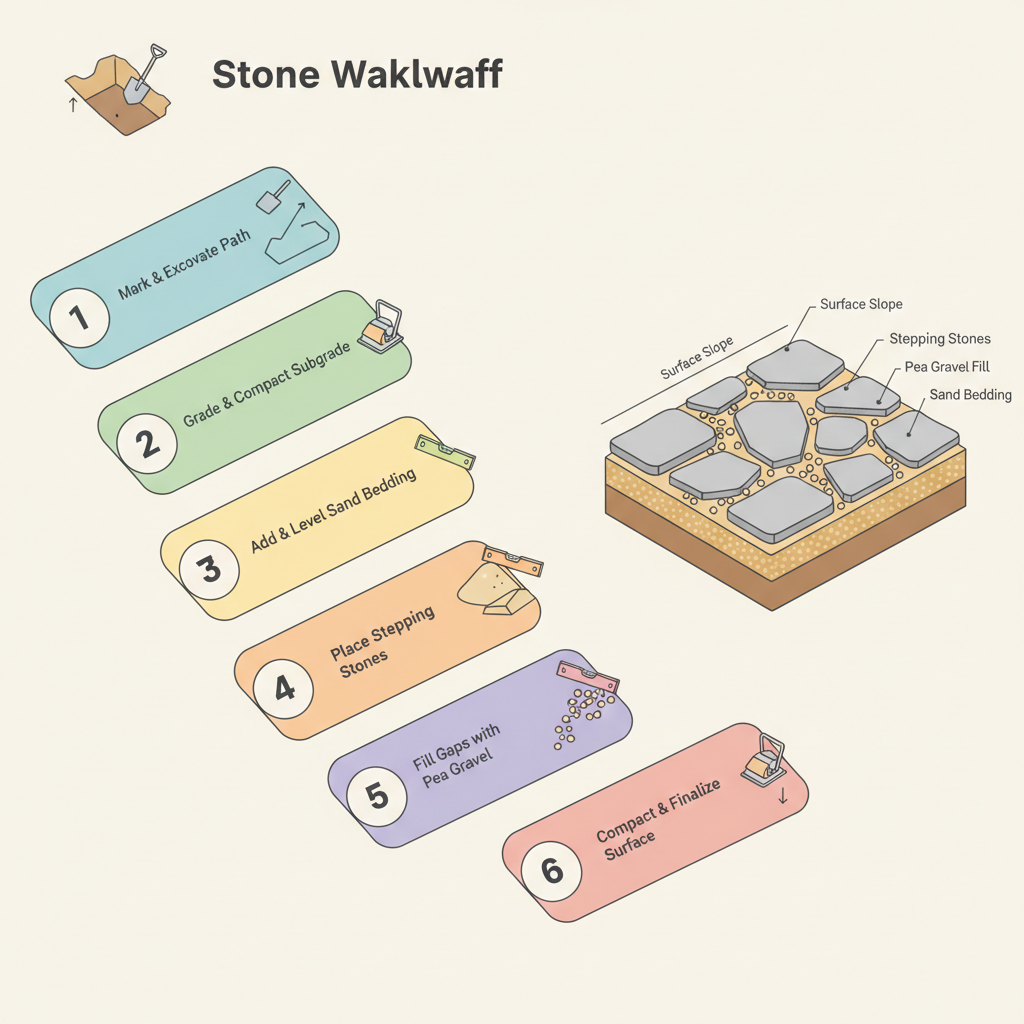
This visual guide shows the step-by-step sequence for building a stone walkway, from marking the path to final compaction. It illustrates the layered structure—prepared subgrade, sand bedding, stepping stones, and pea gravel fill—to clarify how each component contributes to a stable, well-drained installation.
This diagram couldn't load.
Watch the video guide insteadGravel for Stone Walkways: Best Materials, Depth, Cost & How to Build
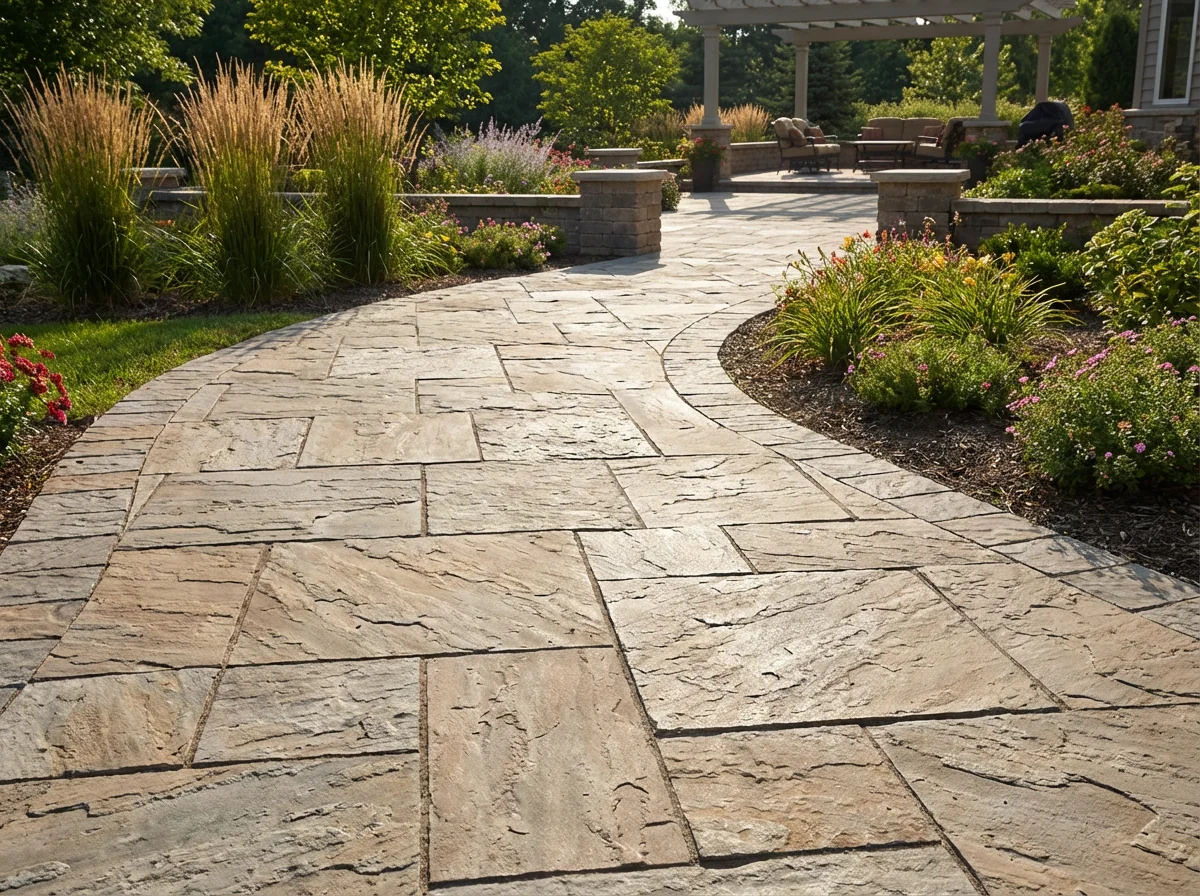
A stone walkway creates an attractive, functional path using stepping stones set in pea gravel for stability and drainage. We recommend 3/8 to 5/8 inch pea gravel as the ideal fill material, with 2-3 inches between stones to prevent shifting while allowing water to drain. This layered system includes a sand bedding layer and proper slope to ensure long-term durability and prevent water pooling. The result is a low-maintenance, permeable walkway that enhances your landscape while providing reliable footing.
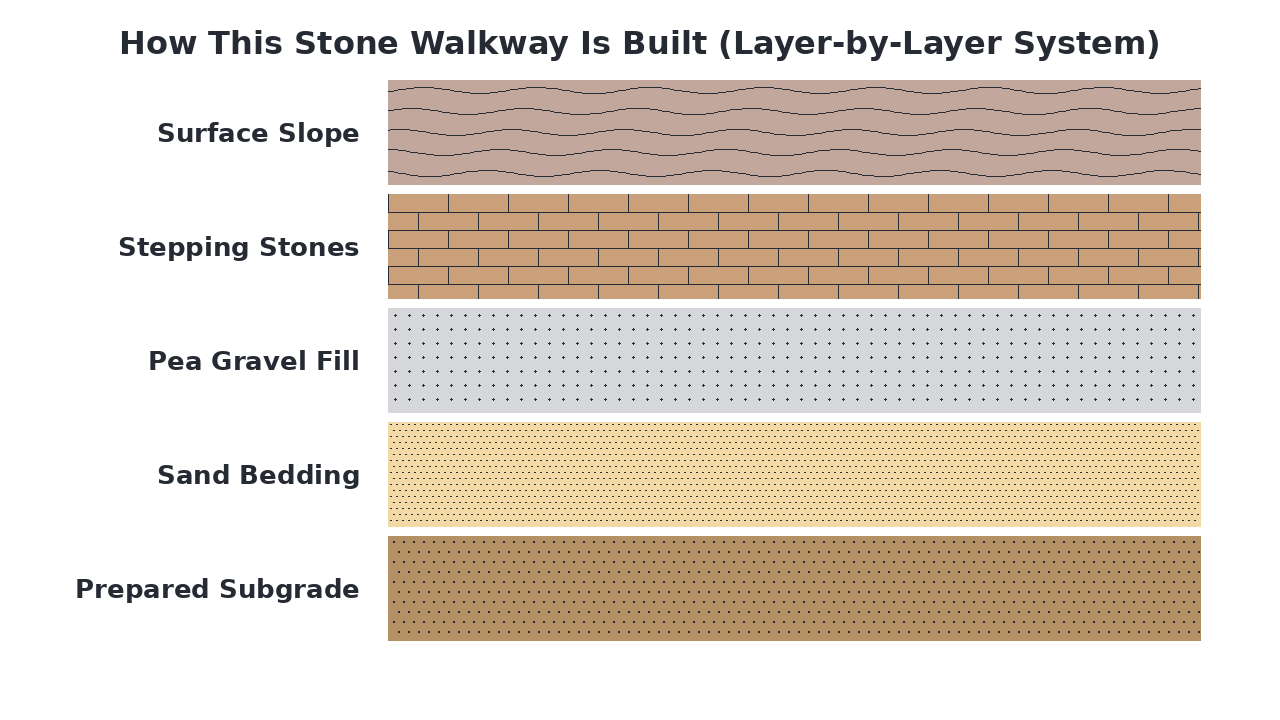
How This Stone Walkway Is Built (Layer-by-Layer System)
A stone walkway is built as a layered system designed to create a stable, level surface for walking while allowing proper drainage. The system starts with a prepared subgrade, followed by a sand layer that provides a smooth, level bedding surface for the stepping stones. The stepping stones are then placed in a bed of pea gravel, which fills the gaps and prevents shifting while allowing water to drain between them. A slight slope or crown ensures water runs off the surface rather than pooling around the stones.
Materials Breakdown: What Each Layer Does
A stone walkway is constructed as a layered system where each material serves a specific purpose in creating a stable, long-lasting path. The components work together to provide a solid foundation that prevents shifting and settling, while allowing for proper drainage and a level walking surface. Choosing the right product for each layer ensures the walkway remains functional and attractive for years.
Compacted Soil
The native soil that has been excavated, leveled, and compacted to create a stable base for the entire walkway structure.
Sand
A leveling layer that provides a smooth, even surface for setting the stepping stones and helps with minor drainage.
View Sand →Pea Gravel
Small, rounded gravel that fills gaps between stepping stones, allowing for drainage while preventing weed growth.
View Pea Gravel →Flagstone or Stepping Stones
The primary walking surface that provides stable footing and creates the visual appeal of the walkway.
Surface Slope
The slight grade built into the walkway to ensure water runs off the surface rather than pooling between stones.
What Is a Stone Walkway and Why Does It Matter?
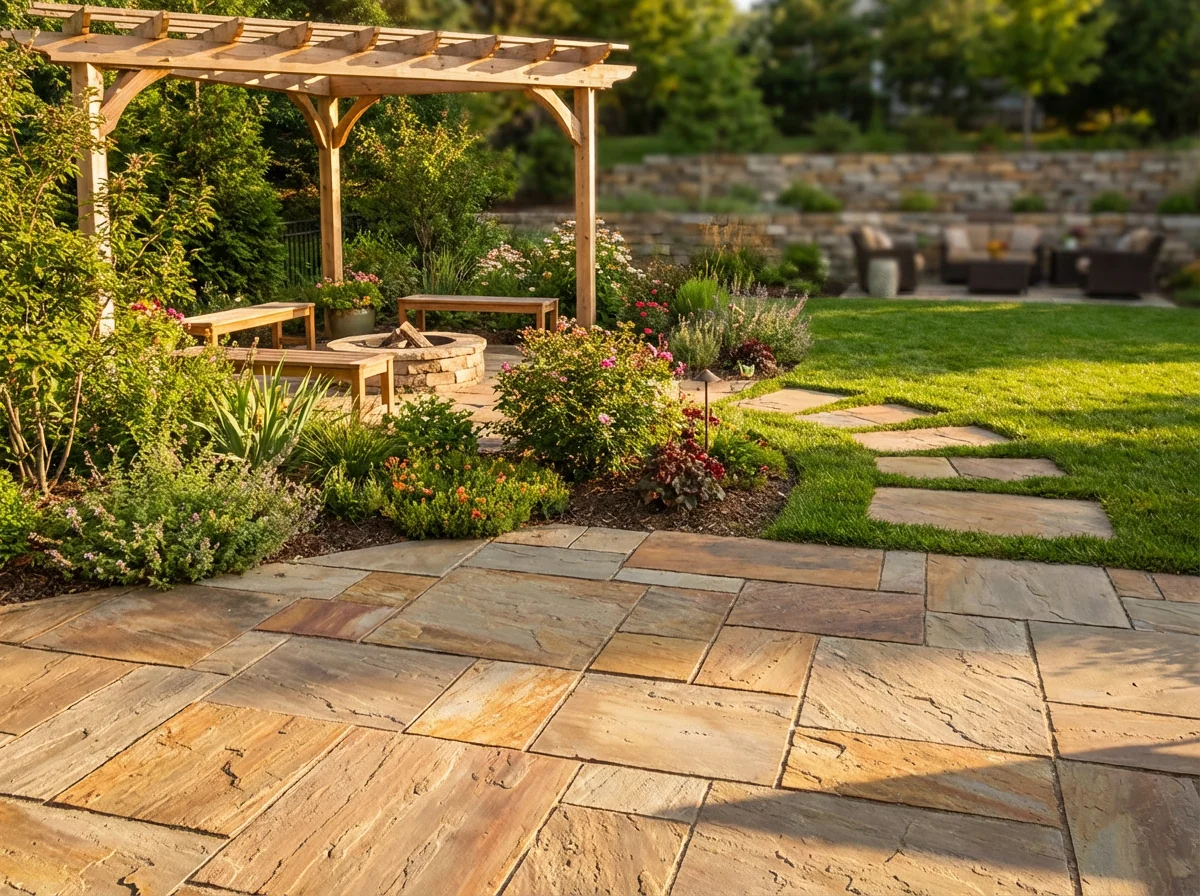
A stone walkway is a layered landscape feature that provides a stable walking surface while allowing natural water drainage through permeable materials. It matters because it creates an attractive, functional path that prevents erosion, reduces mud issues, and requires less maintenance than solid concrete or asphalt surfaces. Unlike poured concrete walkways, stone walkways with gravel fill allow water to percolate into the ground, reducing runoff and preventing water pooling around the path. This makes them ideal for gardens, yards, and natural landscapes where drainage and aesthetics are equally important.
Common Types of Stone Walkway Systems
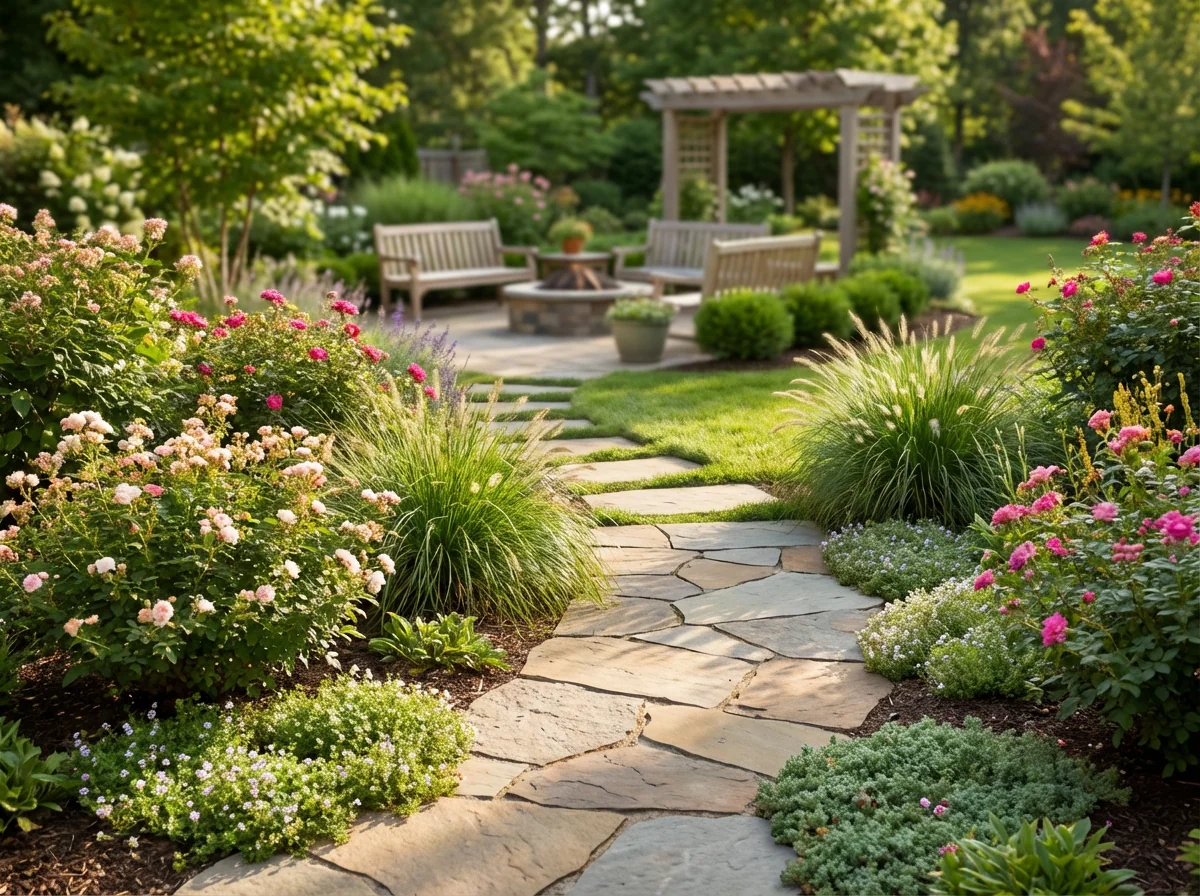
Stone walkways can be built using several common materials, each with distinct characteristics. Pea gravel creates a loose, natural-looking path that's easy to install but shifts underfoot. Decomposed granite compacts into a firm, permeable surface that's more stable than loose gravel. Flagstone offers a solid, flat walking surface with natural stone aesthetics but requires more installation effort. Stepping stones placed in gravel or grass provide defined steps with natural drainage between them.
- Natural, rounded appearance
- Easy to install and adjust
- Excellent drainage
- Shifts underfoot
- Lowest material cost
Best for: Low-traffic garden paths
- Compacts to firm surface
- Excellent permeability
- Natural earthy colors
- Resists shifting
- Moderate installation effort
Best for: Frequently used garden walkways
- Solid, flat walking surface
- Natural stone aesthetics
- Minimal maintenance
- Requires professional installation
- Higher material cost
Best for: Formal entry paths
- Defined step placement
- Natural drainage between stones
- Easy DIY installation
- Can shift over time
- Moderate cost
Best for: Informal garden trails
When a Stone Walkway Is the Best Solution
A decomposed granite walkway is ideal when you need a stable, permeable path for regular foot traffic in garden areas. It's perfect for yards with drainage concerns since water percolates through naturally, preventing pooling and erosion. This option balances affordability with durability, creating an attractive natural surface that withstands frequent use while maintaining good water management. Choose decomposed granite for functional walkways that blend seamlessly with landscape aesthetics.
Everything You Need to Build a Stone Walkway
Building a stone walkway requires several key materials to create a stable, layered foundation and an attractive surface. You'll need foundational materials like gravel for drainage and stability, a leveling layer such as sand, and your chosen stepping stones or flagstone. Essential tools for excavation, leveling, and compaction will ensure a professional and long-lasting result.
- Landscape fabric, Pea gravel, Sand, Stepping stones or flagstone, Edging (optional)
- Shovel, Rake, Hand tamper or plate compactor, Level, Rubber mallet, Wheelbarrow
- Home Depot or Your local hardware store, Hello Gravel (pea gravel, sand), Equipment rental store (plate compactor)
What to Consider Before You Start
Proper planning before you dig ensures your walkway is functional, durable, and meets local requirements. Consider the following key points before starting your project.
- Path Layout and Dimensions
Mark the exact route and width of your walkway, ensuring it accommodates foot traffic and any yard features.
- Local Utility Lines
Call 811 to have underground utility lines marked to avoid damaging pipes, cables, or wires during excavation.
- Drainage and Slope
Plan a slight slope (about 1/4 inch per foot) away from structures to ensure proper water runoff and prevent pooling.
- Material Quantities
Calculate the amount of gravel, sand, and stone needed based on your walkway's length, width, and depth specifications.
- Edging and Containment
Decide whether to install permanent edging to keep materials in place and define the walkway's borders neatly.
How to Prepare the Ground for a Stone Walkway
Begin by clearing the area of all vegetation, rocks, and debris to create a clean workspace. Mark the walkway boundaries with stakes and string, then excavate to the required depth for your layered system. Grade the subgrade to establish a slight slope away from structures for drainage, and thoroughly compact the soil to create a stable foundation that prevents future settling.
How a Stone Walkway Works
A stone walkway functions as a multi-layer system where loads are distributed through stepping stones to the sand bedding layer, which transfers weight to the compacted subgrade. The pea gravel fill between stones allows for proper drainage, preventing water accumulation and frost heave. The slight surface slope directs water runoff away from the path, maintaining structural integrity while providing a stable, comfortable walking surface.
How to Install a Stone Walkway
Mark & Excavate Path
Outline the walkway with stakes and string, then dig out the area to the required depth for your layered system.
Grade & Compact Subgrade
Establish a slight slope for drainage and thoroughly compact the soil base to create a stable foundation.
Add & Level Sand Bedding
Spread a layer of sand over the compacted subgrade and level it to provide a stable base for the stepping stones.
Place Stepping Stones
Position the stepping stones on the sand bedding, leaving consistent gaps between them for pea gravel fill.
Fill Gaps with Pea Gravel
Pour pea gravel into the spaces between stepping stones, leveling it flush with the stone surfaces.
Compact & Finalize Surface
Gently tamp the stones and gravel to settle everything, then check the final slope and surface level.
Alternative Gravel Options for Stone Walkways
For a stone walkway, the primary layer typically needs a compactable, stable base material that locks together to prevent shifting. While options like pea gravel or sand can be used for specific purposes, decomposed granite is often the best choice because it compacts firmly, provides excellent drainage, and creates a smooth, level surface for laying stones. Other aggregates like crushed stone or road base offer good stability but may be less aesthetically pleasing or harder to work with for this application.
Ideal for walkways as it compacts firmly and provides excellent drainage.
View Product →Common Stone Walkway Mistakes (And How to Avoid Them)
Even with quality materials, stone walkways can fail without proper installation techniques. Avoiding these common errors will ensure your path remains stable and attractive for years to come.
- Insufficient base depth
- Poor drainage planning
- No edge restraint
- Uneven stone placement
- Inadequate compaction
How to Maintain a Stone Walkway
Regular maintenance keeps your stone walkway looking great and functioning properly. Sweep debris regularly and pull weeds as they appear between stones. Every spring, check for settling areas and add fresh decomposed granite or sand to level the surface. Reseal any flagstones if needed to protect them from weathering and staining.
Calculate How Much Gravel You Need
Enter Your Dimensions
Measure your project area and we'll calculate how much material you need.