Outdoor Shower Drainage Gravel: Pea Gravel & Drain Rock
An outdoor shower adds convenience and a touch of nature to your home, but its success depends on proper drainage and a stable foundation. This guide explains what an outdoor shower is, which materials you need, how to prepare the installation site, how to build it step by step, and how to estimate the amount of gravel required. Whether you are adding a simple rinse-off station or designing a fully enclosed spa-like retreat, use the sections below to navigate through the process.
See How to Build an Outdoor Shower
This visual guide illustrates the step-by-step sequence for building a gravel-based outdoor shower, clarifying the critical drainage and layering process. It helps you see how each numbered install stage—from excavation to finishing—creates a stable, permeable foundation that prevents water pooling. The labeled cross-section highlights the compacted subgrade, drainage rock, and pea gravel surface layers that make the project durable and functional.
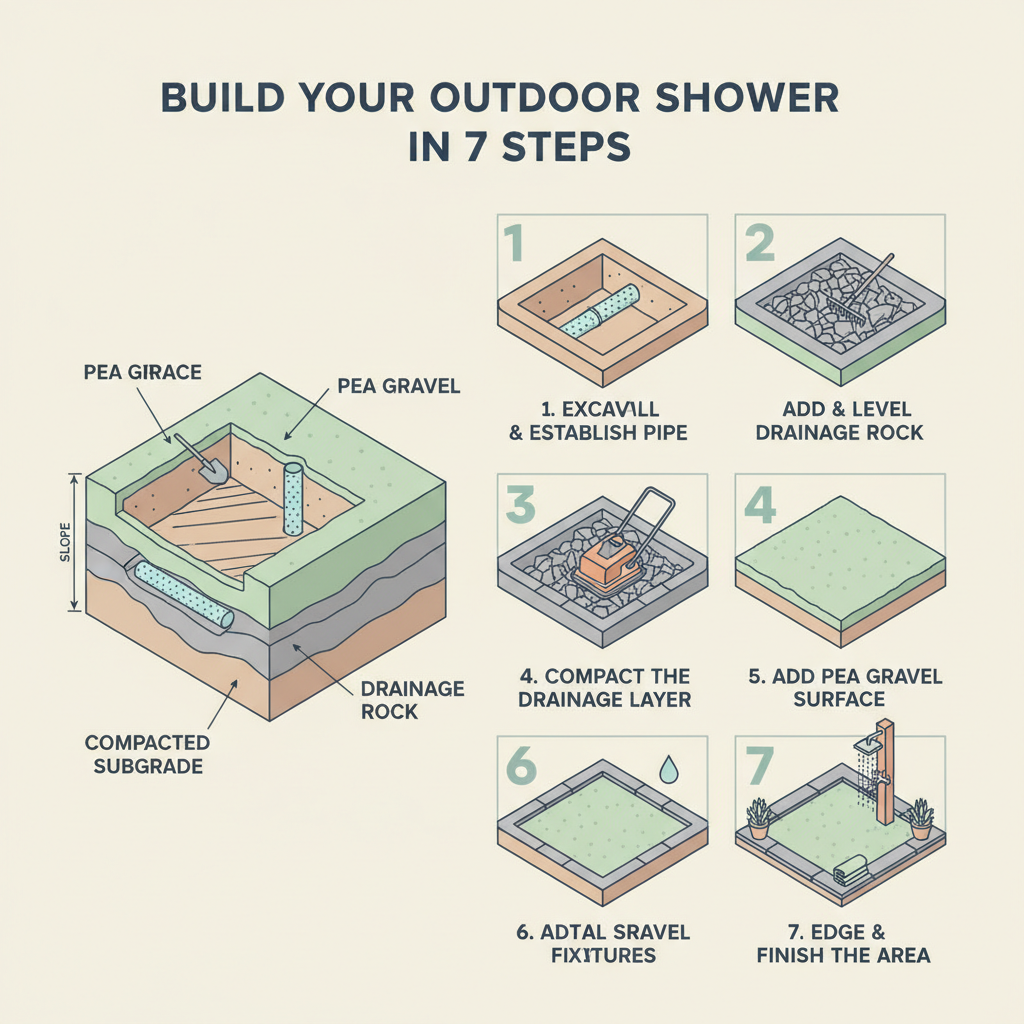
This diagram couldn't load.
Watch the video guide insteadGravel for Outdoor Showers: Best Materials, Depth, Cost & How to Build
An outdoor shower requires a drainage-focused foundation with a comfortable walking surface. We recommend 2-3 inches of 3/8 to 5/8 inch pea gravel over 4-6 inches of drainage rock for optimal performance. This layered system ensures water drains quickly while providing a soft, natural surface underfoot. Proper slope and drainage rock prevent water from pooling and keep the base stable long-term.
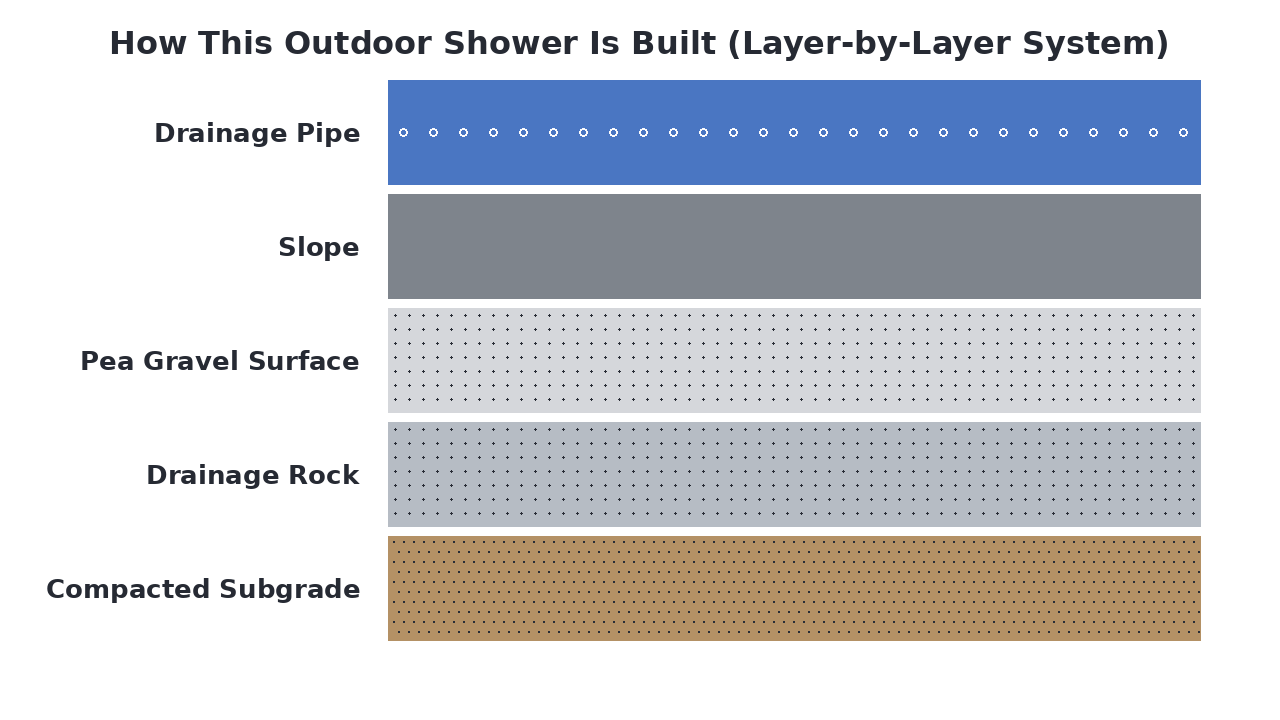
How This Outdoor Shower Is Built (Layer-by-Layer System)
An outdoor shower is built as a layered system designed to handle water drainage while providing a stable, comfortable surface. The system starts with a compacted subgrade, followed by a drainage rock layer that prevents pooling and allows water to infiltrate, and a pea gravel surface that offers natural drainage and a soft footing. A slight slope directs water away from the shower area, ensuring the base stays dry and stable over time.
Materials Breakdown: What Each Layer Does
An outdoor shower is built as a layered system, with each material playing a specific role in managing water and creating a stable surface. The components work together to quickly drain water away, prevent pooling, and provide a comfortable standing area that won't become muddy or slippery. Using the right products for each layer ensures the shower remains functional and durable over time.
Compacted Native Soil
The firm, stable base layer that provides structural support for the entire shower system and prevents settling.
Drainage Rock
Crushed stone that creates voids for rapid water movement away from the surface, preventing standing water.
Pea Gravel
A smooth, rounded gravel layer that provides a comfortable, non-slip standing surface while allowing water to filter through.
View Pea Gravel →Surface Slope
A gentle grade built into the shower floor that directs water toward the drainage system rather than allowing it to pool.
Perforated Drainage Pipe
A slotted pipe installed beneath the gravel that collects and carries water away from the shower area to a proper discharge point.
What Is an Outdoor Shower and Why Does It Matter?
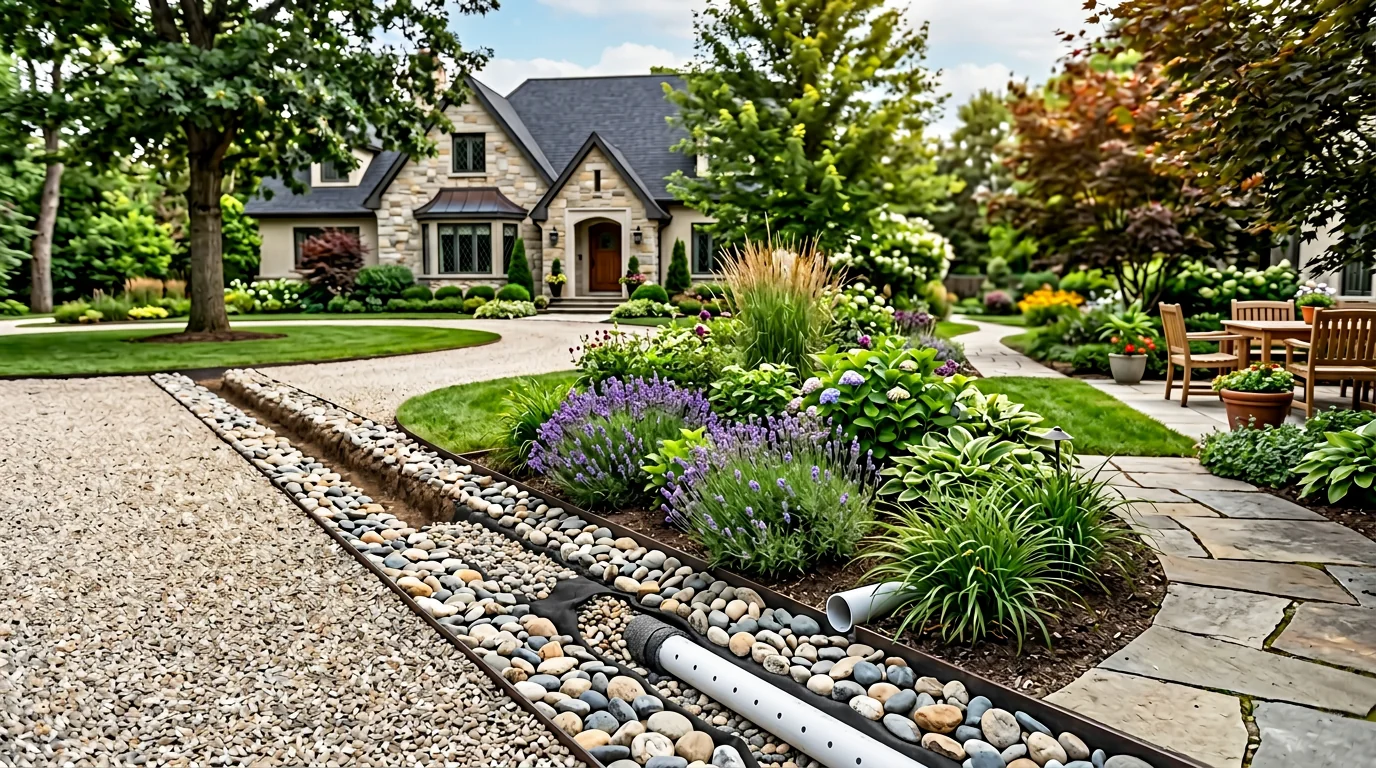
An outdoor shower is a practical, water-efficient addition to any yard that provides a convenient way to rinse off after swimming, gardening, or outdoor activities. It matters because it extends your living space, reduces indoor water usage, and creates a natural, spa-like experience. Unlike simple concrete pads, a properly built gravel shower base allows water to drain naturally, preventing standing water and creating a more comfortable, natural surface that blends with your landscape.
Common Types of Outdoor Shower Systems
Outdoor showers typically come in three main types based on their base construction: simple concrete pads, gravel drainage bases, and raised deck platforms. Concrete pads are low-cost and durable but can lead to standing water and feel harsh underfoot. Gravel bases provide excellent natural drainage and a softer, more natural feel, while deck platforms offer a clean, elevated look but require more maintenance and can trap moisture underneath.
- Low initial cost
- Durable and long-lasting
- Easy to clean
- Can create standing water
- Hard, uncomfortable surface
Best for: Budget-conscious installations with good drainage
- Excellent natural drainage
- Soft, comfortable surface
- Blends with landscape
- Prevents standing water
- Easy DIY installation
Best for: Natural-looking showers with good drainage
- Elevated, clean appearance
- Good airflow underneath
- Customizable design options
- Higher maintenance required
- Can trap moisture
Best for: Modern designs with good ventilation
When an Outdoor Shower Is the Best Solution
A gravel-based outdoor shower is ideal when you need excellent drainage to prevent standing water and mosquito breeding. It's perfect for yards with natural landscaping where you want the shower to blend seamlessly with the environment. This option works well for DIY projects where you want a comfortable, natural surface underfoot without the harshness of concrete. It's also a smart choice for eco-conscious homeowners who prioritize water efficiency and natural materials.
Everything You Need to Build an Outdoor Shower
Building an outdoor shower requires specific materials for proper drainage and a comfortable surface. You'll need foundational drainage materials, a stable base layer, and a comfortable surface material. Essential tools include excavation equipment, leveling tools, and compaction devices to create the proper slope and stability.
- Drainage rock, Sand, Pea gravel, Drainage pipe, Flagstone (optional)
- Shovel, Rake, Hand tamper or plate compactor, Level, Measuring tape, Utility knife
- Hello Gravel (gravel materials), Home Depot (tools and supplies), A contractor supply store
What to Consider Before You Start
Before starting your outdoor shower project, consider these key planning factors to ensure proper drainage and long-term functionality.
- Drainage location and slope
Determine where water will drain and ensure you can create the necessary slope away from structures.
- Local building codes and permits
Check if your area requires permits for outdoor plumbing or drainage systems.
- Water source and plumbing
Plan how you'll connect water supply and whether you need hot water capabilities.
- Privacy and enclosure design
Decide on screening materials and layout to maintain privacy while allowing drainage.
- Winterization considerations
Plan for cold weather if you live in a freezing climate to prevent pipe damage.
How to Prepare the Ground for an Outdoor Shower
Start by clearing the area of all vegetation, roots, and debris to create a clean workspace. Mark the shower's perimeter and excavate the soil to a depth that accommodates all planned layers plus a gentle slope for drainage. Grade the subgrade to create a consistent slope of about 1/4 inch per foot away from the shower's center or wall towards the drainage outlet. Finally, thoroughly compact the exposed soil using a hand tamper or plate compactor to create a firm, stable foundation that will prevent settling.
How an Outdoor Shower Works
The outdoor shower functions as a multi-layered drainage system. Water flows through the permeable pea gravel surface layer into the drainage rock layer below, which creates a void space for rapid water movement. A perforated drainage pipe, embedded within the rock layer and sloped away from the shower, collects and channels the water to a designated drainage area or dry well. This structure prevents water from pooling at the surface, keeps the standing area dry and mud-free, and protects the compacted subgrade from erosion.
How to Install an Outdoor Shower
Excavate & Establish Slope
Dig out the marked area to the required depth, ensuring the subgrade is sloped consistently towards your planned drainage outlet.
Install Drainage Pipe
Lay a perforated PVC pipe along the lowest point of the excavation, sloping it away from the shower to carry water to a safe dispersal point.
Add & Level Drainage Rock
Fill the excavated area with a 4-6 inch layer of coarse drainage rock, covering the pipe and raking it level while maintaining the slope.
Compact the Drainage Layer
Use a plate compactor to firmly compact the drainage rock, creating a solid, stable base for the surface layer.
Add Pea Gravel Surface
Spread a 2-3 inch layer of pea gravel over the compacted drainage rock, raking it smooth to create a comfortable, permeable standing surface.
Install Shower Fixtures
Set the shower post or wall mount on a stable flagstone pad and connect the plumbing according to local code and manufacturer instructions.
Edge & Finish the Area
Install landscape edging around the perimeter to contain the gravel and create a clean border for the finished shower space.
Alternative Gravel Options for Outdoor Showers
For an outdoor shower's primary standing surface, homeowners often consider pea gravel for its comfortable texture, river rock for a decorative look, drainage rock for maximum water flow, sand for a smooth base, or flagstone for a solid, stable platform. While each material has its place, pea gravel is generally the top choice because its small, rounded stones provide excellent drainage while remaining gentle on bare feet and preventing slips. River rock and drainage rock can work well in the drainage layer beneath, and sand is best used as a leveling agent, but flagstone is better suited for patios than shower floors due to potential slipperiness.
Ideal for the top layer due to its comfortable texture and excellent drainage.
View Product →Best used in the base layer to ensure rapid water movement away from the shower.
Not recommended for shower floors as it can become slippery and uneven when wet.
Common Outdoor Shower Mistakes (And How to Avoid Them)
A well-built outdoor shower requires careful planning to avoid common pitfalls that lead to drainage issues, unstable surfaces, and premature wear. Homeowners often overlook key steps in the construction process, resulting in problems that are difficult to fix later.
- Insufficient drainage slope
- Missing base layer
- Wrong gravel type
- Poor edge containment
- Inadequate depth
How to Maintain an Outdoor Shower
Regular maintenance keeps your outdoor shower functional and safe. Periodically rake the gravel surface to redistribute stones and prevent compaction, and add fresh pea gravel as needed to maintain proper depth and drainage. Clear any debris from the drain area to prevent clogs, and check for erosion around the edges, adding more gravel or adjusting the slope if water begins to pool.
Calculate How Much Gravel You Need
Enter Your Dimensions
Measure your project area and we'll calculate how much material you need.