Dry Creek Bed Stones: Sizing, Depth & Tonnage Calculator
A dry creek bed combines natural aesthetics with practical drainage to enhance your landscape. This guide explains what a dry creek bed is, which materials you need, how to design an effective layout, how to install it step by step, and how to estimate the amount of gravel required. Whether you are tackling a small decorative accent or solving a major drainage problem, use the sections below to find what you need.
See How to Build a Dry Creek Bed
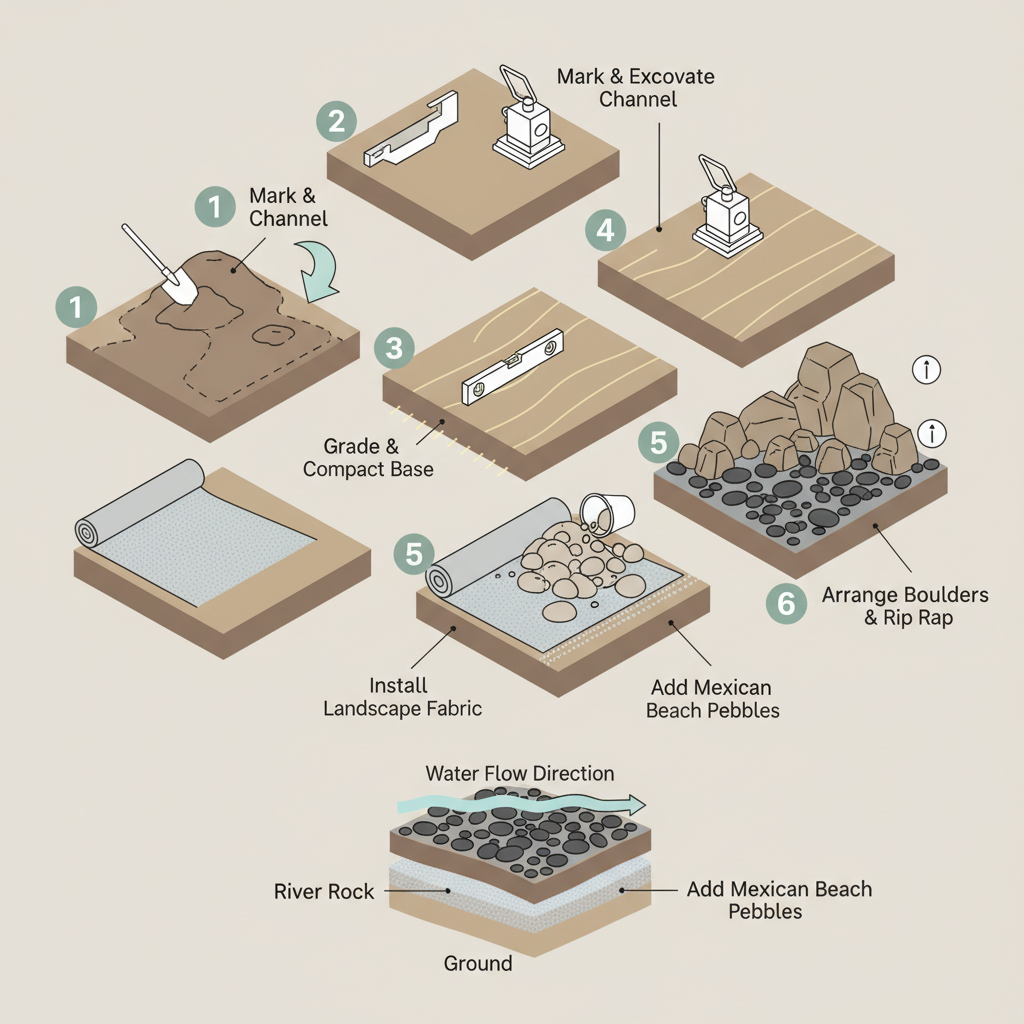
This visual guide breaks down the installation of a dry creek bed into a clear, numbered sequence, showing each step from excavation to finishing. It also provides a labeled cross-section diagram that clarifies the essential layer structure—from the compacted ground up through the river rock and decorative pebbles—helping you visualize the project's foundation and final look before you begin.
This diagram couldn't load.
Watch the video guide insteadGravel for Dry Creek Beds: Best Materials, Depth, Cost & How to Build
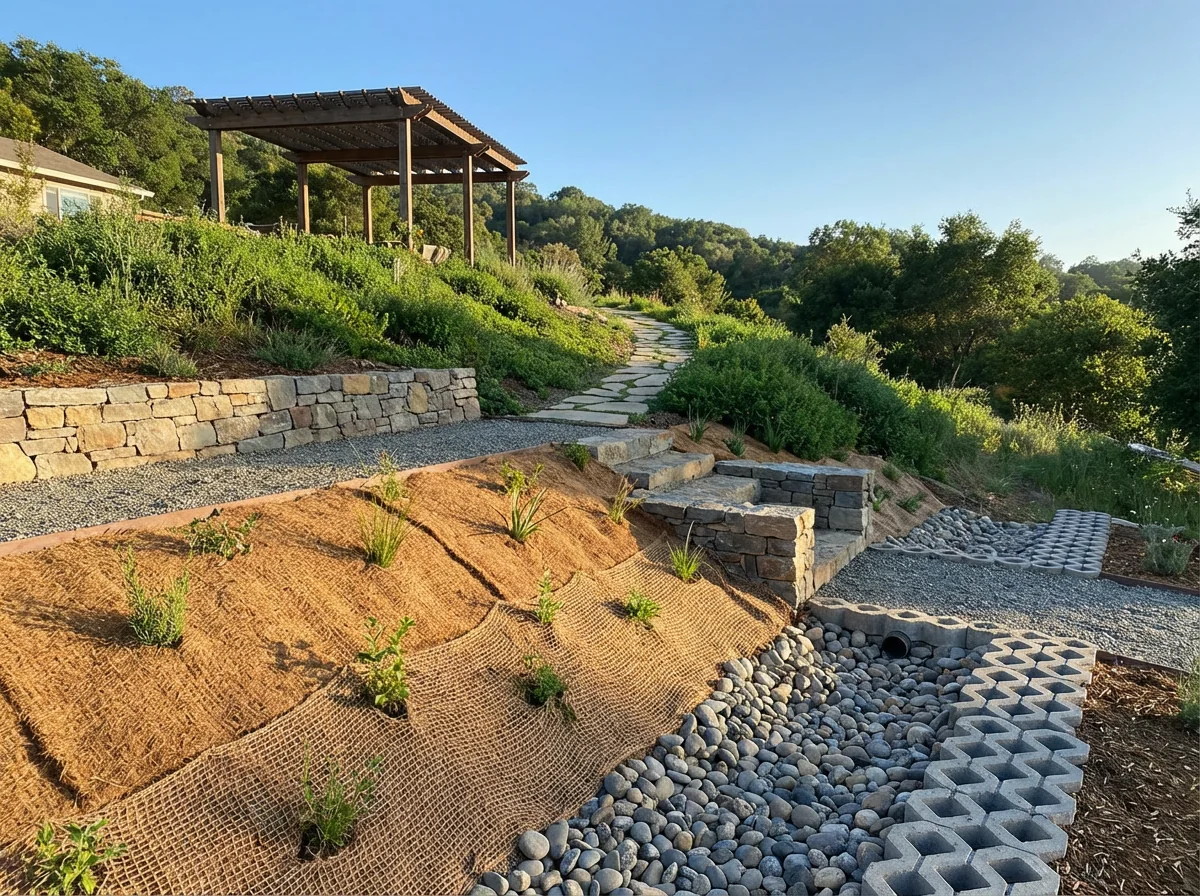
A dry creek bed is a decorative drainage solution that mimics a natural streambed while managing stormwater runoff. We recommend using 2-4 inch river rock as your base layer, installed 3-4 inches deep, with a 1-2 inch top layer of smaller pebbles for a finished look. This creates a stable, natural-looking feature that prevents erosion and directs water away from structures. Proper slope and landscape fabric are essential for long-term weed prevention and effective water flow.
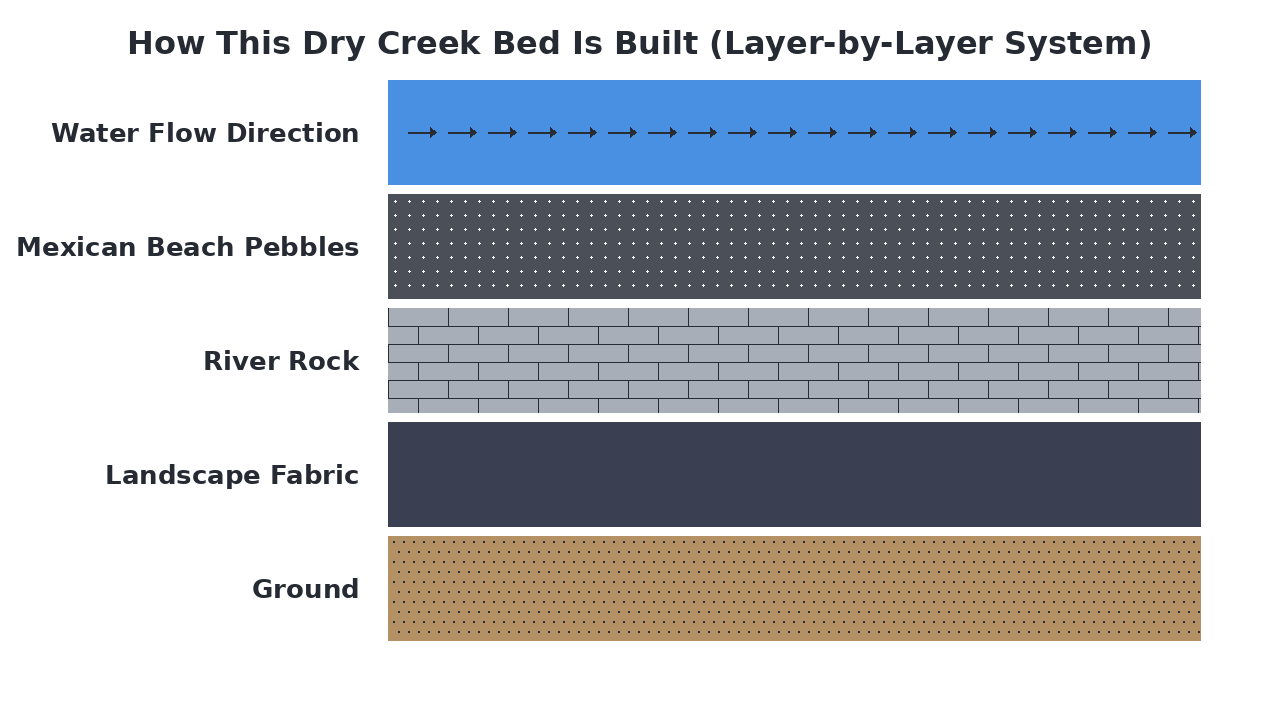
How This Dry Creek Bed Is Built (Layer-by-Layer System)
A dry creek bed is a decorative drainage feature that mimics a natural streambed while managing stormwater runoff. The system starts with a shallow trench lined with landscape fabric to prevent weed growth, followed by a base layer of river rock that provides structure and drainage. Mexican beach pebbles or pea gravel can be added as a top layer to create a smooth, natural-looking surface that allows water to flow freely during rain events. The entire bed is sloped to direct water away from structures and toward a safe discharge point, preventing erosion and water damage.
Materials Breakdown: What Each Layer Does
A dry creek bed is constructed as a series of functional layers that mimic a natural stream while managing stormwater. Each material is chosen to provide drainage, prevent weed growth, and create a stable, decorative channel. The layers work together so that water can flow through the rock bed, exit the area, and keep the landscape looking intentional even when dry.
Excavated Ground
The native soil that is shaped to form the creek bed's channel, establishing the slope and depth for proper water flow.
Landscape Fabric
A permeable geotextile that suppresses weeds and prevents soil from mixing with the decorative rock layers above.
River Rock
Medium-sized, rounded stones that form the primary drainage layer, allowing water to percolate quickly while providing a natural streambed appearance.
View River Rock →Mexican Beach Pebbles
Smooth, dark pebbles used as a decorative top layer that enhances the visual appeal and helps keep the larger river rock in place.
Discharge Slope
The intentional downward grade of the creek bed that ensures stormwater flows away from the property rather than pooling.
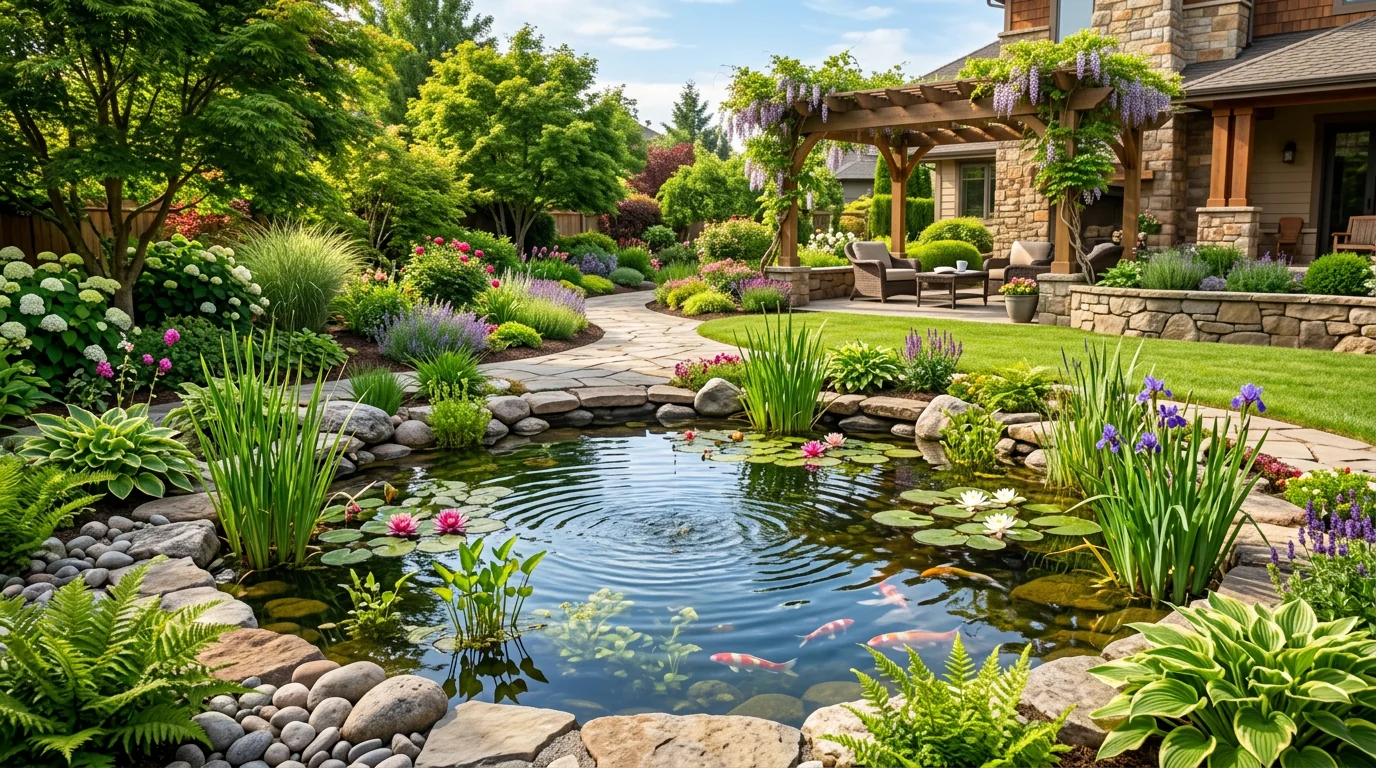
What Is a Dry Creek Bed and Why Does It Matter?
A dry creek bed is a decorative drainage feature that mimics a natural streambed while managing stormwater runoff. It matters because it prevents erosion, controls water flow away from structures, and adds aesthetic value to your landscape. Unlike traditional drainage ditches or French drains, dry creek beds are designed to be visible landscape features that blend naturally with your yard while performing essential water management functions.
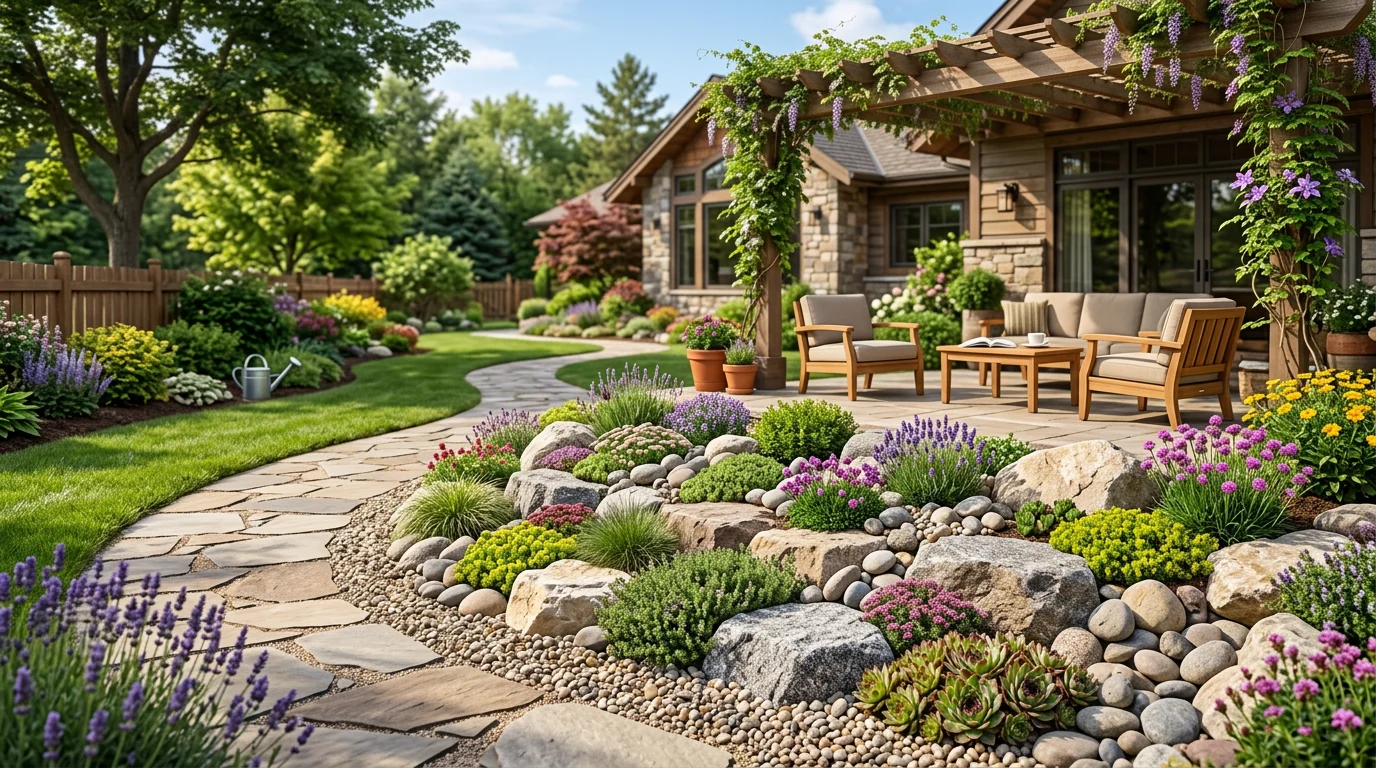
Common Types of Dry Creek Bed Systems
Dry creek beds come in several styles based on the materials used and their primary purpose. Naturalistic designs use river rock and boulders to mimic actual streambeds, while functional versions focus on efficient drainage with materials like rip rap. Decorative options use smooth pebbles for visual appeal, and hybrid designs combine multiple materials for both beauty and water management.
- Natural, rounded river stones
- Mimics real streambed appearance
- Excellent water flow channels
- Blends with natural landscapes
- Durable and erosion-resistant
Best for: Creating authentic natural-looking drainage features
- Small, smooth rounded stones
- Easy to work with
- Budget-friendly material
- Softer visual texture
- Good for gentle slopes
Best for: Budget-conscious decorative drainage projects
- Smooth, polished dark stones
- High-end aesthetic appeal
- Uniform size and color
- Modern, clean appearance
- Expensive but striking
Best for: Upscale decorative landscape features
- Large, angular rock pieces
- Maximum erosion control
- Handles heavy water flow
- Industrial-strength drainage
- Less natural appearance
Best for: High-volume stormwater management needs
When a Dry Creek Bed Is the Best Solution
A river rock dry creek bed is ideal when you need both effective drainage and natural beauty. Choose this option when managing stormwater runoff from roofs or slopes while creating a landscape feature that looks like a real stream. It's perfect for preventing erosion in drainage areas that you want to enhance aesthetically rather than hide. This solution works well for moderate water volumes where you want the feature to blend with your yard's natural elements.
Everything You Need to Build a Dry Creek Bed
Building a dry creek bed requires foundational materials for drainage and stability, plus decorative surface stones for a natural look. You'll need landscape fabric to suppress weeds, river rock as the primary drainage layer, and smaller pebbles for a finished surface. Essential tools include digging and grading equipment to shape the channel, along with safety gear for handling heavy materials.
- Landscape fabric, River rock, Mexican beach pebbles, Boulders (optional)
- Shovel, Rake, Wheelbarrow, Work gloves, Safety glasses
- Hello Gravel (materials), Your local hardware store
What to Consider Before You Start
Before digging, consider these key planning steps to ensure your dry creek bed functions properly and looks great.
- Water flow path
Identify the natural drainage path and determine where water should enter and exit your creek bed.
- Soil type and slope
Check your soil composition and ensure you have adequate slope (1-2% minimum) for proper water flow.
- Channel dimensions
Decide on the width, depth, and length of your creek bed based on expected water volume and available space.
- Material quantities
Calculate how much river rock and decorative pebbles you'll need based on your channel measurements.
- Utility locations
Call 811 to have underground utilities marked before you begin any excavation work.
How to Prepare the Ground for a Dry Creek Bed
Begin by clearing the area of all vegetation, debris, and topsoil to expose the subsoil. Mark the winding path of your creek bed using stakes and string, then excavate the channel to a depth of 6-12 inches with a gentle slope for drainage. Grade the excavated soil to create a smooth, bowl-shaped channel, and finally compact the base thoroughly to prevent future settling.
How a Dry Creek Bed Works
A dry creek bed functions by directing stormwater through a layered drainage system that mimics natural hydrology. The landscape fabric beneath the rocks prevents weed growth while allowing water to permeate downward. Water flows through the porous rock layers, following the graded slope to exit the area, while the larger river rock provides structural stability and the smaller pebbles create visual appeal.
How to Install a Dry Creek Bed
Mark & Excavate Channel
Outline the creek bed path with stakes and string, then dig the channel to your desired depth and width.
Grade & Compact Base
Shape the excavated soil into a smooth, sloping channel and compact it firmly to create a stable foundation.
Install Landscape Fabric
Line the entire excavated channel with landscape fabric to suppress weeds while allowing water drainage.
Place River Rock Layer
Add a 4-6 inch layer of larger river rock as the primary drainage and structural base for the creek bed.
Add Mexican Beach Pebbles
Spread a 2-3 inch top layer of smaller Mexican beach pebbles to create visual texture and finish the surface.
Arrange Boulders & Rip Rap
Strategically place boulders and rip rap along the edges to anchor the design and mimic natural stream banks.
Alternative Gravel Options for Dry Creek Beds
Homeowners have several aggregate options for constructing a dry creek bed, each offering different aesthetics and functional benefits. River rock provides a natural, rounded appearance and excellent water flow, while pea gravel offers a smaller, more uniform look that can shift easily. Mexican beach pebbles deliver a polished, decorative finish but are less stable for drainage channels. Rip rap and boulders serve as structural anchors and visual focal points, but their large size makes them unsuitable as the primary bed material. For the main channel layer, river rock is often the best choice because its varied sizes interlock for stability while allowing efficient water passage and mimicking a natural stream.
Ideal as the primary bed material for natural appearance and excellent drainage.
View Product →Works well for decorative topping or low-flow areas where movement is acceptable.
View Product →Best used as accent stones for visual appeal rather than functional drainage.
Suitable for bank stabilization and erosion control along creek edges.
Poor choice for the main channel layer due to excessive size and poor water flow.
View Product →Common Dry Creek Bed Mistakes (And How to Avoid Them)
Even with careful planning, several common errors can undermine a dry creek bed's function and appearance. Avoiding these mistakes ensures proper drainage, long-term stability, and minimal maintenance.
- Insufficient base preparation
- Poor drainage slope
- Wrong rock size
- Inadequate edging
- No weed barrier
- Overlooking overflow points
How to Maintain a Dry Creek Bed
Regular maintenance keeps your dry creek bed functional and attractive. Periodically remove accumulated debris like leaves and twigs that can block water flow. Check for erosion or displacement of rocks after heavy rains, and reposition stones as needed to maintain the channel's shape. Every few years, add fresh gravel to areas that have become thin or washed away, and ensure the drainage outlet remains clear of obstructions.
Calculate How Much Gravel You Need
Enter Your Dimensions
Measure your project area and we'll calculate how much material you need.