Channel Drain Gravel Bed: Drain Rock Size & Depth Specs
Installing a channel drain properly ensures effective water management and prevents landscape erosion. This guide explains what a channel drain is, which materials you need, how to design and lay out the channel, how to install it step by step, and how to estimate the amount of gravel required. Whether you are redirecting runoff from a driveway or solving drainage issues around a patio, use the sections below to find what you need.
See How to Build a Channel Drain
This visual guide walks you through the eight key steps for installing a channel drain, from site preparation to final testing. It clearly illustrates the numbered installation sequence and the essential layered structure—soil, geotextile fabric, drainage rock, and slotted channel—to help you understand the proper build order and material placement for effective water management.
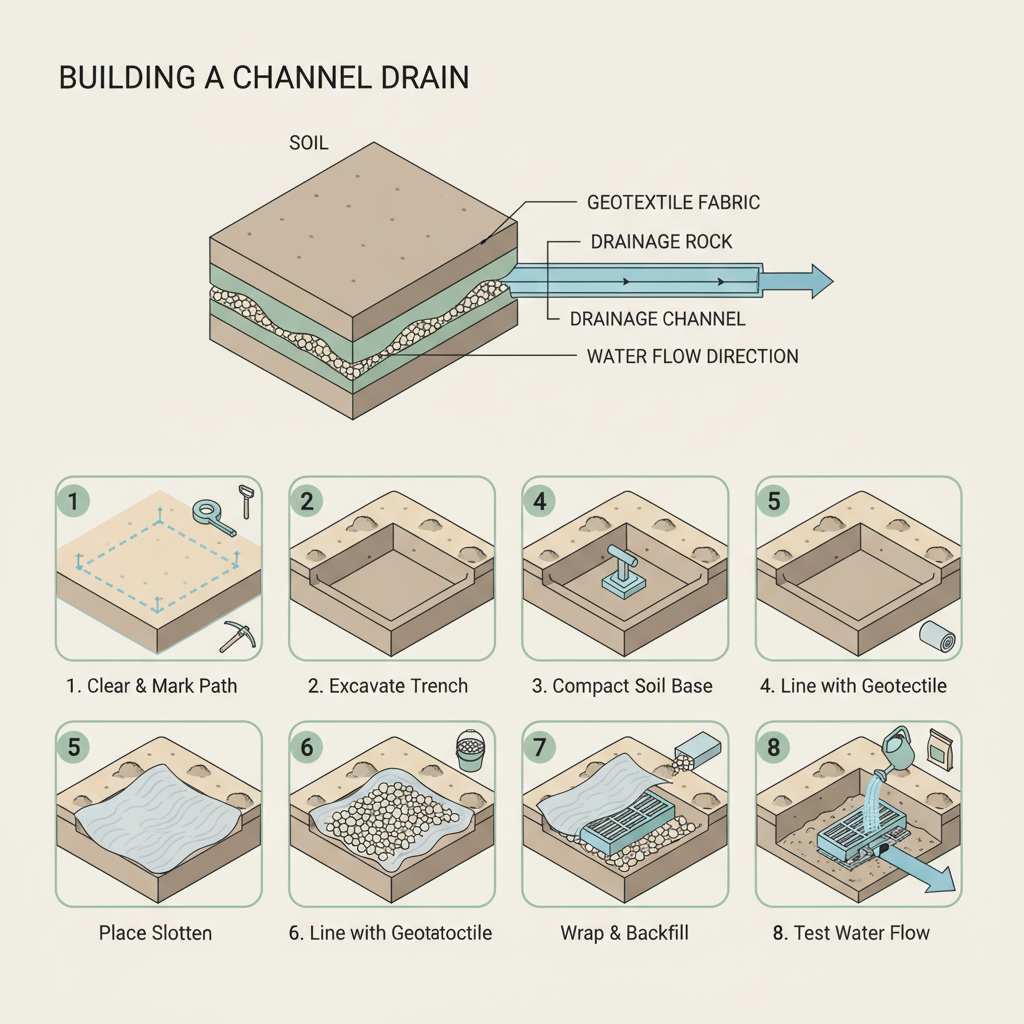
This diagram couldn't load.
Watch the video guide insteadGravel for Channel Drains: Best Drainage Rock, Depth & Installation Guide
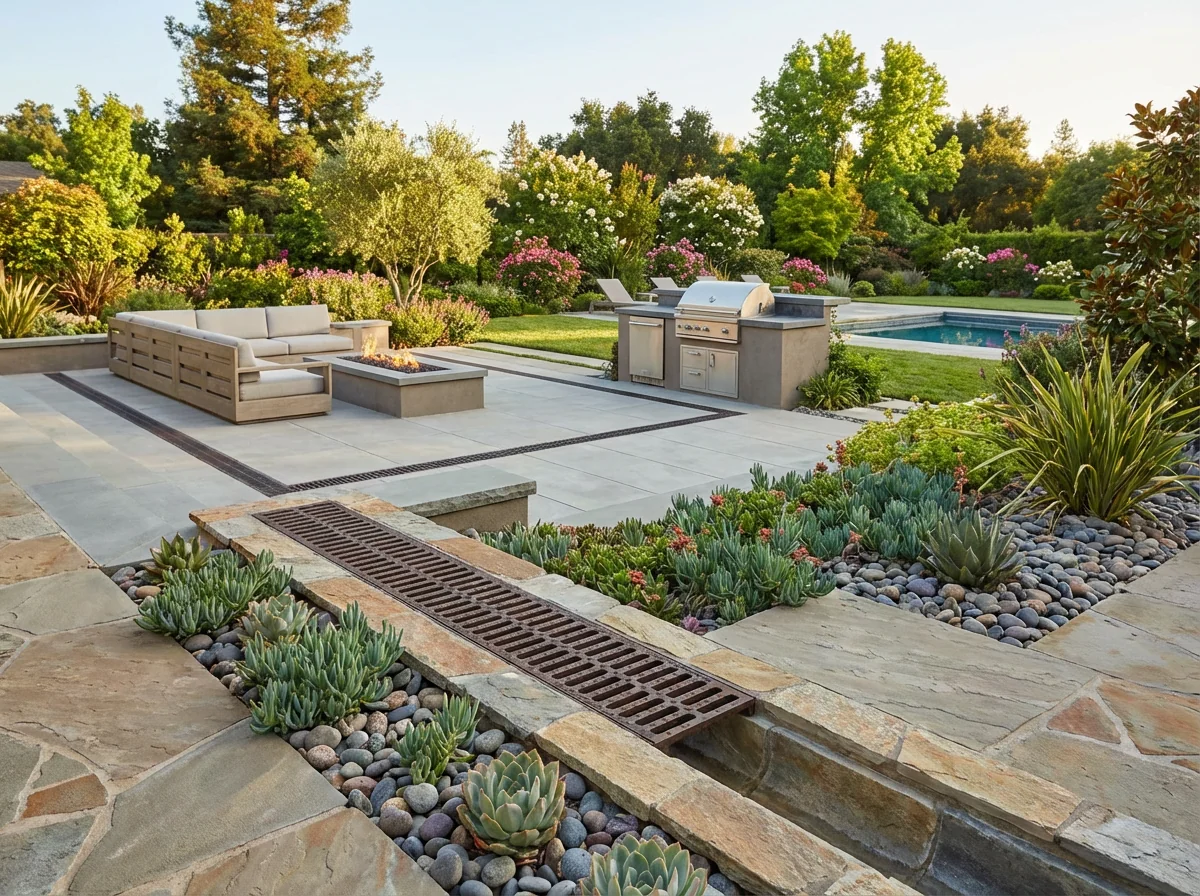
A channel drain is a linear drainage system that captures surface water from paved areas and directs it away from your property. We recommend using 1/2 to 2 inch drainage rock at a depth of 6-12 inches to create optimal void space for water flow. This angular, clean stone prevents clogging and provides stable support for the slotted channel drain above. Proper slope installation ensures efficient water movement to prevent pooling and protect your foundation.
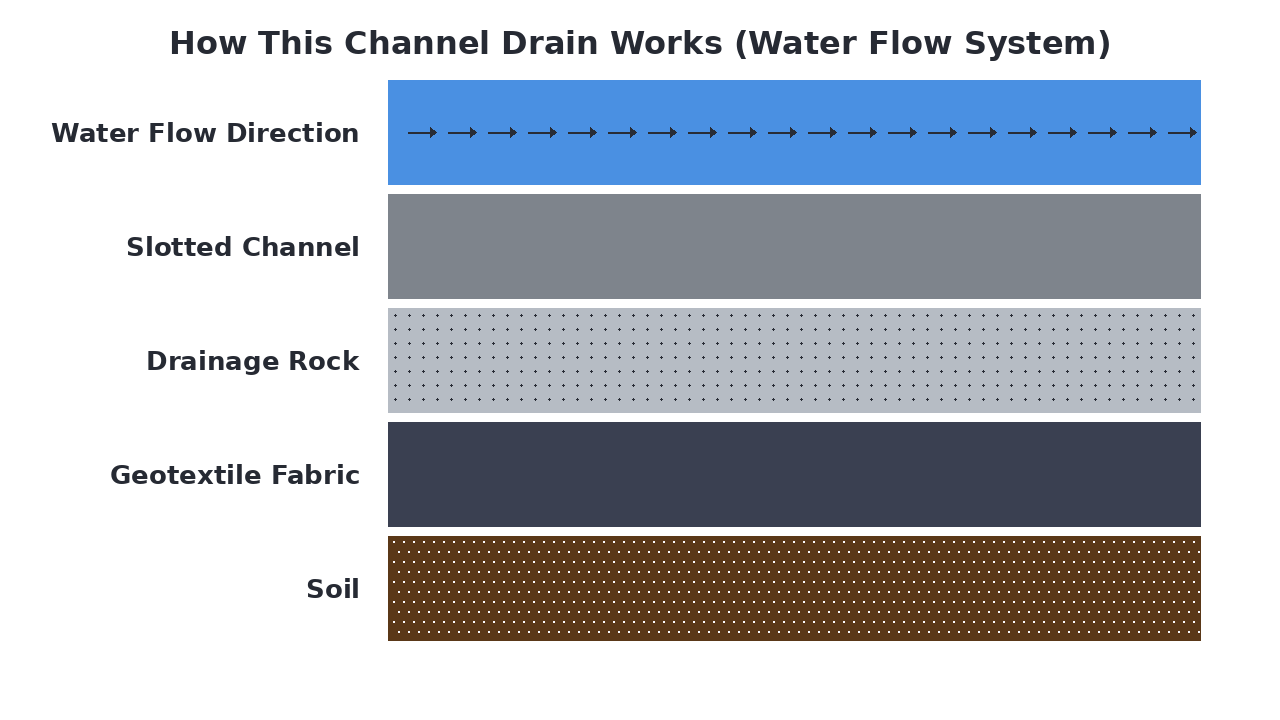
How This Channel Drain Works (Water Flow System)
A channel drain is a linear drainage system designed to capture and redirect surface water from paved areas. The system features a trench lined with geotextile fabric, filled with drainage rock that provides an open void space for water to flow. A slotted channel drain sits atop the rock layer, collecting water that flows across the surface and directing it toward the discharge point. Proper slope ensures efficient water movement through the drainage rock and channel to prevent pooling and flooding.
Materials Breakdown: What Each Layer Does
A channel drain is a layered system designed to capture surface water and direct it away from vulnerable areas. Each material serves a distinct purpose, from stabilizing the trench to ensuring rapid water conveyance and preventing clogs. Together, these layers create a durable, efficient drainage path that protects foundations and landscaping from water damage.
Native Soil
The existing ground into which the channel is excavated; provides the foundation and surrounding support for the drainage system.
Geotextile Fabric
A filter fabric that lines the trench to prevent fine soil particles from migrating into and clogging the drainage rock layer.
Drainage Rock
Clean, angular crushed stone that creates a highly permeable layer for water to flow quickly into the channel drain.
Slotted Channel Drain
A pre-formed channel with slots or grates that collects surface water and directs it through the system to the discharge point.
Discharge Slope
The consistent downward slope along the channel's length that ensures water flows freely to the outlet and does not pool.
What Is a Channel Drain and Why Does It Matter?
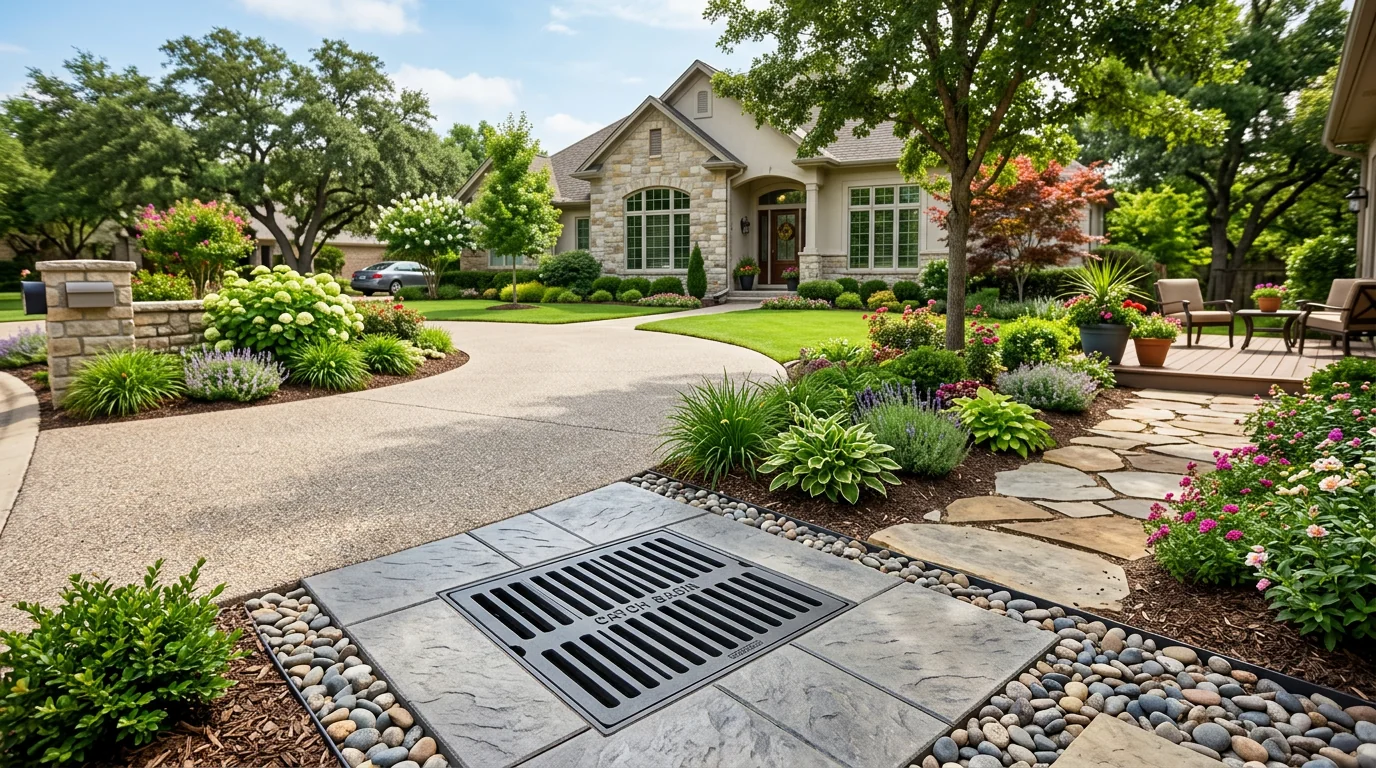
A channel drain is a linear drainage system designed to capture and redirect surface water from paved areas like driveways, patios, and walkways. It matters because it prevents water damage to foundations, eliminates standing water that creates safety hazards, and protects landscaping from erosion. Unlike French drains that handle subsurface water, channel drains specifically address surface runoff, making them essential for hardscape areas where water can't penetrate the surface.
Common Types of Channel Drain Systems
Channel drain systems come in several common types, each suited for different applications and budgets. Plastic channel drains are lightweight and affordable, ideal for residential use with moderate water flow. Concrete channel drains offer superior durability and load-bearing capacity for driveways and commercial areas. Composite or polymer concrete drains provide a balance of strength and corrosion resistance, while stainless steel grates add aesthetic appeal to visible areas.
- Lightweight and affordable
- Easy DIY installation
- Moderate load capacity
- Basic residential drainage
Best for: Budget-friendly residential projects
- Heavy-duty durability
- High load-bearing capacity
- Long-lasting construction
- Commercial grade strength
Best for: Driveways and high-traffic areas
- Natural drainage solution
- Uses drainage rock/pea gravel
- Blends with landscaping
- Cost-effective installation
- Permeable water filtration
Best for: Landscaped areas needing drainage
- Corrosion resistant
- Medium load capacity
- Aesthetic options available
- Chemical resistant
Best for: Pool decks and patios
When a Channel Drain Is the Best Solution
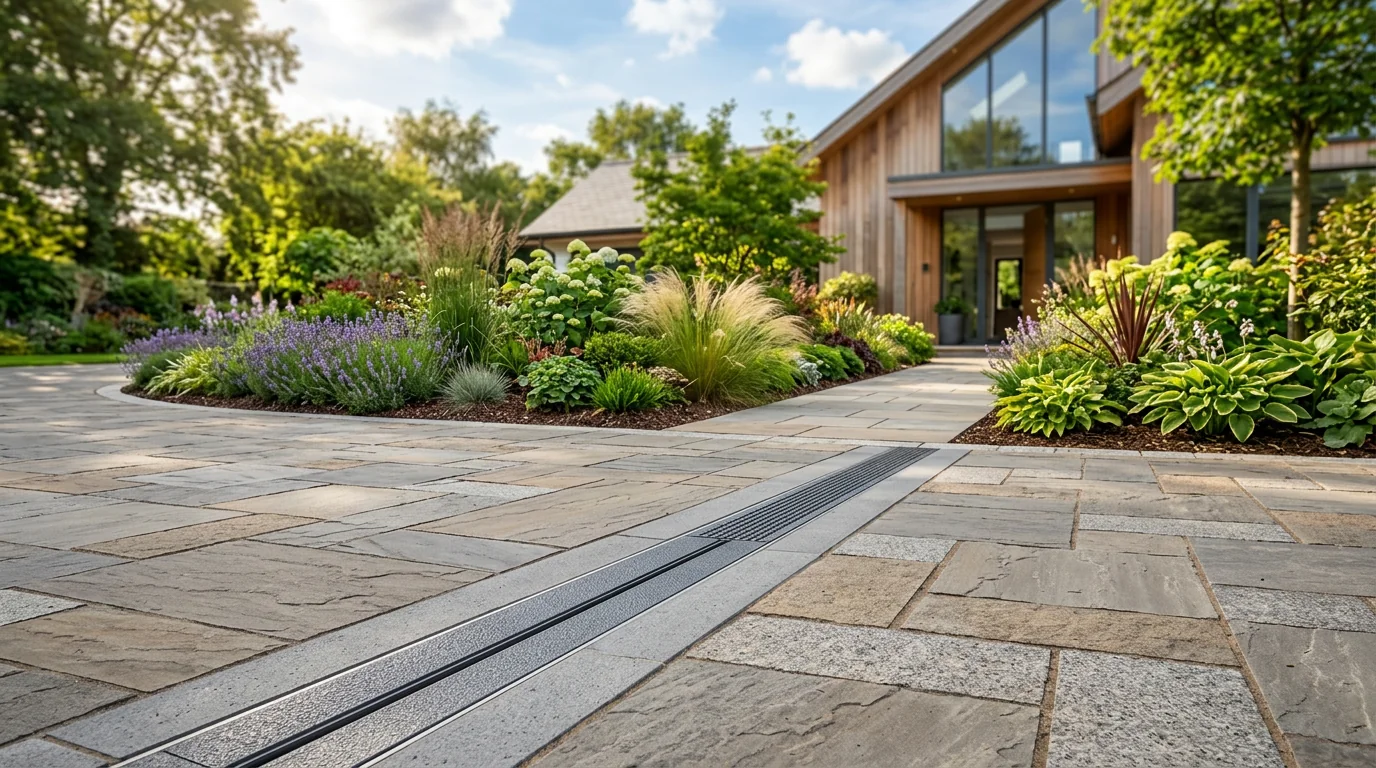
A gravel-filled channel drain is ideal when you need an affordable drainage solution that blends naturally with your landscaping. It's perfect for garden paths, patio edges, and driveway borders where you want water management without industrial-looking drains. This option works well for moderate water flow situations and homeowners who prefer DIY-friendly projects that complement their outdoor aesthetic rather than disrupt it.
Everything You Need to Build a Channel Drain
Building a channel drain requires specific materials to create a stable, layered drainage system. You'll need geotextile fabric to separate soil from drainage rock, slotted channel sections to capture and direct water, and appropriate gravel for efficient water conveyance. Essential tools include a shovel and level for trench excavation and alignment, plus a compactor to ensure proper base stability.
- Geotextile fabric, Drainage rock, Slotted channel
- Shovel, Level, Compactor, Measuring tape, Utility knife
- Hello Gravel (materials), A contractor supply store, Equipment rental store (compactor)
What to Consider Before You Start
Proper planning ensures your channel drain functions effectively and avoids common installation pitfalls. Consider these key factors before beginning your project.
- Water flow direction
Determine the natural slope and water flow path to position your drain where it will capture the most surface water.
- Trench depth and slope
Calculate the required trench depth and ensure proper slope (minimum 1% grade) for effective water drainage toward the outlet.
- Outlet location
Identify where the drained water will discharge, ensuring it's directed away from foundations and toward appropriate drainage areas.
- Soil composition
Assess your soil type to determine if additional stabilization or drainage improvements are needed before installation.
- Local regulations
Check municipal codes regarding drainage system installation, especially if connecting to stormwater systems or property boundaries.
How to Prepare the Ground for a Channel Drain
Begin by clearing the area of any vegetation, debris, or large rocks that could interfere with the trench. Mark the drain's path using stakes and string, ensuring it slopes consistently at a minimum of 1% grade away from the structure or area you're protecting. Excavate the trench to the required depth and width, then compact the soil base thoroughly to create a stable, level foundation that prevents future settling.
How a Channel Drain Works
A channel drain captures surface runoff through its slotted top, which is set flush with the ground. Water flows downward through the drainage rock layer, which provides structural support and prevents soil from clogging the system. The geotextile fabric wrapped around the rock acts as a filter, allowing water to pass while keeping fine sediment out. The sloped trench then efficiently directs the collected water away from foundations, driveways, or landscaped areas, preventing pooling and erosion.
How to Install a Channel Drain
Clear & Mark Path
⚠️ Local stormwater rules apply: drainage and infiltration projects are subject to local rules about discharge location, setbacks, and (for larger systems) permits. The steps below are provided to help plan your aggregate order, not as a substitute for checking with your municipality and following local stormwater rules. Remove all vegetation and debris from the drain's planned route, then mark its edges and slope with stakes and string.
Excavate Trench
Dig a trench along the marked path to the required depth and width, ensuring a consistent downward slope for water flow.
Compact Soil Base
Firmly compact the bottom of the trench using a hand tamper or plate compactor to create a solid, level foundation.
Line with Geotextile
Line the entire trench with geotextile fabric, allowing ample excess to wrap over the drainage rock layer later.
Add Drainage Rock
Pour a layer of clean drainage rock into the fabric-lined trench, leveling it to the planned height for the channel.
Place Slotted Channel
Set the slotted drain channel on top of the rock bed, aligning it with the trench slope and ensuring the slots face upward.
Wrap & Backfill
Fold the excess geotextile fabric over the rock and channel, then backfill around the sides with soil or gravel to secure it.
Alternative Gravel Options for Channel Drains
For a channel drain, the primary aggregate layer must balance drainage efficiency with structural stability. While decorative options like pea gravel can be used, they risk shifting and clogging. Crushed stone, with its angular edges and self-compacting nature, is typically the best choice as it creates a stable, permeable channel that resists washout and maintains flow.
Ideal for the primary drainage layer due to its angular shape and excellent stability.
View Product →A larger, uniform rock that provides high permeability for water conveyance.
A smooth, rounded gravel suitable for decorative top layers but prone to movement.
View Product →A recycled, economical option that offers good drainage when properly compacted.
View Product →A solid, impermeable material that prevents drainage and is unsuitable for this application.
View Product →Common Channel Drain Mistakes (And How to Avoid Them)
Installing a channel drain requires careful planning to ensure long-term functionality. Avoiding these common pitfalls will prevent water backup, structural failure, and costly repairs.
- Insufficient trench depth
- Wrong aggregate selection
- Poor slope or grading
- Lack of filter fabric
- Inadequate compaction
How to Maintain a Channel Drain
Regular maintenance ensures your channel drain continues to function effectively. Inspect the drain channel seasonally, removing any accumulated debris, silt, or leaves that could impede water flow. Check the aggregate layer for washout or settling, and top up with fresh crushed stone as needed to maintain proper depth and slope. Ensure the outlet remains clear and that the surrounding landscape hasn't shifted to redirect water away from the drain.
Calculate How Much Gravel You Need
Enter Your Dimensions
Measure your project area and we'll calculate how much material you need.