River Rock Patio Base Guide: Building the Perfect Outdoor Seating Area
Get an estimate for your project in 60 seconds

Creating an outdoor seating area that’s both beautiful and functional doesn’t have to involve expensive concrete pours or complex paver installations. River rock offers an excellent alternative that combines natural beauty with practical benefits like superior drainage and long-lasting durability.
River rock, particularly smaller varieties like pea gravel, creates stable, attractive bases for patios, fire pit areas, and casual seating spaces. You’ll get excellent water drainage, minimal maintenance requirements, and a natural aesthetic that complements any landscape design. The installation process is straightforward enough for most DIY enthusiasts, requiring basic tools and materials that are readily available.
Quick Answer: River rock works exceptionally well for outdoor seating areas when properly installed with a 2-3 inch compacted base layer and 2 inches of rock on top. Expect to spend $3-8 per square foot depending on rock type and delivery distance.
This guide walks you through everything you need to know about using river rock for your outdoor seating project, from choosing the right size to calculating quantities and handling common installation challenges.
What type of river rock works best for seating areas
Not all river rock performs equally well under outdoor furniture and foot traffic. The size and shape of your chosen material directly impacts both comfort and stability.
Pea gravel, typically ranging from 1/8 to 3/8 inch, offers the best balance for most seating applications. These small, rounded stones compact well while remaining comfortable to walk on and providing stable support for furniture legs. Larger river rock (1-3 inches) looks dramatic but can create uneven surfaces that make chairs wobble and walking uncomfortable.

Crushed river rock provides another excellent option, especially for high-traffic areas. The angular edges help pieces lock together, creating a more stable surface than smooth rounded stones. This makes it particularly suitable for dining areas where you need chairs to sit level.
For fire pit areas or casual lounge spaces where people primarily sit rather than walk around frequently, you can use slightly larger stones (up to 3/4 inch) for visual interest while maintaining reasonable comfort levels.
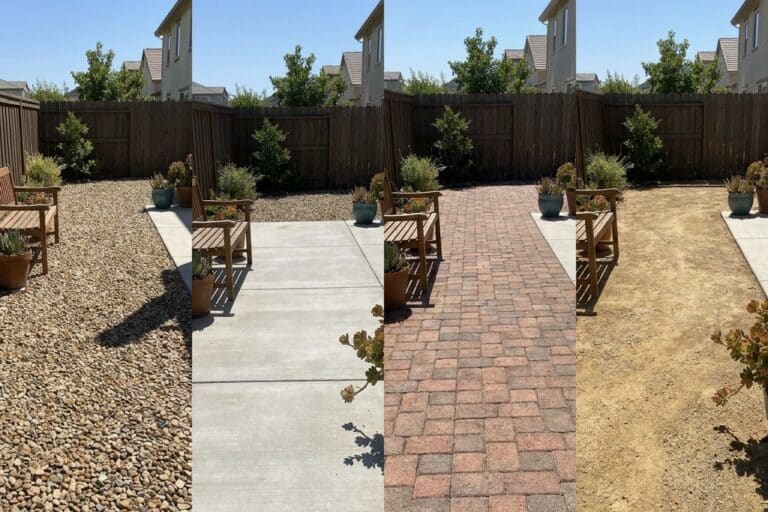
River rock vs other patio base materials
Understanding how river rock compares to alternatives helps you make the right choice for your specific situation and budget.
Concrete slabs offer the most stable surface but require professional installation and significant upfront costs. They also create drainage issues and can crack in freeze-thaw cycles. River rock costs roughly half as much and handles weather changes much better.
Pavers provide excellent stability and visual appeal but demand precise installation and ongoing maintenance to prevent shifting. They typically cost 2-3 times more than river rock when you factor in sand bedding and edge restraints.
| Material | Cost per sq ft | DIY Friendly | Drainage | Maintenance |
|---|---|---|---|---|
| River Rock | $3-8 | High | Excellent | Low |
| Concrete | $8-15 | Low | Poor | Medium |
| Pavers | $10-20 | Medium | Good | High |
| Decomposed Granite | $2-5 | High | Good | Medium |
Decomposed granite creates a more formal appearance and compacts into a solid surface, but it can become muddy during heavy rains and requires periodic reapplication. River rock maintains its appearance and function regardless of weather conditions.
Pro Tip: Combine materials for the best of both worlds. Use stepping stone pavers for high-traffic walkways with river rock filling the spaces between for drainage and visual interest.
Step-by-step installation process
Proper installation ensures your river rock seating area remains stable and attractive for years. The key lies in creating adequate base preparation and using the right depth of materials.
Start by marking your seating area boundaries and excavating 4-6 inches deep across the entire space. Remove all grass, roots, and debris to create a clean working surface. Slope the excavated area slightly away from any structures to promote drainage.
Install a 2-3 inch layer of compacted crushed stone base. This provides the stable foundation that prevents your river rock from sinking into soft soil over time. Rent a plate compactor for areas larger than 100 square feet, or use a hand tamper for smaller projects.
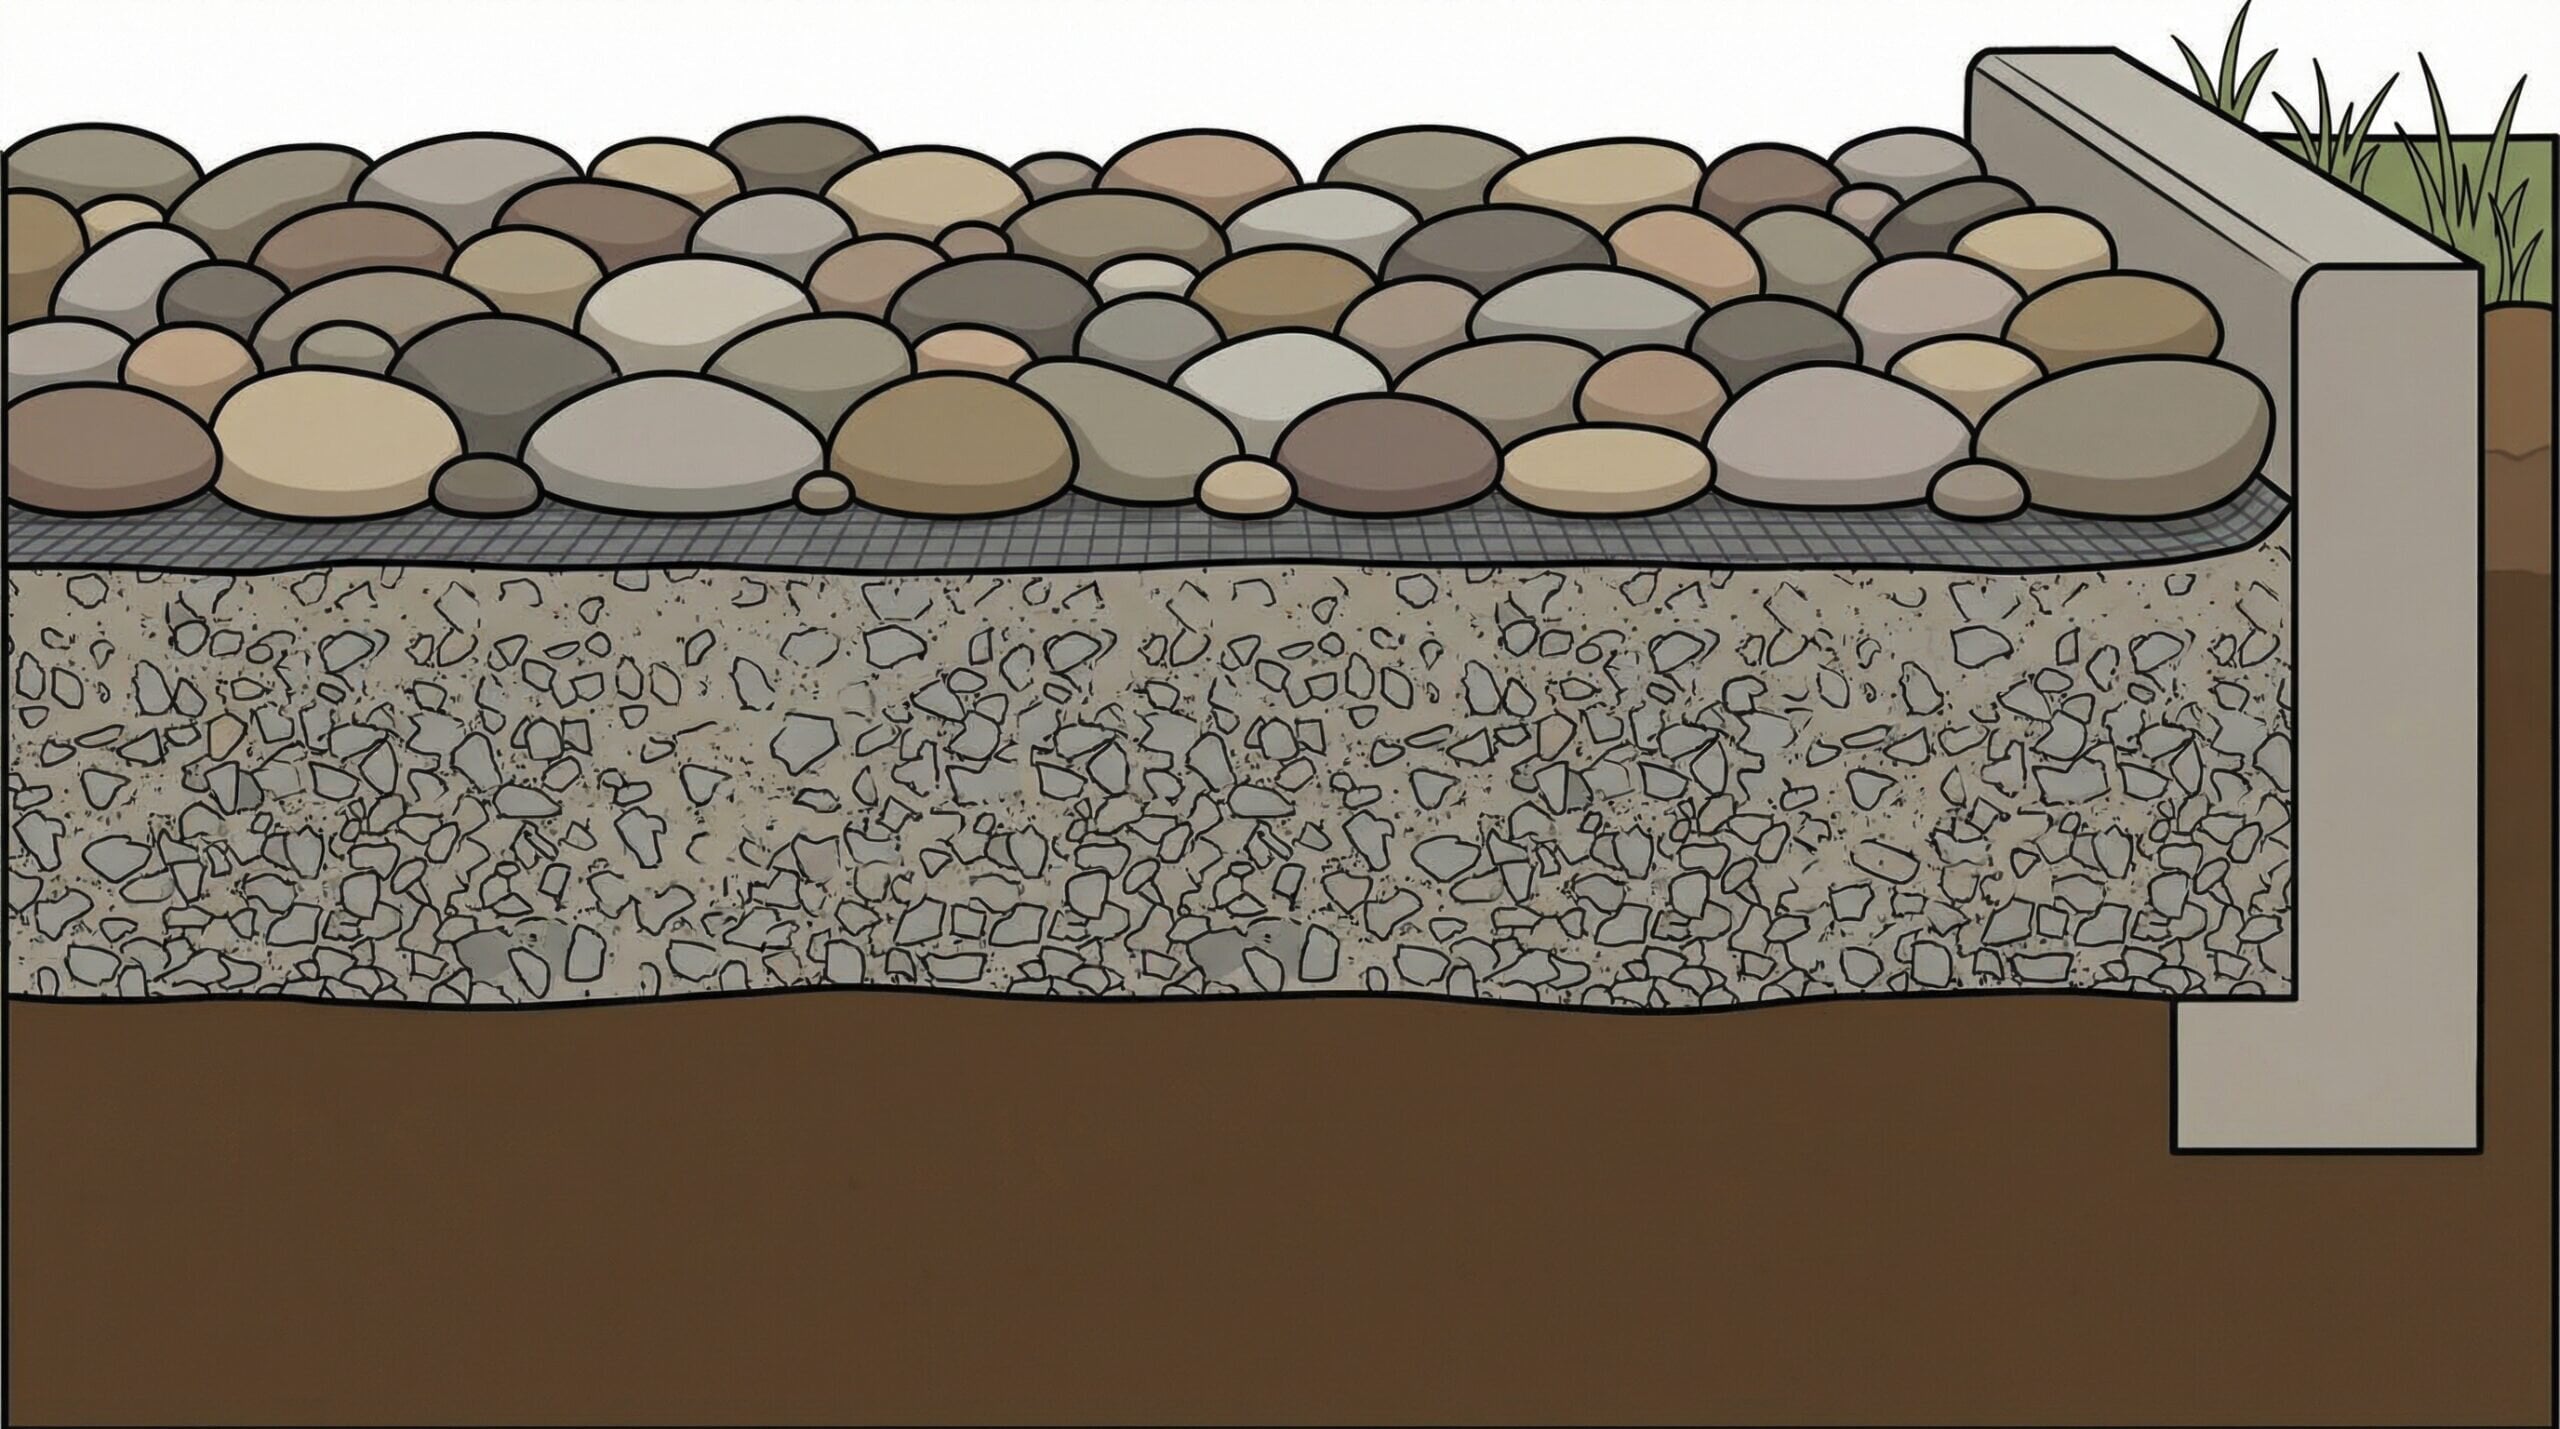
Lay landscape fabric over the compacted base to suppress weeds while allowing water to drain through. Overlap seams by 6 inches and secure edges with landscape pins every 3 feet.
Add your river rock in a uniform 2-inch layer, spreading it evenly with a rake. Avoid walking on the fabric during this process to prevent tears. For pea gravel, you can lightly mist the surface and compact gently to help stones settle into place.
Install edging around the perimeter using steel, plastic, or stone borders to contain the rock and maintain clean lines. This prevents migration onto surrounding lawn areas and keeps your seating area looking neat.
Calculating quantities and managing costs
Getting the right amount of river rock prevents delays and minimizes waste while staying within budget. Most suppliers sell by the ton or cubic yard, so accurate calculations save money.
For a typical 2-inch depth installation, plan on 1 ton of river rock covering approximately 100 square feet. A 10×12 foot seating area requires about 1.2 tons, while a larger 16×20 space needs roughly 3.2 tons.
Factor in 10-15% extra material for initial settling and future top-ups. River rock naturally migrates and settles over time, especially during the first few months after installation.
Cost Breakdown: Expect total project costs of $300-800 for a typical 150 square foot seating area, including base materials, landscape fabric, edging, and delivery. Labor costs add $200-500 if you hire professionals.
Hello Gravel offers competitive pricing on various river rock sizes with convenient delivery options. Their online quote system helps you estimate costs based on your specific location and project requirements, making budget planning straightforward.
Design ideas and finishing touches
River rock’s versatility allows for creative designs that enhance your outdoor living space beyond basic patio coverage. Consider these popular approaches that maximize both function and visual appeal.
Create defined zones within larger spaces by varying rock sizes or colors. Use finer pea gravel in high-traffic areas with larger decorative stones around planters or water features. This approach adds visual interest while maintaining practical walkways.
Fire pit areas benefit from circular or curved layouts that encourage conversation. Install the fire pit on a concrete pad within the river rock field, allowing the stones to extend right up to the fire ring for seamless integration.
Mixed material designs combine river rock with flagstone stepping stones or timber borders for sophisticated looks. The contrast between smooth stones and structured elements creates dynamic visual patterns while providing stable walking surfaces where needed.
For dining areas, consider installing a central paver section large enough for your table and chairs, surrounded by river rock. This gives you the stability needed for dining furniture while maintaining the natural drainage and aesthetic benefits of stone throughout the rest of the space.
Your river rock seating area will provide years of low-maintenance outdoor enjoyment when properly installed. The natural drainage keeps the space usable even after heavy rains, while the timeless appearance complements any landscape style. If you’re also considering other outdoor projects, river rock works equally well for shed foundations, raised garden beds, and walkway foundations. Ready to start your project? Hello Gravel’s expert team can help you choose the right materials and calculate exact quantities for your specific seating area design.