Can you tile over aggregate concrete
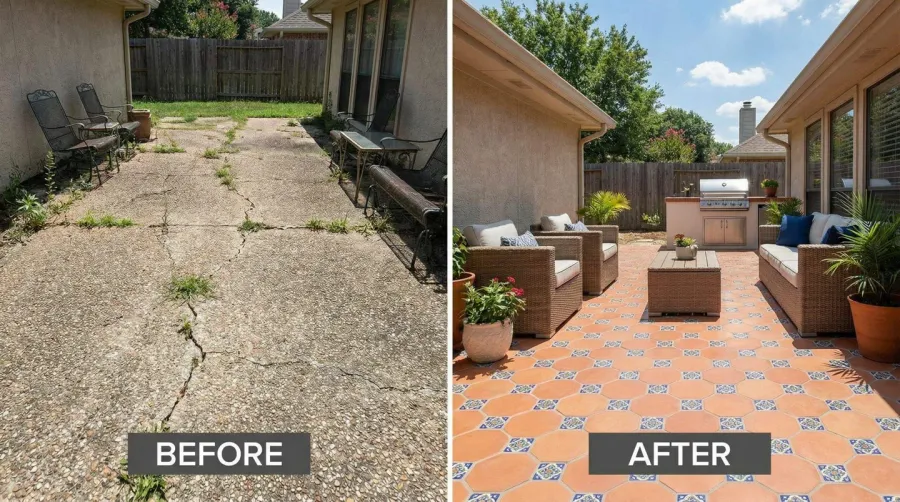
Yes, you can absolutely tile over aggregate concrete, and it’s becoming an increasingly popular way to upgrade outdoor spaces like patios, pool decks, and walkways. While aggregate concrete provides excellent durability, its rough textured surface can feel uncomfortable underfoot and may look dated over time. Tiling over it creates a smooth, modern finish without the expense of complete removal and replacement.
Quick tip: The key to success lies in proper surface preparation. Aggregate concrete’s uneven texture requires leveling before tile installation to ensure long-lasting results.
The process involves careful preparation, selecting appropriate materials, and following specific installation techniques. When done correctly, you’ll transform your rough aggregate surface into an elegant tiled area that enhances both comfort and property value.
Understanding aggregate concrete surfaces
Aggregate concrete, also known as exposed aggregate or pebblecrete, contains visible stones, pebbles, or decorative aggregates embedded in the surface. This creates the characteristic textured, granular appearance that’s both slip-resistant and visually interesting.
The aggregate size and type can vary significantly between installations. Some surfaces feature small pea gravel creating a relatively smooth texture, while others use larger river rocks resulting in more pronounced bumps and valleys. This variation affects how much preparation work you’ll need before tiling.
Color variations also depend on the aggregate materials used. Natural stone aggregates create earthy tones, while colored glass or ceramic pieces can produce more vibrant finishes. Understanding your specific surface helps determine the best approach for your tiling project.
Preparing your surface for tiling
Surface preparation is absolutely critical for successful tile installation over aggregate concrete. Start by thoroughly cleaning the surface with a pressure washer to remove dirt, algae, and loose debris that could interfere with adhesion. If you’re wondering about pressure washing exposed aggregate, it’s an essential first step in the preparation process.
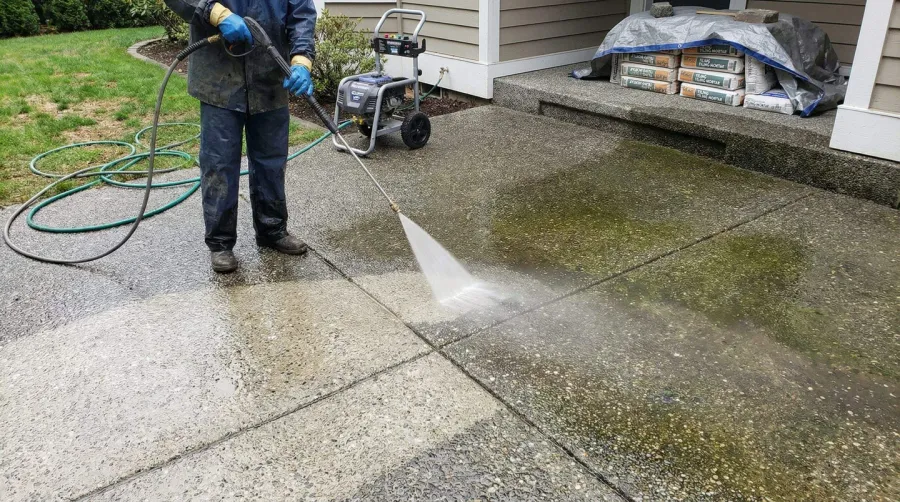
Next, inspect for structural issues like cracks, loose aggregate pieces, or significant damage. Fill any cracks wider than hairline with concrete patching compound and allow complete curing. Remove any loose stones by hand or with a wire brush.
The most important step involves leveling the surface. Aggregate concrete’s inherent unevenness makes direct tile installation nearly impossible. Apply a self-leveling compound designed for outdoor use, following manufacturer instructions carefully. This creates the smooth, even base essential for proper tile adhesion.
Important note: Allow the leveling compound to cure completely before proceeding. Rushing this step often leads to tile failure later.
Selecting tiles and adhesives
Choose tiles specifically rated for outdoor use if your project involves exterior surfaces. Porcelain tiles offer excellent durability and moisture resistance, making them ideal for pool areas and patio projects. Ceramic tiles provide good performance at a lower cost, while natural stone creates an elegant appearance but requires more maintenance.
Consider tile size carefully when working over aggregate concrete. Larger format tiles can help minimize the visual impact of any minor surface irregularities, but they’re also heavier and may require stronger adhesive systems.
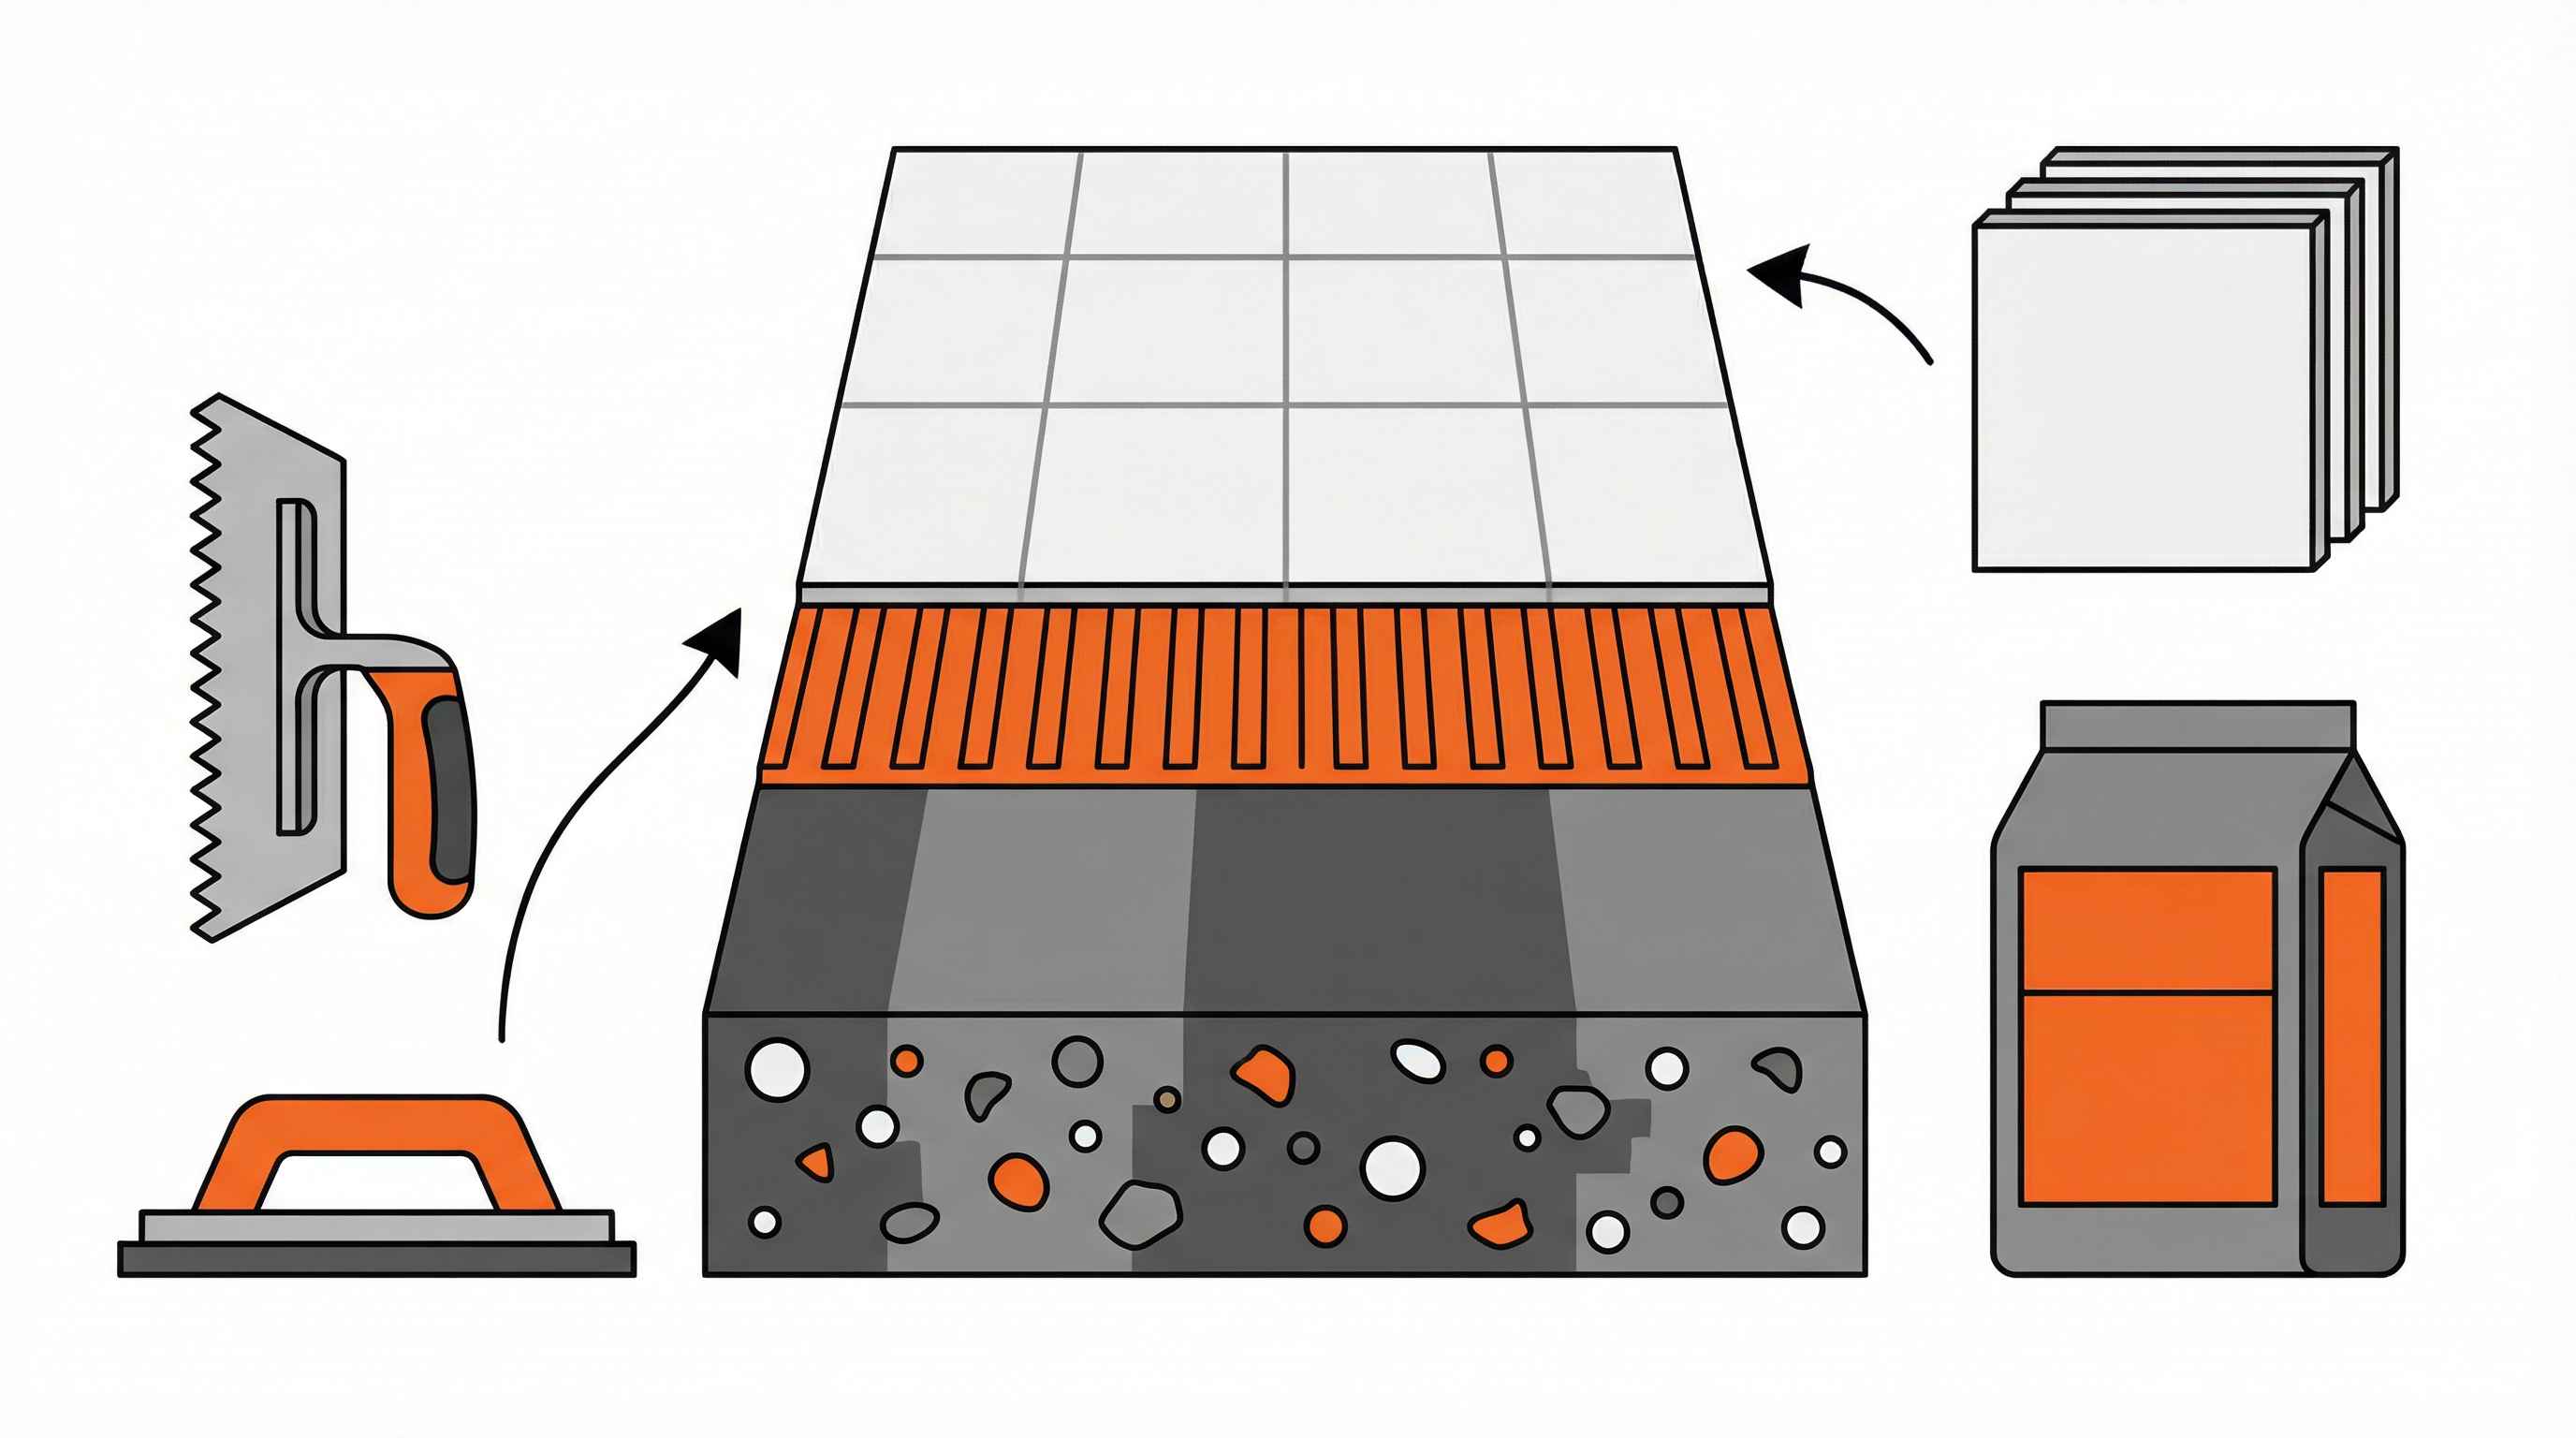
For adhesives, select a high-quality polymer-modified thin-set mortar designed for outdoor applications. These flexible adhesives accommodate the slight movement that occurs in concrete slabs due to temperature changes. Avoid standard thin-set mortars, which may crack over time when used over aggregate surfaces.
| Tile Type | Best Use | Maintenance Level |
|---|---|---|
| Porcelain | High-traffic, wet areas | Low |
| Ceramic | General outdoor use | Low |
| Natural Stone | Decorative applications | High |
Installation process and techniques
Begin installation by marking layout lines to ensure straight, even rows. Start from the most visible area and work toward less prominent edges where cut tiles will be less noticeable.
Apply adhesive in small sections using a notched trowel, working only as much area as you can tile within 15-20 minutes. The open time for outdoor adhesives is often shorter than indoor products due to temperature and humidity factors.
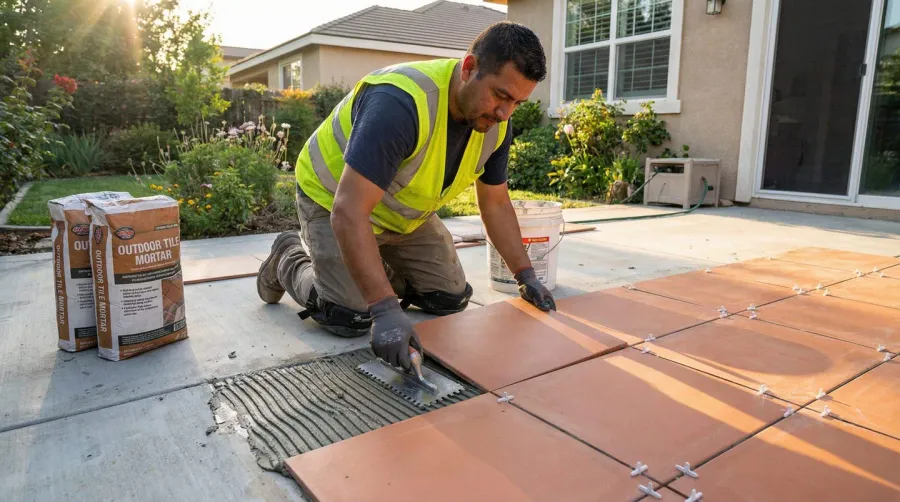
Place tiles with a slight twisting motion to ensure full contact with the adhesive bed. Use spacers to maintain consistent joint widths and check frequently with a level to ensure even placement. Remove excess adhesive from joints immediately to prevent interference with grouting later.
After tile installation, allow 24-48 hours for initial curing before grouting. Choose a grout suitable for outdoor use and your specific joint width. Apply grout diagonally across tile faces, pressing firmly to fill joints completely. Clean excess grout with a damp sponge, working carefully to avoid pulling grout from the joints.
The transformation from rough aggregate concrete to smooth tiled surface dramatically improves both the appearance and functionality of your outdoor space. With proper preparation and installation techniques, your new tiled surface will provide years of beautiful, comfortable use while adding significant value to your property. For those considering alternative approaches to enhancing their aggregate surfaces, you might also explore options like staining exposed aggregate or painting exposed aggregate concrete.
Pro tip: Consider applying a penetrating sealer to both tiles and grout after installation to protect against stains and moisture damage, especially in outdoor applications.
FAQ
Can you tile directly over exposed aggregate concrete?
You cannot tile directly over exposed aggregate concrete without proper preparation. The rough, textured surface requires thorough cleaning, crack repairs, and application of self-leveling compound to create a smooth base. Use polymer-modified adhesives for proper adhesion and long-lasting results.
What type of adhesive should I use for tiling over aggregate concrete?
Use high-quality polymer-modified thin-set mortar designed for outdoor applications. These flexible adhesives accommodate concrete movement due to temperature changes and provide superior bonding on textured surfaces. Avoid standard thin-set mortars which may crack over time on aggregate surfaces.
What are the best tiles to use over aggregate concrete?
Porcelain tiles are ideal for their excellent durability and moisture resistance, especially for pool areas and high-traffic zones. Ceramic tiles offer good performance at lower cost, while natural stone creates an elegant appearance but requires more maintenance. Choose tiles specifically rated for outdoor use for exterior projects.
How long should I wait between steps when tiling over aggregate concrete?
Allow the self-leveling compound to cure completely before proceeding with tile installation (typically 24-48 hours). After tile installation, wait another 24-48 hours for initial curing before grouting. Rushing these steps often leads to tile failure and poor adhesion.