How to Level a Gravel Driveway by Hand Step by Step Guide
Guide handoff
Want help applying this guide to your project?
Share your ZIP and what you need help with. We'll use this guide as context when we follow up.
- 1 This guide gives us the context you were reading.
- 2 Ask about pricing, material choice, delivery timing, or quantity.
- 3 Keep it broad if you are still figuring out the project.
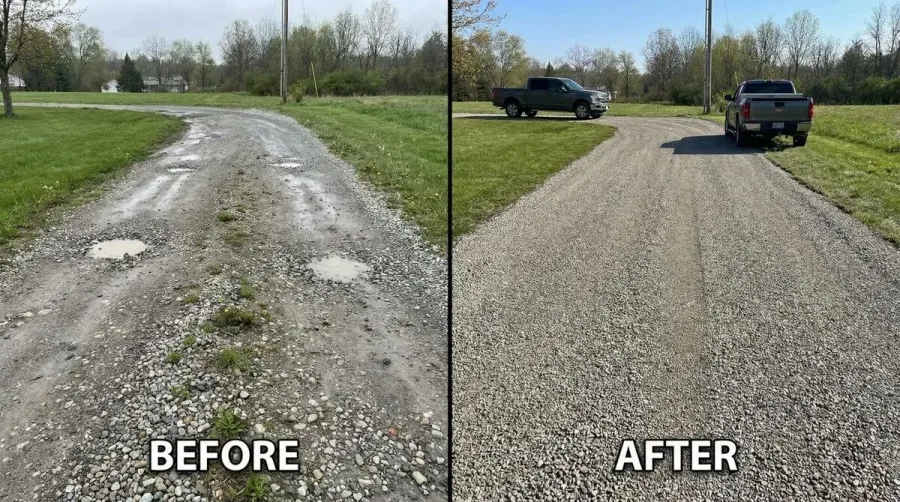
Leveling a gravel driveway by hand might seem challenging, but with the right approach and basic tools, you can achieve professional results without expensive equipment. Whether your driveway has developed ruts from heavy traffic or settled unevenly over time, proper leveling restores both safety and curb appeal while preventing costly drainage issues.
Pro Tip: Most gravel driveways need leveling every 12-18 months, depending on traffic and weather conditions. Regular maintenance prevents major repairs down the road.
The key to successful hand leveling lies in understanding your gravel type, using proper technique, and working systematically across the surface. This guide walks you through each step, from initial assessment to final compaction, ensuring your driveway remains smooth and functional for years to come.
Why level your gravel driveway matters
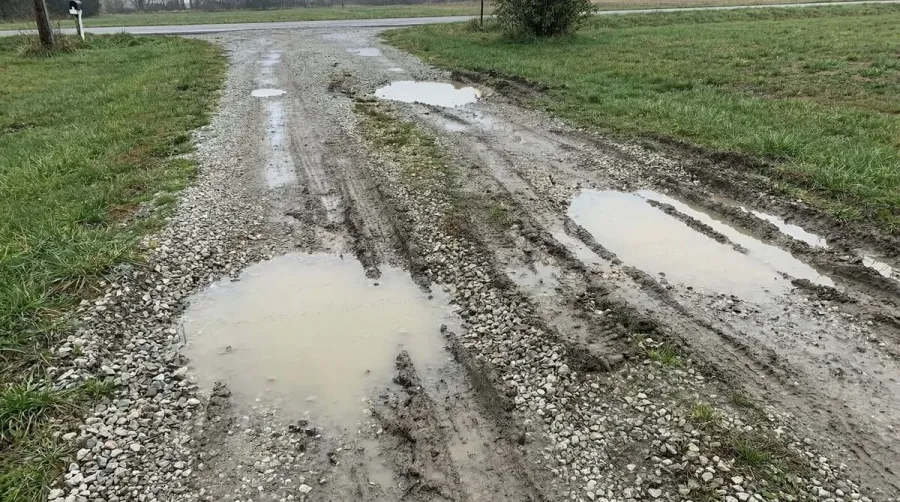
Uneven gravel creates more problems than just an uncomfortable ride. When your driveway develops low spots and high areas, water pools instead of draining properly. This standing water weakens the foundation, causes erosion, and can even freeze during winter months, creating dangerous ice patches.
Beyond practical concerns, a well-leveled driveway significantly improves your property’s appearance. Think of it like mowing your lawn – the difference between maintained and neglected surfaces is immediately obvious to visitors and potential buyers.
Safety becomes a major factor when gravel shifts and creates uneven surfaces. These irregular areas can cause vehicles to bottom out, damage undercarriages, or create tripping hazards for pedestrians. Regular leveling eliminates these risks while extending your driveway’s lifespan.
Essential tools for hand leveling gravel
Success in leveling gravel starts with having the right tools within reach. You don’t need expensive machinery, but quality hand tools make the job significantly easier and more effective.
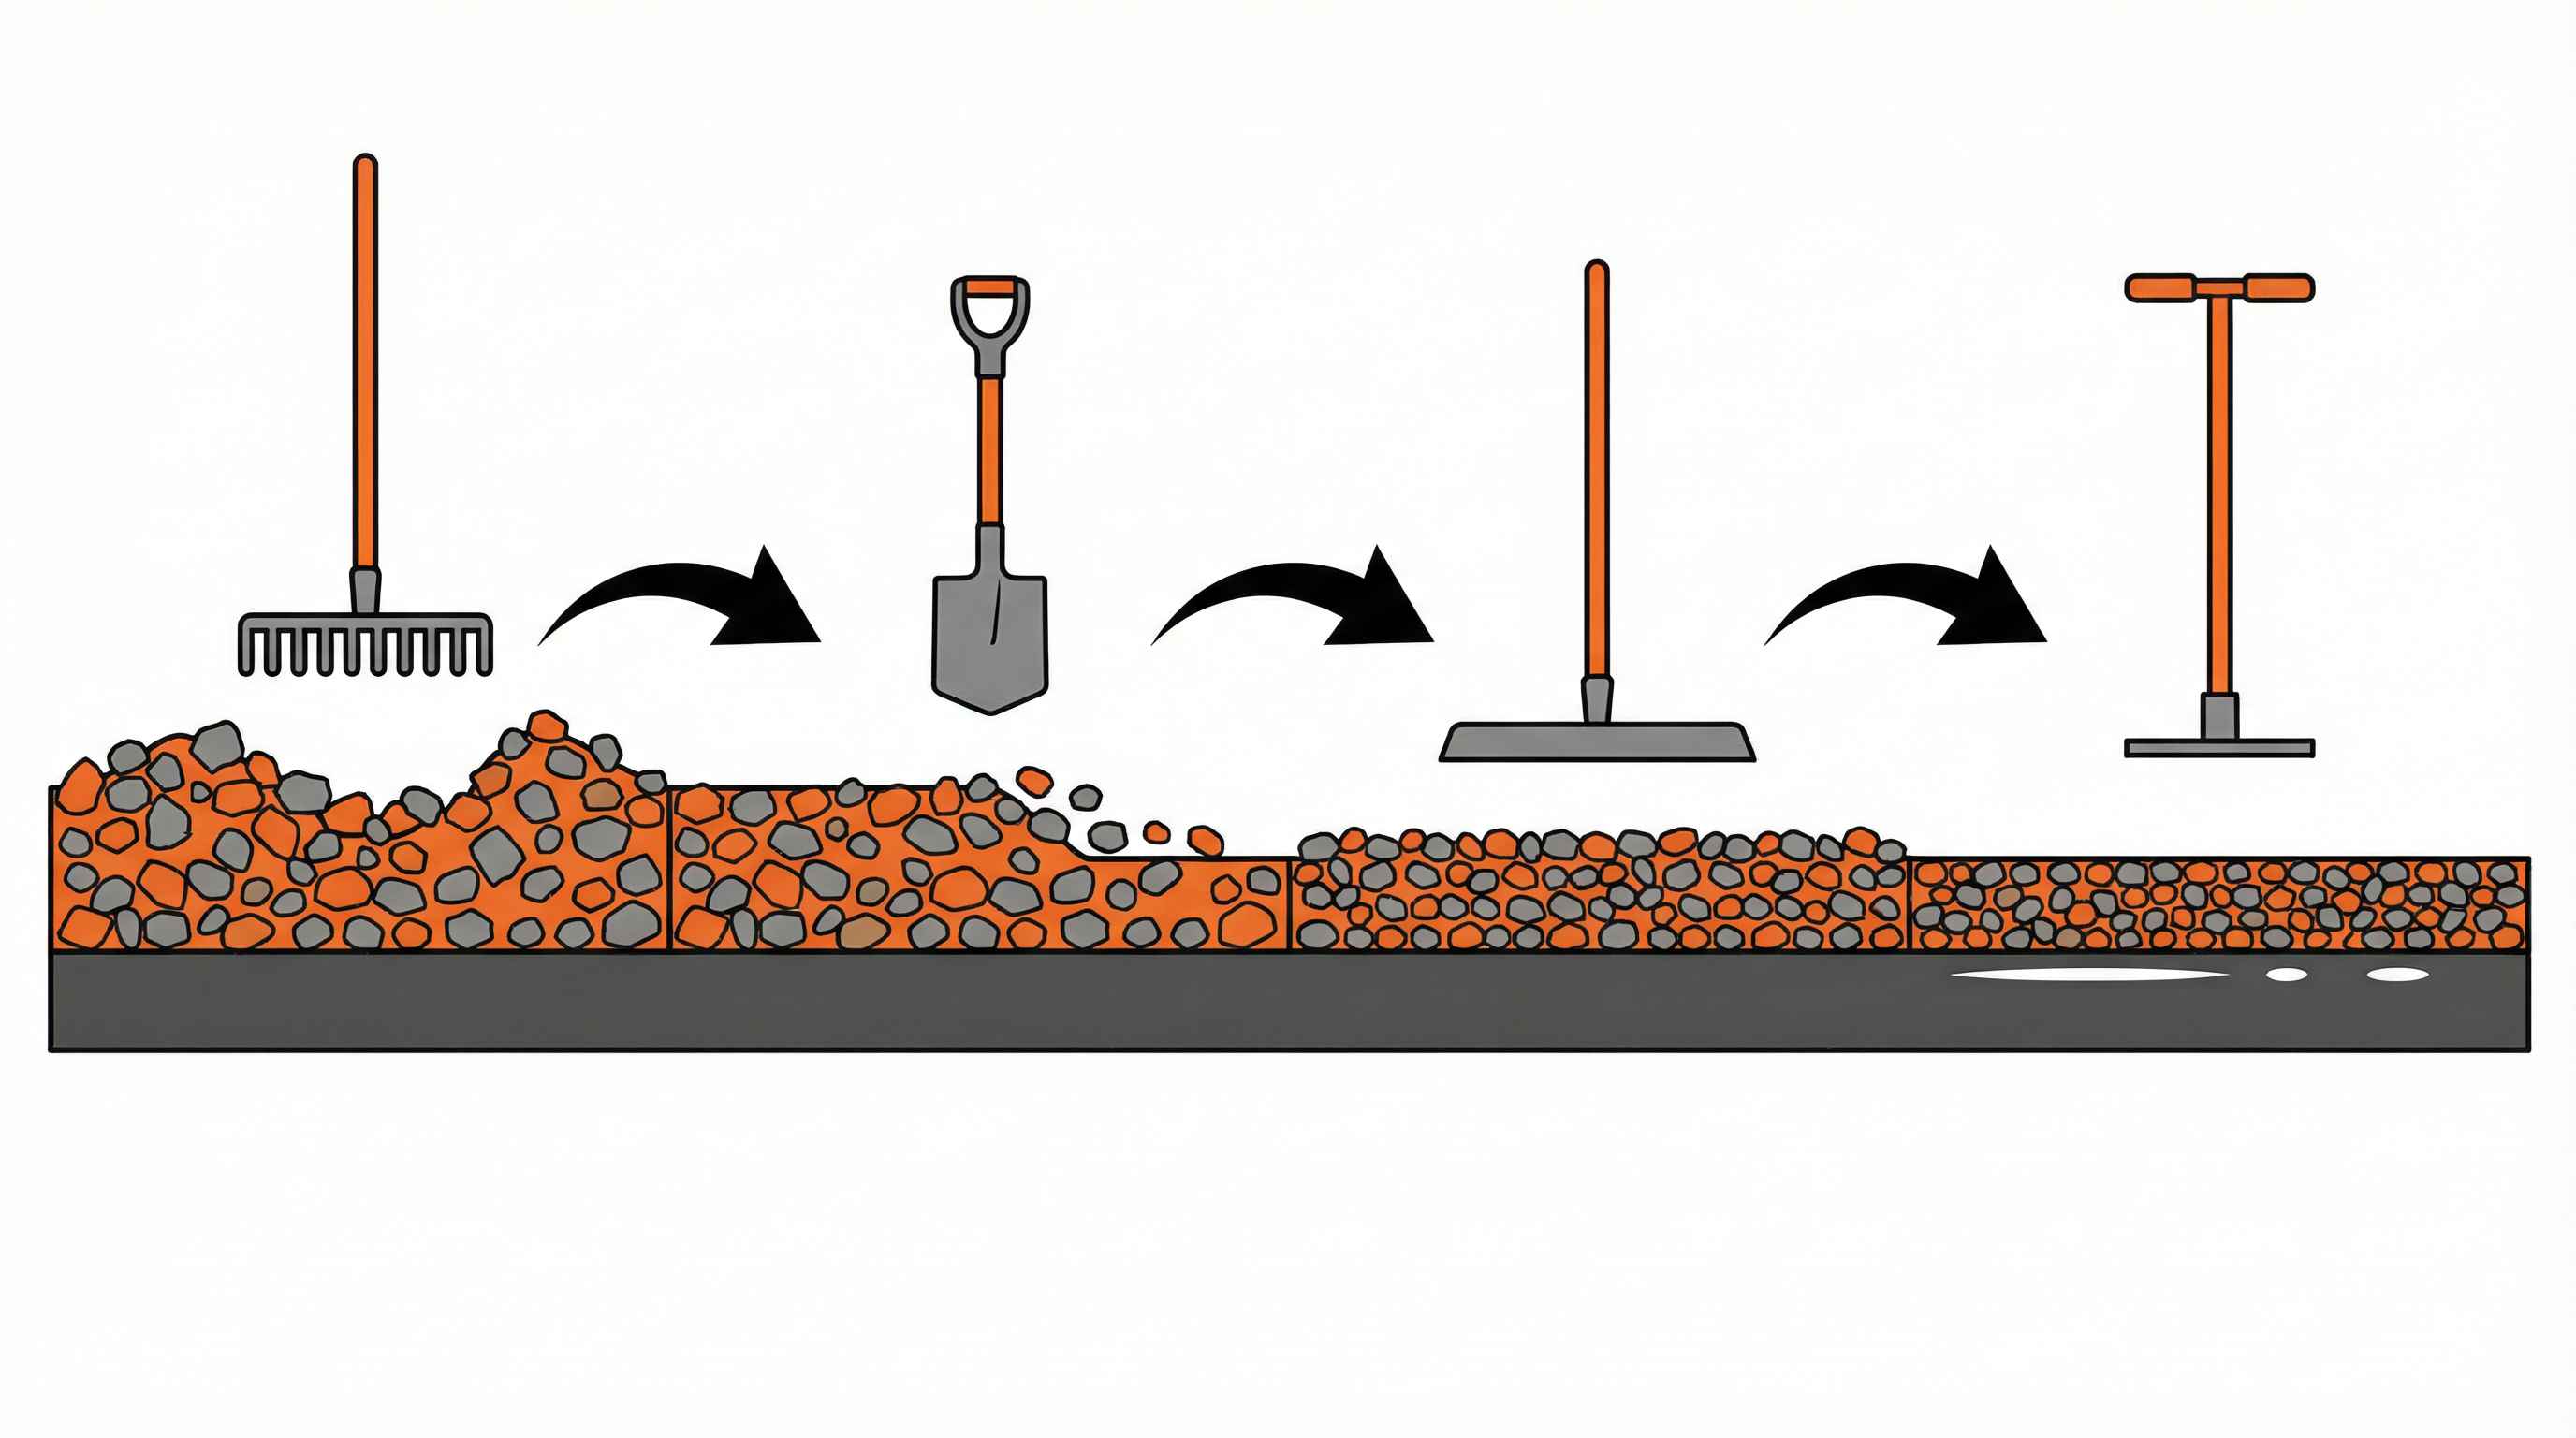
Your basic toolkit should include a landscape rake with steel tines, a square-point shovel for moving gravel, and a wheelbarrow for transport. A tamper or hand compactor helps create a solid surface, while string line and stakes ensure you maintain proper grades and slopes.
| Tool | Primary Use | Best For |
|---|---|---|
| Landscape rake | Spreading and smoothing | All gravel types |
| Square shovel | Moving material | Heavy lifting |
| Hand tamper | Compacting surface | Small to medium areas |
| Wheelbarrow | Transporting gravel | Efficiency |
For larger driveways, consider renting a plate compactor, though hand tamping works perfectly for most residential projects. Safety gear including gloves, safety glasses, and sturdy boots protects you throughout the process.
Preparing your driveway for leveling
Before touching any gravel, walk your entire driveway and identify problem areas. Look for deep ruts, washouts, and spots where gravel has migrated to the edges. This assessment helps you plan your approach and estimate how much gravel you might need for the project.
Clear the surface of debris, leaves, and any foreign objects that could interfere with leveling. Pay special attention to areas where weeds have grown through the gravel – these need removal to prevent future problems. Consider using a quality weed killer for gravel to keep vegetation at bay.
Important: Check for proper drainage slope before starting. Your driveway should slope away from buildings at roughly 1-2% grade to prevent water issues.
Mark severely damaged areas with spray paint or flags. These spots may need extra gravel or deeper work to achieve a level surface. Having a clear plan prevents you from missing problem areas during the leveling process.
Step by step leveling process
Start at the highest point of your driveway and work systematically toward the lowest areas. This approach allows gravity to help move material where it’s needed most.
Begin by redistributing existing gravel using your rake. Pull material from high spots and push it toward low areas, creating a more even base layer. Work in sections roughly 10 feet wide to maintain control over the process.
Once you’ve redistributed the existing material, add fresh gravel to areas that need it. If you’re unsure about the best gravel for your driveway, consider factors like drainage, durability, and appearance. Spread new material in thin layers, no more than 2 inches at a time, to ensure proper compaction and prevent settling.
Use your rake to blend new and existing gravel, creating smooth transitions between areas. Pay attention to the edges of your driveway, ensuring gravel doesn’t spill onto adjacent landscaping or walkways.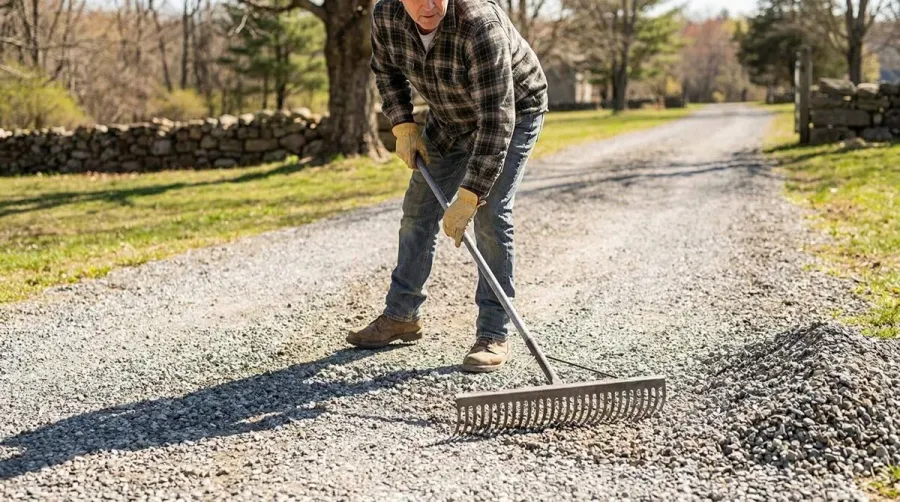 After achieving the desired grade and smoothness, compact the entire surface. Work systematically with your tamper, overlapping each area to ensure uniform compaction. This step locks the gravel in place and creates a stable driving surface. For tips on achieving optimal compaction, check out our guide on how to level a crushed stone base.
Maintenance tips for long lasting results
Regular maintenance keeps your newly leveled driveway looking and performing its best. Plan to rake and redistribute gravel monthly during heavy use periods, and always after major storms that might cause washouts.
Add fresh gravel annually to replace material lost to traffic and weather. A thin layer of new stone helps maintain proper drainage and prevents the base layer from becoming exposed. Understanding different types of driveway gravel can help you choose the right material for top-ups.
Watch for early signs of problems like small ruts or edge erosion. Addressing these issues immediately prevents them from becoming major repairs. Keep a small pile of matching gravel on hand for quick touch-ups throughout the year. If your driveway requires more extensive work, our comprehensive guide on how to restore a gravel driveway provides detailed restoration techniques.
During winter months, avoid using metal snow shovels or plows directly on the gravel surface. These tools can gouge and displace material, undoing your leveling work. Instead, use plastic shovels or raise plow blades slightly above the surface.
Proper gravel driveway leveling by hand requires patience and technique, but the results speak for themselves. With regular maintenance and the methods outlined in this guide, your driveway will provide years of reliable service while enhancing your property’s value and appearance. Take your time with each step, and don’t hesitate to add fresh material when needed for the best long-term results.
FAQ
How often should you level a gravel driveway?
Most gravel driveways need leveling every 12-18 months, depending on traffic and weather conditions. Heavy use areas may require more frequent attention, while light traffic driveways can go longer between leveling sessions. Regular monthly raking during heavy use periods helps maintain the surface between major leveling projects.
Can you level gravel without a compactor?
Yes, you can level gravel effectively using hand tools. Use a landscape rake to spread and smooth the gravel, then compact it with a hand tamper or by driving over the surface slowly with your vehicle. For best results, work in thin layers no more than 2 inches at a time and overlap your tamping areas for uniform compaction.
What slope should a gravel driveway have for proper drainage?
A gravel driveway should slope away from buildings at roughly 1-2% grade to ensure proper water drainage. This means the surface should drop about 1-2 inches for every 100 inches of length. Proper slope prevents water pooling, reduces erosion, and helps maintain the integrity of your leveled surface.
How much new gravel should I add when leveling?
Add fresh gravel only to areas that need it, typically in thin layers of no more than 2 inches at a time. Most leveling projects require minimal new material since you’re primarily redistributing existing gravel. Plan to add a thin layer of new gravel annually to replace material lost to traffic and weather, which helps maintain proper drainage and surface integrity.