How to Use Gravel for Stunning Garden Borders in 2026
Creating defined garden borders transforms your outdoor space from ordinary to extraordinary. Gravel offers one of the most versatile and cost-effective solutions for establishing clear boundaries between your planted areas and lawn. Whether you’re a weekend DIY enthusiast or planning your first landscaping project, this guide will walk you through everything you need to know about using gravel for garden borders.
Quick Answer: Gravel makes excellent garden borders due to its durability, drainage properties, and aesthetic versatility. Installation typically takes one weekend and costs 60-70% less than stone alternatives.
You’ll discover the best gravel types for your specific needs, learn proper installation techniques, and explore design ideas that complement your garden’s style. By the end, you’ll have the confidence to create professional-looking borders that enhance your landscape for years to come.
Why gravel works perfectly for garden borders
Gravel stands out as a superior border material because it combines functionality with visual appeal. Unlike rigid materials, gravel adapts to your garden’s natural contours while providing the structure you need.
The drainage benefits alone make gravel worth considering. Water flows freely through gravel, preventing the pooling that can damage plant roots and create muddy areas around your garden beds. This natural drainage system keeps your borders looking clean and prevents erosion during heavy rains.
From a maintenance perspective, gravel requires minimal upkeep once installed. You won’t need to replace rotting wood or repair cracked concrete. A simple rake-over once or twice a year keeps your borders looking fresh and well-defined. For more comprehensive guidance, check out our article on how to maintain a gravel garden.
The cost advantage is significant too. Quality gravel typically costs between $30-50 per cubic yard, while decorative stone borders can run $80-120 per cubic yard. For most garden border projects, you’ll save hundreds of dollars choosing gravel over premium alternatives.
Choosing the right gravel for your borders
The gravel you select determines both the appearance and performance of your borders. Size matters most when making your choice, as it affects everything from stability to visual impact.
Pea gravel, measuring 3/8 inch in diameter, works beautifully for decorative borders. Its smooth, rounded shape feels comfortable underfoot and creates a neat, polished appearance. The small size allows for easy installation around curved garden beds and intricate landscape features.
For areas requiring more stability, consider 3/4-inch crushed stone. The angular edges lock together, creating a firm surface that stays in place even with foot traffic. This option works well for borders that double as pathways or areas where you need to walk for garden maintenance. If you’re considering multiple applications, explore our comprehensive guide on the ultimate guide to landscaping gravel.
| Gravel Type | Size | Best Use | Cost Range |
|---|---|---|---|
| Pea Gravel | 3/8″ | Decorative borders | $35-45/yard |
| Crushed Stone | 3/4″ | High-traffic borders | $30-40/yard |
| River Rock | 1-2″ | Statement borders | $45-60/yard |
Color selection should complement your home’s exterior and existing landscape elements. Neutral tones like gray and beige work with any style, while warmer browns and tans create a more natural, earthy feel. Avoid overly bright colors that might clash with seasonal plant changes. For detailed comparisons, our resource on the best gravel for borders offers expert recommendations.
Pro Tip: Order 10% more gravel than calculated to account for settling and future touch-ups. With Hello Gravel’s nationwide delivery network, you can get quality materials delivered to your location in as little as 2 business days, making it easy to get exactly what you need for your project.
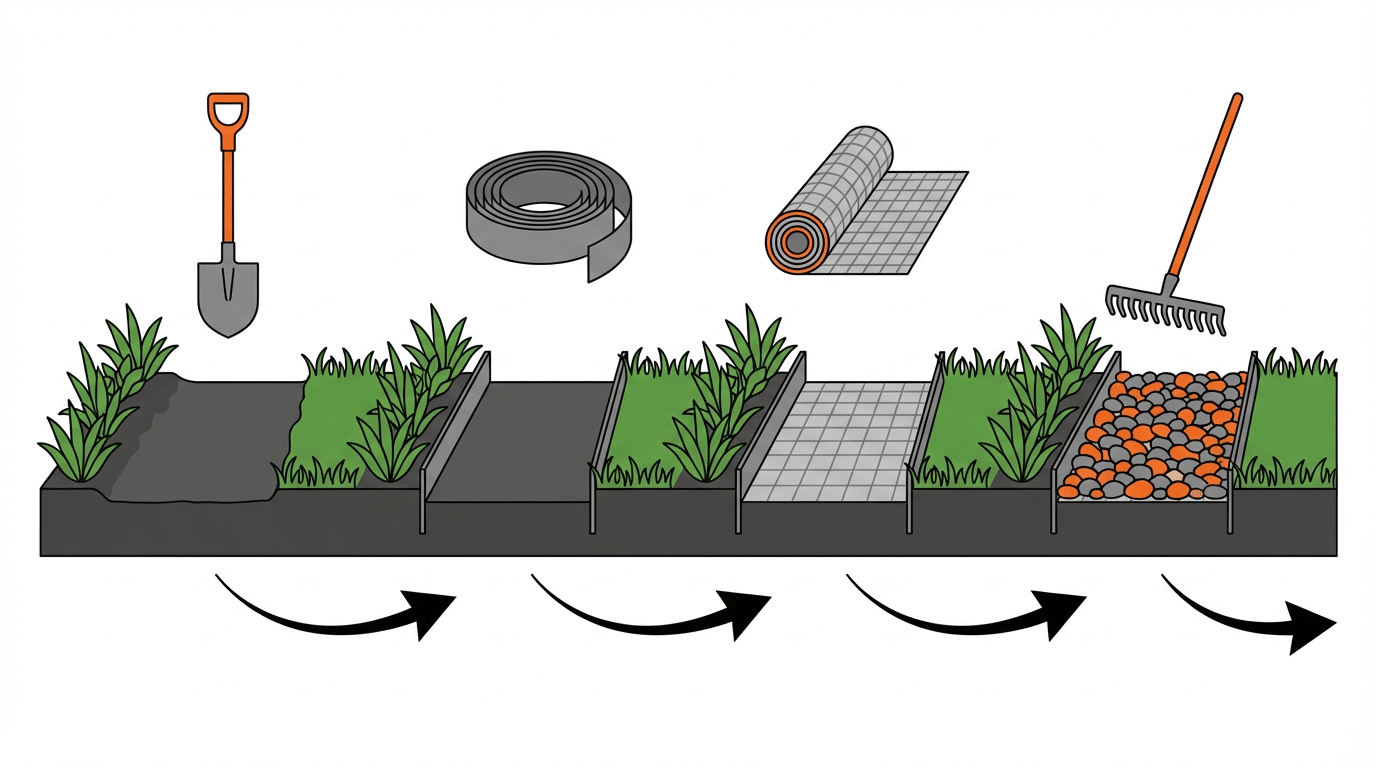
Installing your gravel border step by step
Proper installation ensures your gravel borders look professional and last for years. The key lies in thorough preparation and attention to detail during each phase.
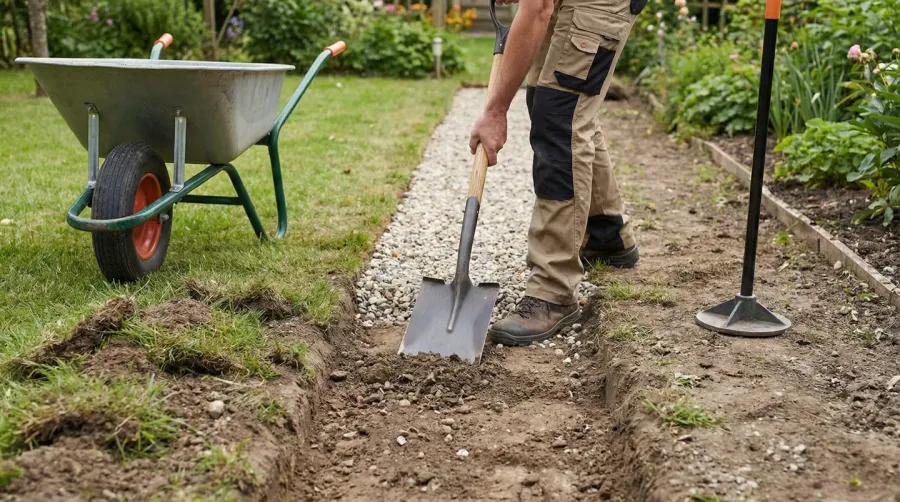
Start by marking your border layout with spray paint or garden hose. This visual guide helps you maintain consistent curves and spacing. Measure the area to calculate gravel needs using this formula: length × width × depth (in feet) ÷ 27 = cubic yards needed. For precise calculations, you can use Hello Gravel’s online material calculator to determine exactly how much gravel you’ll need based on your project measurements.
Ground preparation makes the difference between success and frustration. Remove all grass, weeds, and debris from the border area. Dig down 3-4 inches to create a stable foundation. Level the area using a rake, checking with a straight board to ensure evenness. If you’re wondering about whether you can put gravel over grass, we’ve covered that topic in detail.
Install edging to contain your gravel and create clean lines. Flexible plastic edging works well for curved borders, while metal edging provides the crispest straight lines. Secure edging with stakes every 3-4 feet, ensuring the top sits slightly below your desired gravel surface level.
Lay landscape fabric over the prepared area before adding gravel. This barrier prevents weeds while allowing water drainage. Overlap fabric edges by 6 inches and secure with landscape pins every few feet.
Pour gravel gradually, working in small sections to maintain control. Spread with a rake to achieve uniform 2-3 inch depth. Use a hand tamper or the back of your rake to lightly compact the surface, creating stability without over-packing.
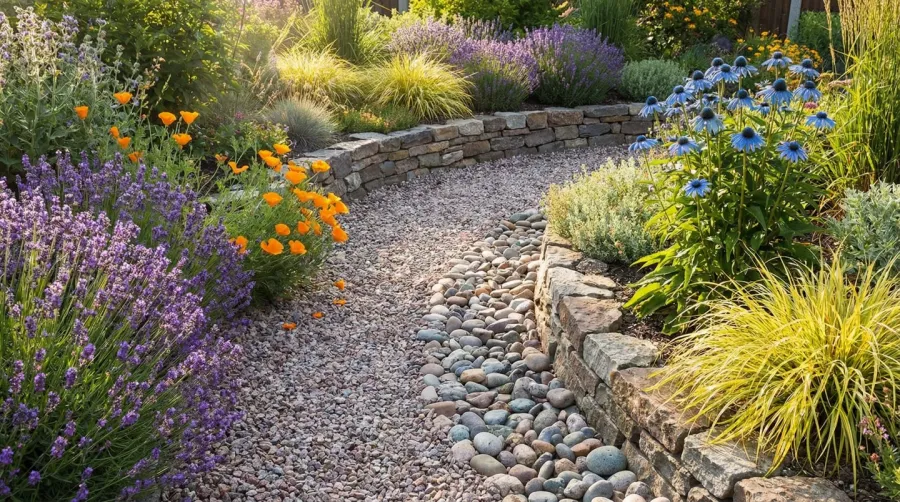
Design ideas that make your borders shine
Creative design approaches transform basic gravel borders into landscape features that enhance your entire garden. Think beyond simple straight lines to create borders that complement your space’s unique character.
Curved borders following your garden’s natural flow create a more organic, established appearance. Use a garden hose to experiment with different curves before committing to your layout. Gentle S-curves work particularly well for longer borders, adding visual interest without appearing forced.
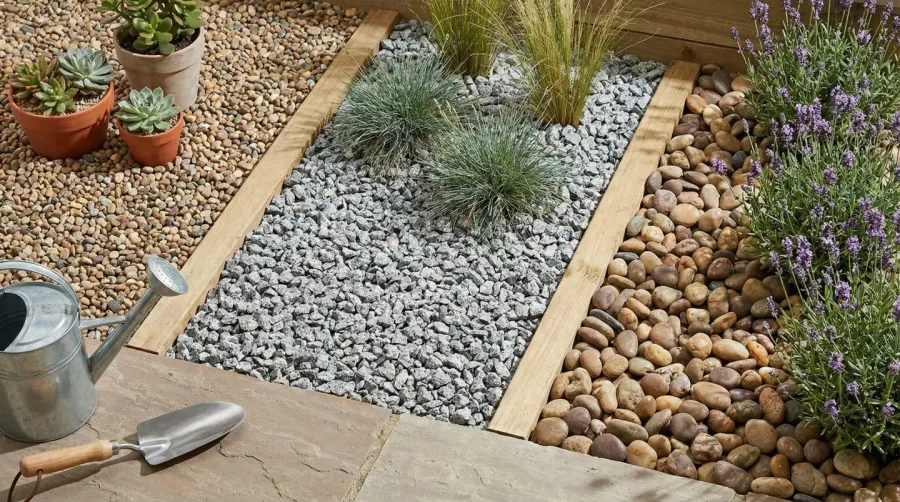
Mixing gravel sizes creates texture and depth. Try using larger river rocks as accent stones within your pea gravel border, or create a graduated effect with different sizes transitioning from large to small. This layered approach adds sophistication while maintaining the practical benefits of gravel. For more inspiration, explore our collection of creative gravel ideas for your backyard.
Consider incorporating planted pockets within your gravel borders. Small drought-tolerant plants like sedums or ornamental grasses thrive in gravel environments and break up long stretches of stone. These living elements soften the border’s appearance while requiring minimal maintenance. Learn more about combining materials in our guide on the benefits of mulch and gravel for your garden.
Design Insight: Light-colored gravel reflects heat and appears larger, making narrow borders seem more substantial. Dark gravel absorbs heat and creates a more intimate, cozy feeling.
Width matters for visual impact and functionality. Borders narrower than 12 inches often look skimpy and require frequent maintenance. Aim for 18-24 inches for most applications, which provides enough presence without overwhelming smaller gardens.
Your gravel borders represent a smart investment in your landscape’s long-term beauty and functionality. With proper planning and installation, they’ll provide years of low-maintenance definition for your garden beds. The combination of practical benefits and design flexibility makes gravel an ideal choice for homeowners seeking professional results on a reasonable budget. Whether you’re ordering materials for a small DIY project or planning a larger landscaping renovation, Hello Gravel’s simple online ordering process and reliable delivery make it easy to get started. Start with one section to gain confidence, then expand your borders as time and budget allow.
FAQ
How deep should gravel be for garden borders?
For garden borders, gravel should be installed at a depth of 2-3 inches (5-7.5 cm). First, dig down 3-4 inches to create a stable foundation, then add your gravel to achieve the proper depth. This provides adequate coverage while allowing for proper drainage and preventing weeds from growing through.
What type of gravel is best for low-maintenance garden borders?
Pea gravel (3/8 inch diameter) is ideal for decorative, low-maintenance borders due to its smooth texture and neat appearance. For high-traffic areas, 3/4-inch crushed stone provides better stability as the angular edges lock together. Both options offer excellent drainage and require minimal upkeep once properly installed with landscape fabric underneath.
Do I need landscape fabric under gravel borders?
Yes, landscape fabric is essential for gravel borders as it prevents weeds from growing through while allowing water drainage. Install the fabric after preparing the ground and before adding gravel. Overlap fabric edges by 6 inches and secure with landscape pins every few feet for best results.
How much does it cost to install gravel garden borders?
Gravel borders typically cost $30-50 per cubic yard for materials, which is 60-70% less expensive than stone alternatives that run $80-120 per cubic yard. For most garden border projects, you can expect to save hundreds of dollars choosing gravel over premium materials while achieving professional-looking results.